The Best No-Bake Cherry Cheesecake (Dreamy, Creamy Dessert Delight!)
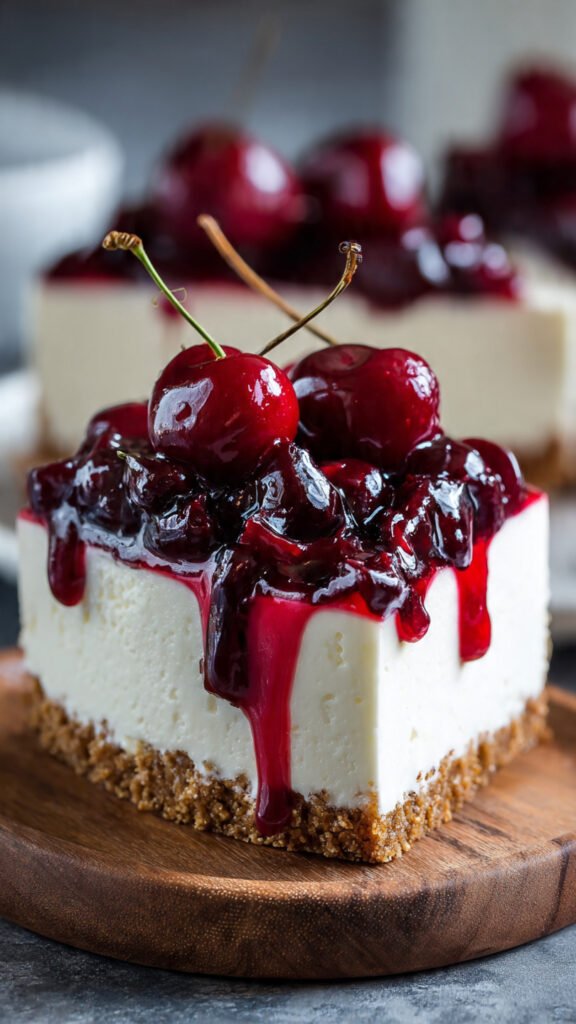
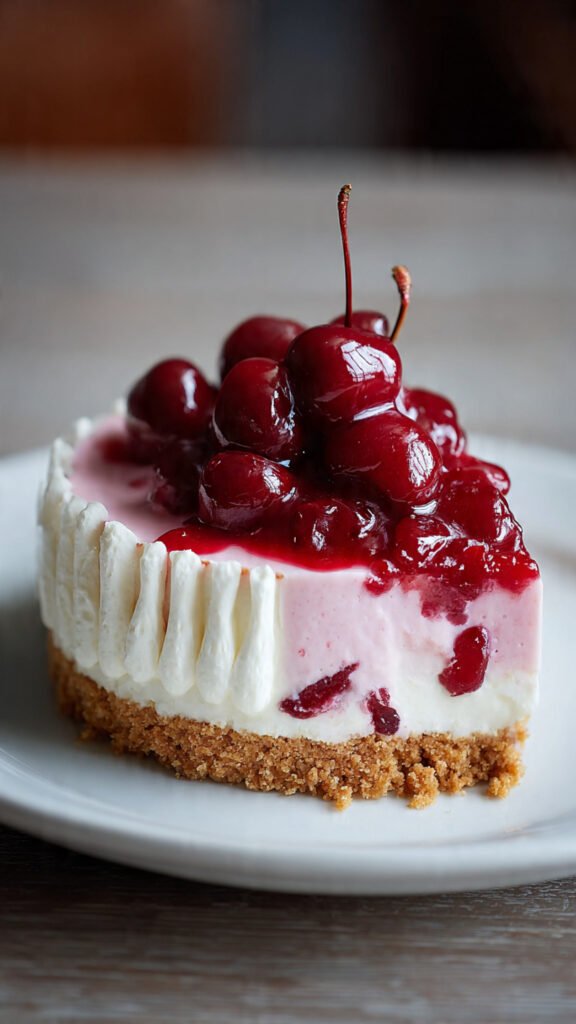
There’s a special kind of anticipation that comes from opening the fridge and seeing a chilled, glossy-topped cherry cheesecake waiting for you. The first slice glides through that velvety, cloud-like filling and hits the buttery crust with just enough resistance to promise the perfect bite. It’s the kind of dessert that feels like a celebration even on an ordinary weeknight.
I fell in love with no-bake cherry cheesecake as a kid, long before I ever learned how to make a classic baked version. It was the “company dessert” at family gatherings because it never cracked, never dried out, and could be made the day before without any stress. Over time, I tweaked the crust-to-filling ratio, dialed in the tangy-sweet balance, and figured out how to get that ultra-smooth texture without ever turning on the oven.
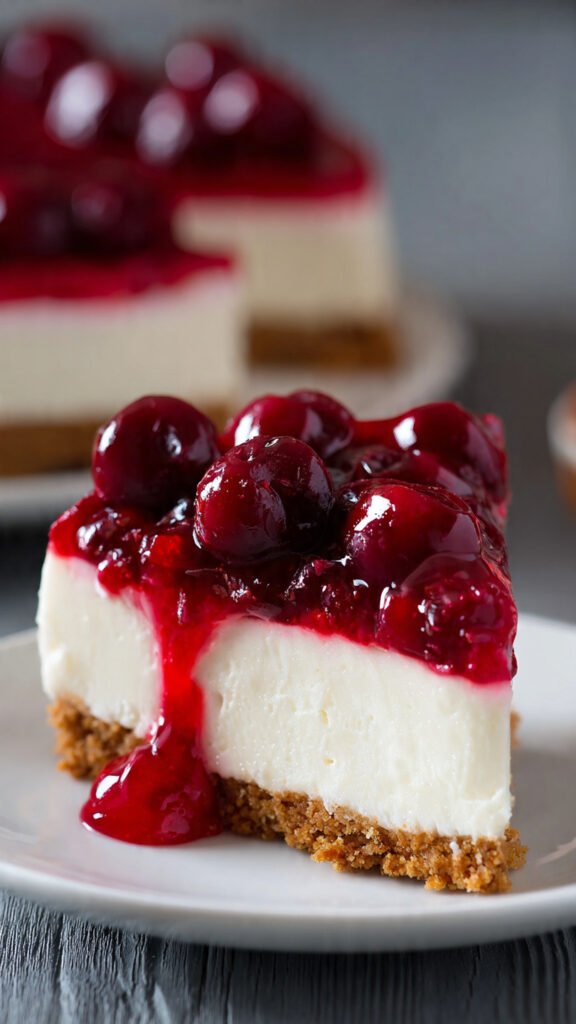
This version is all about maximum payoff for minimal effort: a sturdy, buttery graham cracker crust, a perfectly creamy, lightly tangy cheesecake layer, and a jewel-like cherry topping that makes it look straight out of a bakery. You’ll get a dessert that slices cleanly, holds up beautifully on a buffet table, and melts in your mouth with every bite.
Table of Contents
Prep Time: 25 min | Chill Time: 4–6 hours (or overnight) | Total: 4½–6½ hours
Yield: 12 servings | Difficulty: Easy
Quick Stats Box:
- Cuisine: American
- Course: Dessert
- Diet: Vegetarian (contains dairy)
- Best for: Holidays, potlucks, birthdays, make-ahead entertaining
Why This Recipe Works
- No oven needed — Perfect for hot days, busy holidays, or when your oven is already full with other dishes.
- Ultra-creamy, stable filling — Whipped cream plus cream cheese creates a light yet sliceable texture that holds its shape.
- Foolproof crust — The butter-to-crumb ratio gives you a crust that cuts cleanly without crumbling all over the plate.
- Make-ahead friendly — Actually tastes better after chilling overnight, so you can prep it the day before your event.
- Classic flavor combo — The tang of the cheesecake and sweetness of the cherries hit that nostalgic “old-school dessert” note everyone loves.
Ingredient Spotlight
Cream Cheese: Full-fat, brick-style cream cheese is essential for a rich, smooth filling. It needs to be fully softened so it whips without lumps. Lower-fat or tub-style cream cheese can make the filling loose or grainy.
Whipped Cream (or Whipping Cream): Whipped cream lightens the texture, turning a dense cheesecake into something airy and dreamy. It also helps the filling set without baking, thanks to its fat and air structure.
Cherry Pie Filling: This is the shortcut that delivers big visual impact with zero effort. The cherries add sweetness, color, and a little tartness. You can use classic canned pie filling or a homemade cherry topping if you prefer.
Ingredients
For the Graham Cracker Crust
- 2 cups graham cracker crumbs (about 16 full sheets, finely crushed)
- ½ cup (1 stick) unsalted butter, melted
- ¼ cup granulated sugar
- ¼ teaspoon salt
For the Cheesecake Filling
- 16 ounces (2 bricks) full-fat cream cheese, softened
- 1 cup powdered sugar, sifted
- 1 teaspoon vanilla extract
- 1 tablespoon fresh lemon juice (optional but recommended)
- 1⅓ cups cold heavy whipping cream (or 1 tub whipped topping, thawed, see notes)
For the Cherry Topping
- 1 (21-ounce) can cherry pie filling
Ingredient Notes
- Room temperature is key: Let cream cheese sit out 30–45 minutes so it beats completely smooth.
- Whipped cream vs. whipped topping: Heavy cream gives a fresher flavor and slightly lighter texture. Whipped topping is a stable shortcut and works well for hot-weather events.
- Crust sweetness: If you prefer a less sweet dessert, reduce crust sugar to 2 tablespoons.
Essential Equipment
You’ll Need:
- 9-inch springform pan (or deep 9-inch pie dish)
- Mixing bowls (one large, one medium)
- Electric mixer (hand or stand mixer)
- Rubber spatula
- Measuring cups and spoons
Nice to Have:
- Parchment paper for the pan base (for super clean slices)
- Offset spatula for smoothing the filling and topping
How to Make No-Bake Cherry Cheesecake (Step-by-Step)
Step 1: Prepare the Pan and Crust
Lightly grease a 9-inch springform pan and, if desired, line the bottom with a circle of parchment paper. In a medium bowl, combine graham cracker crumbs, granulated sugar, and salt. Pour in melted butter and stir until all crumbs are evenly moistened and look like wet sand.
Press the mixture firmly into the bottom of the pan, using the bottom of a measuring cup or glass to compact it into an even layer. You can push the crust slightly up the sides if you like. Place the crust in the fridge (or freezer) to chill while you make the filling, at least 15 minutes.
Pro tip: The more firmly you press the crust, the cleaner your slices will be.
Step 2: Beat the Cream Cheese Base
In a large mixing bowl, add softened cream cheese. Beat on medium speed until completely smooth and creamy, about 2–3 minutes, scraping down the sides as needed. Add powdered sugar, vanilla, and lemon juice. Beat again until the mixture is silky, fluffy, and no lumps remain.
You’re looking for a thick, smooth base that tastes slightly tangy and not overly sweet—remember, the cherry topping will add extra sweetness.
Step 3: Whip the Cream
In a separate, clean bowl, pour in the cold heavy cream. Beat on medium-high speed until it forms stiff peaks (when you lift the beaters, the peaks stand up without drooping). Be careful not to overwhip into butter; once it’s thick and holds its shape, stop.
If using whipped topping, simply fold it in as-is (no need to whip).
Step 4: Fold the Filling Together
Add about one-third of the whipped cream to the cream cheese mixture and gently fold it in with a spatula to lighten the base. Then add the remaining whipped cream and continue folding until no streaks remain and the filling is smooth, light, and fluffy.
Avoid stirring aggressively; you want to keep as much air in the mixture as possible for that dreamy texture.
Step 5: Fill and Smooth
Remove the chilled crust from the fridge. Spoon the cheesecake filling into the pan, spreading it evenly and smoothing the top with an offset spatula or the back of a spoon. Tap the pan gently on the counter a few times to release any large air bubbles.
Cover the pan tightly with plastic wrap or foil and refrigerate for at least 4–6 hours, preferably overnight. This chilling time is crucial for a clean set.
Note: Don’t add the cherry topping yet—waiting keeps the layers visually distinct and prevents color bleeding.
Step 6: Add Cherry Topping
Once the cheesecake is fully set, gently spoon the cherry pie filling over the top, spreading it into an even layer all the way to the edges. For the cleanest look, try not to drag the spoon into the cheesecake layer beneath; just nudge the cherries around on top.
Return to the fridge for another 30–60 minutes to let everything chill together before slicing.
Expert Tips & Tricks
- Chill fully: A minimum of 4 hours is necessary, but overnight gives the best texture and sliceability.
- Smooth filling: Always start with very soft cream cheese to avoid lumps; cold cream cheese is almost impossible to smooth out later.
- Clean slices: Run a thin knife under hot water, wipe it dry, and slice. Clean and reheat the knife between each cut.
- Springform success: When releasing the springform, run a knife around the inside edge first so the cheesecake doesn’t tear.
Customization Ideas
Crust Variations
- Use chocolate cookie crumbs (like Oreos with filling removed) for a black forest vibe.
- Use vanilla wafer crumbs for a milder, more buttery base.
- Add ¼ teaspoon cinnamon to the graham crust for extra warmth.
Filling & Flavor Twists
- Swirl in ¼ cup of melted white chocolate before folding in the whipped cream.
- Add extra lemon zest to the filling for a bright, citrusy version.
- Fold in mini chocolate chips for a cherry-chocolate cheesecake.
Topping Ideas
- Mix half cherry filling and half fresh cherries for more texture.
- Swap cherries for strawberry, blueberry, or mixed berry pie filling.
- Add a drizzle of melted dark chocolate over the cherry layer before serving.
Storage & Meal Prep
Make Ahead
- This cheesecake is ideal to make 1 day in advance.
- You can make the crust and filling, chill overnight, and add the cherry topping the day you plan to serve.
Storing
- Fridge: Store covered in the refrigerator for up to 4–5 days.
- Freezer: For longer storage, freeze (without cherry topping) tightly wrapped for up to 1 month. Thaw overnight in the fridge, then add topping before serving.
Serving from Cold
Serve well-chilled for the cleanest slices. If it’s been in the freezer, allow enough time in the fridge for the filling to become creamy again before cutting.
What to Serve With No-Bake Cherry Cheesecake
Perfect Pairings
- Hot coffee or espresso to contrast the cold, creamy texture.
- A glass of milk or a light dessert wine.
- Fresh berries or a simple fruit salad to balance richness.
Complete the Dessert Table
- Pair with a no-bake chocolate dessert for variety in flavors.
- Add some lemon bars or blondies for guests who prefer non-cheesecake options.
- Serve mini portions in small jars alongside other jar desserts for a party-friendly dessert bar.
Nutrition Facts (Per Serving)
Approximate per slice (1 of 12):
- Calories: ~380
- Protein: ~5g
- Carbs: ~38g
- Fat: ~23g
- Fiber: ~1g
- Sugar: ~27g
(Values will vary with specific brands and exact portion sizes.)
Your Questions Answered
Can I use whipped topping instead of heavy cream?
Yes. Use about 3 cups of thawed whipped topping and fold it directly into the cream cheese mixture. The texture will be slightly different but very stable, especially for hot-weather events.
Why is my filling runny or too soft?
Common causes are not chilling long enough, using low-fat cream cheese, or not whipping the cream to stiff peaks. Always use full-fat bricks of cream cheese and give it plenty of fridge time.
Can I make this in a regular pie dish?
Yes. Use a deep 9-inch pie dish and slightly reduce the crust and filling if needed. The layers will be thicker; chilling is even more important for clean slices.
Can I make it without lemon juice?
You can, but the lemon brightens the flavor and balances the sweetness. If you skip it, consider adding a tiny pinch of salt to the filling to keep it from tasting flat.
Can I use fresh cherries instead of pie filling?
Yes. Toss pitted cherries with a bit of sugar and a spoon of cornstarch, then cook briefly until thickened and glossy. Cool completely before topping the cheesecake.
Recipe History & Cultural Context
No-bake cheesecakes became popular in home kitchens in the mid-20th century, when refrigeration was common and convenience desserts were on the rise. They offered a simpler alternative to traditional baked cheesecakes, which require careful baking and cooling to avoid cracks and dryness. By using whipped cream (or non-dairy whipped toppings) and gelatin or stabilized structures, these desserts delivered the indulgent feel of cheesecake with far less risk.
Cherry topping quickly became a classic pairing, especially with canned pie fillings making it easy for home cooks to get a bakery-style look without extra work. The contrast of creamy white cheesecake and bright red cherries turned no-bake cherry cheesecake into a nostalgic staple at potlucks, church socials, and holiday tables throughout North America. Today, it remains a beloved “grandma dessert” that still fits perfectly into modern, make-ahead entertaining.
Printable Recipe Card
No-Bake Cherry Cheesecake – Dreamy, Creamy Dessert Delight
Ingredients
Crust:
- 2 cups graham cracker crumbs
- ½ cup melted butter
- ¼ cup sugar
- ¼ tsp salt
Filling:
- 16 oz cream cheese, softened
- 1 cup powdered sugar
- 1 tsp vanilla
- 1 tbsp lemon juice (optional)
- 1⅓ cups cold heavy cream (or 3 cups whipped topping)
Topping:
- 1 (21-oz) can cherry pie filling
Instructions
- Mix graham crumbs, sugar, salt, and melted butter until evenly moistened. Press firmly into a 9-inch springform pan. Chill 15 minutes.
- Beat cream cheese until smooth. Add powdered sugar, vanilla, and lemon juice; beat until creamy.
- In a separate bowl, whip heavy cream to stiff peaks.
- Fold whipped cream into cream cheese mixture gently until no streaks remain.
- Spread filling over chilled crust, smooth top, cover, and refrigerate 4–6 hours or overnight.
- Spoon cherry pie filling over set cheesecake, spread evenly, and chill 30–60 minutes more before slicing.
Notes
- Use full-fat brick cream cheese for best texture.
- For freezing, freeze without cherry topping; add topping after thawing.
- Clean knife between slices for picture-perfect pieces.