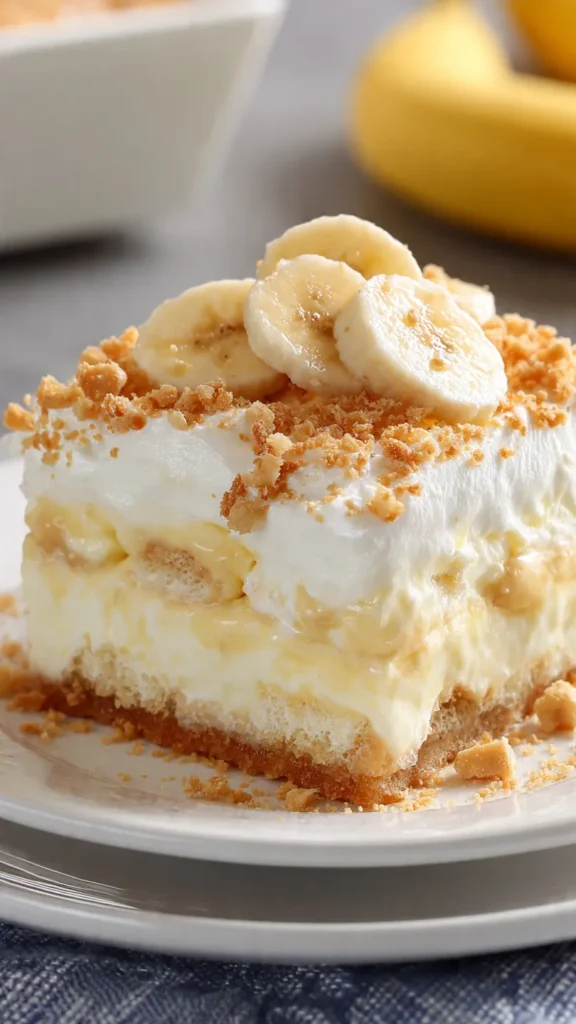
Banana Pudding Lush – Creamy, Dreamy & No-Bake Southern Bliss! (Layered Heaven in 20 Minutes!)
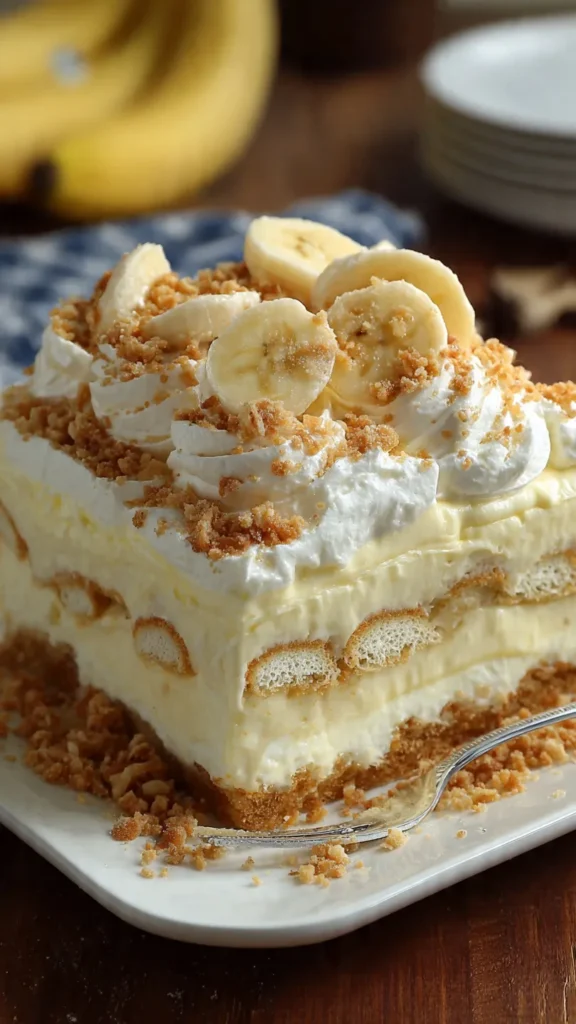
Imagine diving your spoon through cloud-like layers of sweetened cream cheese, silky banana pudding studded with fresh banana slices, and billowy whipped topping—all sitting on a buttery vanilla wafer crust that adds the perfect crunch to every bite. This isn’t just any banana pudding; it’s Banana Pudding Lush, a no-bake Southern sensation that transforms the classic banana pudding into an elegant, layered dessert that looks like you spent hours in the kitchen but takes only 20 minutes to assemble.
I discovered this recipe at a church potluck where it disappeared faster than any other dessert on the table, leaving everyone asking for the recipe. What makes Banana Pudding Lush truly special is how it elevates traditional banana pudding by adding a rich cream cheese layer and structured presentation—transforming a simple bowl dessert into something that feels sophisticated enough for special occasions yet easy enough for Tuesday night. The combination of textures and temperatures—cool, creamy layers contrasted with crunchy cookie crust—creates an unforgettable dessert experience.
Whether you’re bringing dessert to a gathering, celebrating a special occasion, or simply indulging your Southern comfort food cravings, expect bakery-quality results that’ll have everyone convinced you’re a dessert genius—without ever turning on the oven.
Table of Contents
Recipe Quick Reference Module
Time Breakdown: Prep: 20 min | Chill: 2-4 hours | Total: 2.5-4.5 hours
Output: 12-15 servings | Skill Level: Beginner
At-a-Glance Details:
- Origin cuisine: Southern American
- Meal category: Dessert
- Dietary tags: Vegetarian, No-bake required
- Ideal occasion: Potlucks, family gatherings, summer desserts, holidays, church suppers
Value Proposition Points
- No-Bake Simplicity — Completely assembled without using an oven, perfect for hot summer days or oven-free kitchens
- Lightning Assembly — Only 20 minutes active prep time, then refrigerator does all the work creating perfect texture
- Crowd-Pleasing Scale — Serves 12-15 people generously, making it ideal for gatherings and celebrations
- Make-Ahead Friendly — Can be prepared up to 24 hours in advance, actually improving as flavors meld overnight
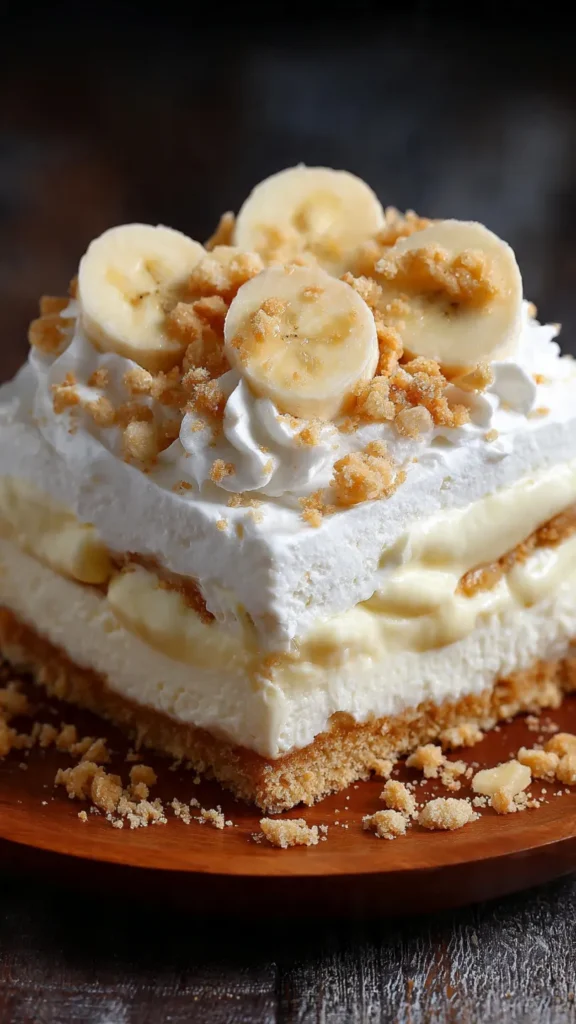
- Visual Impact — Beautiful layered presentation when scooped reveals colorful strata that impresses before first bite
Featured Ingredient Analysis
Vanilla Wafer Cookies
The foundation that provides essential texture contrast to the creamy layers above. Vanilla wafers contribute buttery, cookie flavor that complements banana without competing, while their firm texture holds up even after hours of contact with moist layers. When crushed and mixed with melted butter, vanilla wafers create a press-in crust that’s easier than traditional pie crust yet delivers similar structural support. Nilla Wafers are the gold standard brand, offering consistent sweetness and vanilla flavor that’s become synonymous with Southern banana pudding. The cookies also provide nostalgic flavor that connects this modern lush version to traditional banana pudding roots.
Cream Cheese (Full-Fat, Softened)
The secret ingredient that elevates this beyond standard banana pudding by adding tangy richness and luxurious texture. Full-fat cream cheese (never reduced-fat) creates a stable layer that holds its shape when sliced while providing velvety mouthfeel. The tanginess balances the sweetness of pudding and whipped topping, preventing the dessert from becoming cloying. Room temperature cream cheese is critical—cold cream cheese creates lumps that won’t smooth out no matter how vigorously you beat it. When whipped with powdered sugar, cream cheese transforms into a mousse-like layer that’s both rich and light, creating the sophisticated element that distinguishes lush desserts from simple layered desserts.
Instant Banana Pudding Mix
The flavor centerpiece that delivers authentic banana taste while creating silky, spoonable texture. Instant pudding mix contains modified food starch that thickens when combined with cold milk—no cooking required, making assembly foolproof. Banana flavor pudding is traditional, though vanilla pudding works if banana isn’t available. The pudding layer provides moisture that keeps the dessert from feeling dry while contributing recognizable banana pudding flavor that makes this recipe familiar and comforting. Jell-O brand banana cream pudding is widely preferred for consistent results and nostalgic flavor profile that most people associate with classic banana pudding.
Component-Based Ingredient Lists
Primary Component [Vanilla Wafer Crust]:
- 1 box (11 oz) vanilla wafer cookies (about 3 cups crushed)
- 6 tablespoons unsalted butter, melted
- 2 tablespoons granulated sugar (optional, adds extra sweetness)
Cream Cheese Layer:
- 8 oz (1 block) full-fat cream cheese, softened to room temperature
- ⅓ cup powdered sugar
- 1 cup whipped topping (Cool Whip), thawed
Banana Pudding Layer:
- 2 packages (3.4 oz each) instant banana pudding mix
- 3 cups cold whole milk
- 3-4 medium ripe bananas, sliced (keep firm, not overripe)
- 1 tablespoon lemon juice (prevents banana browning)
Topping Layer:
- 1 container (8 oz) whipped topping (Cool Whip), thawed
- Additional crushed vanilla wafers for garnish
- Extra banana slices for decoration (optional)
Ingredient Intelligence:
- Premium quality crucial for: Cream cheese (defines richness), vanilla wafers (provides structure and flavor), fresh bananas (essential flavor component)
- Temperature requirements: Cream cheese must be room temperature for smooth mixing; milk must be cold for pudding to set properly
- Non-negotiable elements: Full-fat cream cheese and whole milk create proper texture; low-fat versions produce thin, watery layers
Tool & Equipment Section
Required Items:
- 9×13-inch baking dish or glass casserole dish
- Food processor or rolling pin with plastic bag (for crushing cookies)
- Stand mixer or hand mixer (for cream cheese layer)
- Large mixing bowl (for pudding)
- Medium mixing bowl (for cream cheese)
- Rubber spatula
Bonus Tools:
- Offset spatula — Makes spreading layers evenly much easier
- Trifle dish or clear glass bowl — Creates stunning visual presentation showing all layers
- Pastry bag with star tip — Creates elegant whipped topping decoration
Preparation Method (Detailed Steps)
Step 1: Create the Cookie Crust Foundation
Place vanilla wafer cookies in a food processor and pulse until they form fine crumbs (about 1 minute), or place cookies in a sealed plastic bag and crush with a rolling pin until finely ground. You should have approximately 3 cups of crumbs. Transfer crumbs to a medium bowl, add melted butter and sugar if using, and stir with a fork until mixture resembles wet sand and holds together when pressed. Press the mixture firmly into the bottom of a 9×13-inch baking dish, using the bottom of a measuring cup or your hands to pack it down evenly. Pro tip: A firm, compact crust prevents crumbling when scooping servings. Refrigerate crust while preparing other layers.
Step 2: Whip the Cream Cheese Layer
In a medium bowl using an electric mixer, beat softened cream cheese on medium speed for 2-3 minutes until completely smooth and fluffy with no lumps visible. Scrape down sides of bowl frequently. Add powdered sugar and beat for another minute until sugar is fully incorporated and mixture is light and airy. Gently fold in 1 cup of thawed whipped topping using a rubber spatula, making sweeping motions from bottom to top until just combined—don’t overmix or you’ll deflate the whipped topping. Success marker: Mixture should be smooth, creamy, and hold soft peaks. Spread cream cheese mixture evenly over the chilled vanilla wafer crust, smoothing with an offset spatula or back of a spoon. Return to refrigerator while preparing pudding layer.
Step 3: Prepare Pudding and Slice Bananas
In a large bowl, whisk together banana pudding mix and cold milk vigorously for 2 minutes until pudding begins to thicken. Let stand 3-5 minutes to fully set—pudding should be thick enough to hold its shape when spooned. While pudding sets, slice bananas into ¼-inch rounds. Place banana slices in a small bowl, add lemon juice, and toss gently to coat—this prevents enzymatic browning that turns bananas unappealing brown. Timing alert: Don’t slice bananas more than 10 minutes before using; even with lemon juice, prolonged exposure to air causes browning.
Step 4: Layer Bananas and Pudding
Remove dish from refrigerator. Arrange banana slices in a single layer over the cream cheese layer, covering the entire surface—you’ll use approximately 2-3 bananas for this layer. Pour thickened banana pudding over banana slices, using a rubber spatula to spread evenly and fill in any gaps. The pudding will surround and encapsulate the banana slices, preventing them from floating or shifting. Smooth the top of the pudding layer to create an even surface for the final whipped topping. Gently tap the dish on the counter 2-3 times to release any air bubbles.
Step 5: Top with Whipped Cream and Garnish
Spread the remaining 8 oz container of thawed whipped topping over the pudding layer in an even blanket, smoothing with an offset spatula or back of a spoon. For decorative presentation, use a piping bag fitted with a star tip to pipe rosettes or swirls across the top. Sprinkle crushed vanilla wafer crumbs over the whipped topping for visual appeal and textural reminder of the crust below. If serving within a few hours, you can add a few banana slices as decoration, though these should be added just before serving to prevent browning. Cover dish tightly with plastic wrap and refrigerate for at least 2-4 hours (preferably overnight) to allow layers to set and flavors to meld. Scoop into squares or wedges to serve, making sure each serving captures all layers.
Professional Guidance Section
Temperature Control: Room temperature cream cheese is absolutely non-negotiable—cold cream cheese will never smooth out completely, creating lumpy texture that ruins the elegant presentation. Let cream cheese sit at room temperature 1-2 hours before using, or soften in microwave at 30% power in 10-second intervals.
Banana Timing Discipline: Slice bananas immediately before assembly and coat with lemon juice to prevent browning. Never use overripe, spotted bananas—they’re too soft and turn mushy and brown too quickly. Choose firm, yellow bananas with minimal brown spots for best texture and appearance that lasts.
Chilling Patience Secret: The 2-4 hour minimum chill time allows pudding to fully set, cream cheese layer to firm up, and all flavors to harmonize. Overnight chilling produces the absolute best results—flavors meld beautifully and layers become cohesive rather than distinct and separate. Rushing this step results in soupy, poorly structured dessert.
Avoid This Error: Don’t use reduced-fat or light versions of cream cheese, whipped topping, or milk. These products contain more water and less fat, creating thin, watery layers that won’t hold their structure and taste inferior. Full-fat ingredients are essential for proper texture and rich flavor.
Testing Insight: During recipe development, Southern cooks discovered that adding a thin layer of banana slices directly on the cream cheese layer (before pudding) creates even banana distribution and prevents all bananas from sinking to the bottom as sometimes happens when they’re only mixed into pudding.
Adaptation & Variation Guide
Dietary Adjustments
Sugar-Free Version: Use sugar-free instant pudding mix, sugar-free whipped topping (like Sugar-Free Cool Whip), and substitute powdered erythritol or monk fruit sweetener for powdered sugar in cream cheese layer. Reduces sugar by approximately 75% while maintaining similar texture.
Gluten-Free Conversion: Replace vanilla wafers with gluten-free vanilla cookies or graham crackers. Many vanilla wafer brands now offer gluten-free versions. Verify pudding mix is certified gluten-free (most are, but check labels).
Lighter Version: Use reduced-fat cream cheese (Neufchâtel), sugar-free pudding, light whipped topping, and 2% milk. Reduces calories by about 30% per serving. Texture will be slightly less rich but still delicious.
Flavor Transformations
Chocolate Banana Lush: Replace banana pudding with chocolate instant pudding and add mini chocolate chips to cream cheese layer. Drizzle chocolate ganache over whipped topping for decadent Chocolate-Covered Banana variation.
Peanut Butter Banana Lush: Add ½ cup creamy peanut butter to cream cheese layer and use peanut butter cookies in crust instead of vanilla wafers. Top with chopped peanuts and chocolate drizzle for Elvis-inspired dessert.
Strawberry Banana Lush: Use half banana pudding and half vanilla pudding, add layer of sliced fresh strawberries with bananas, and garnish with whole strawberries. Creates beautiful pink and yellow color combination.
Presentation Approaches
Classic Method: Scoop squares onto dessert plates, making sure each serving shows all layers. Garnish with vanilla wafer cookie standing upright and fresh banana slice.
Trifle Style: Layer all components in a clear trifle bowl or individual parfait glasses so beautiful layers are visible from all angles. This presentation is especially stunning for special occasions.
Individual Cups: Assemble in clear plastic cups or mason jars for portable, portion-controlled servings perfect for parties where guests are standing and mingling.
Preservation & Advance Prep
Prepare-Ahead Strategy:
- Assemble completely up to 24 hours before serving; store covered in refrigerator—flavors actually improve overnight
- Make vanilla wafer crust up to 2 days ahead; store covered in refrigerator
- Prepare cream cheese layer up to 1 day ahead; store covered in refrigerator and spread just before assembling
- Maximum advance time: 48 hours for optimal banana appearance and texture
Storage Guidelines:
Room Temperature: Do not leave at room temperature longer than 2 hours due to dairy content and food safety concerns. This dessert must stay refrigerated.
Refrigerated: Store covered tightly with plastic wrap up to 3 days in refrigerator. Bananas will begin darkening after 48 hours even with lemon juice treatment, but flavor remains excellent. The crust softens progressively over time but maintains pleasant texture.
Frozen: Not recommended—bananas become mushy and black when frozen and thawed, cream cheese layer separates, and whipped topping becomes watery. This dessert is best enjoyed fresh or within 3 days of making.
Optimal Reheating:
This dessert is served chilled—no reheating needed. Remove from refrigerator 10 minutes before serving to take the chill off slightly, which enhances flavor perception.
Complementary Serving Suggestions
Ideal Pairings:
- Hot coffee or sweet tea — Traditional Southern beverage pairings that balance the dessert’s sweetness with bitter or tannic contrast
- Fresh berries — Strawberries, blueberries, or raspberries on the side add fresh, tart contrast to rich, creamy dessert
- Vanilla ice cream — An optional scoop alongside creates temperature contrast and adds extra indulgence
Menu Building:
- Southern BBQ Feast: Serve Banana Pudding Lush after meal of pulled pork, coleslaw, baked beans, and cornbread for authentic Southern experience
- Summer Potluck: Bring this no-bake dessert to outdoor gatherings where oven-baked desserts are impractical in hot weather
- Holiday Dinner: Offer as alternative to heavier pies during Thanksgiving or Christmas for guests who prefer lighter, no-bake option
Nutritional Information (Single Serving)
Calories: 295 | Protein: 4g | Carbohydrates: 42g | Fat: 13g | Fiber: 1g | Sugar: 30g | Sodium: 240mg
Disclaimer: Calculated via USDA FoodData Central nutritional database based on 12 servings. Values approximate depending on specific brands used for cookies, pudding mix, and whipped topping. Complete nutrition methodology available upon request.
Reader FAQ Module
Q: Can I make this without instant pudding mix?
A: Yes, though it requires cooking. Make homemade banana pudding using eggs, sugar, milk, cornstarch, and banana extract. Cool completely before layering. Instant pudding is preferred for no-bake convenience and consistent results.
Q: My cream cheese layer has lumps—how do I fix it?
A: Prevention is key—always use room temperature cream cheese and beat thoroughly. If lumps exist, push mixture through fine-mesh strainer before folding in whipped topping, or carefully blend with immersion blender on low speed for 10-15 seconds.
Q: How do I prevent bananas from turning brown?
A: Toss sliced bananas in lemon juice immediately before assembly, use firm (not overripe) bananas, and assemble no more than 24 hours before serving. Submerging banana slices fully in pudding layer also minimizes air exposure that causes browning.
Q: Can I use homemade whipped cream instead of Cool Whip?
A: Yes, though texture differs slightly. Stabilize homemade whipped cream by adding 2 tablespoons powdered sugar and ½ teaspoon vanilla per cup of heavy cream. Beat to stiff peaks. Homemade whipped cream has shorter shelf life—serve within 24 hours.
Q: What size dish should I use?
A: Standard 9×13-inch baking dish is perfect for traditional layering. For thicker layers, use 8×11-inch or 9×9-inch dish. For stunning presentation, use clear trifle bowl where all layers remain visible.
Q: The pudding layer is too thin—what went wrong?
A: Most likely you used warm or room temperature milk instead of cold milk, which prevents proper thickening. Or you didn’t whisk vigorously enough or long enough (full 2 minutes required). Make sure pudding sits 3-5 minutes to fully thicken before layering.
Background & Heritage Context
Banana Pudding Lush belongs to the beloved family of “lush” desserts that emerged in American home kitchens during the 1960s-1970s, representing the golden age of convenience cooking when instant pudding mixes, pre-made cookies, and whipped topping revolutionized dessert preparation. The term “lush” likely derives from the luxurious, rich texture these layered desserts provide—though some speculate it references how irresistible they are.
Traditional Southern banana pudding dates back to the late 1800s when bananas became widely available in the United States. The classic version layers vanilla wafers, sliced bananas, and vanilla custard, topped with meringue. By the mid-20th century, instant pudding simplified preparation dramatically, and variations began emerging as home cooks experimented with additional layers and presentations.
The lush variation—adding a sweetened cream cheese layer and structured presentation in a baking dish rather than bowl—gained popularity through church cookbooks, community fundraiser recipe collections, and potluck circuits throughout the South. The addition of cream cheese elevated the humble banana pudding into something that felt more sophisticated while maintaining the comforting, familiar flavors everyone loved.
What makes Banana Pudding Lush enduringly popular is how it honors tradition while embracing convenience. It maintains the essential banana-vanilla wafer-custard combination that defines Southern banana pudding but adds elegant layers and no-bake ease that suits modern lifestyles. The dessert represents Southern hospitality’s commitment to making guests feel special without requiring the cook to spend all day in a hot kitchen—especially important in Southern summers.
Today, lush desserts have expanded into countless variations (Oreo Lush, Strawberry Lush, Pumpkin Lush), but Banana Pudding Lush remains the quintessential version that connects contemporary convenience cooking to time-honored Southern dessert traditions.
Print-Optimized Recipe Summary
Banana Pudding Lush – No-Bake Southern Layered Dessert
Vanilla wafer crust, cream cheese, banana pudding, whipped topping
Ingredients: 1 box vanilla wafers – 6 tbsp melted butter – 8 oz cream cheese (softened) – ⅓ cup powdered sugar – 9 oz whipped topping (divided) – 2 packages instant banana pudding – 3 cups cold milk – 3-4 bananas (sliced) – 1 tbsp lemon juice
Method:
- Crush vanilla wafers, mix with melted butter, press into 9×13-inch dish; refrigerate
- Beat softened cream cheese until smooth; add powdered sugar, beat until fluffy
- Fold 1 cup whipped topping into cream cheese; spread over crust; refrigerate
- Whisk pudding mix with cold milk 2 minutes; let set 3-5 minutes
- Toss banana slices with lemon juice; layer over cream cheese
- Spread pudding over bananas; smooth top
- Spread remaining whipped topping over pudding; garnish with crushed wafers
- Cover and refrigerate 2-4 hours (overnight preferred) before serving
Essential Notes: Cream cheese must be room temperature – Use cold milk for pudding – Coat bananas with lemon juice to prevent browning – Full-fat ingredients required for proper texture – Chill minimum 2 hours before serving – Best within 48 hours – Store covered up to 3 days refrigerated – Do not freeze