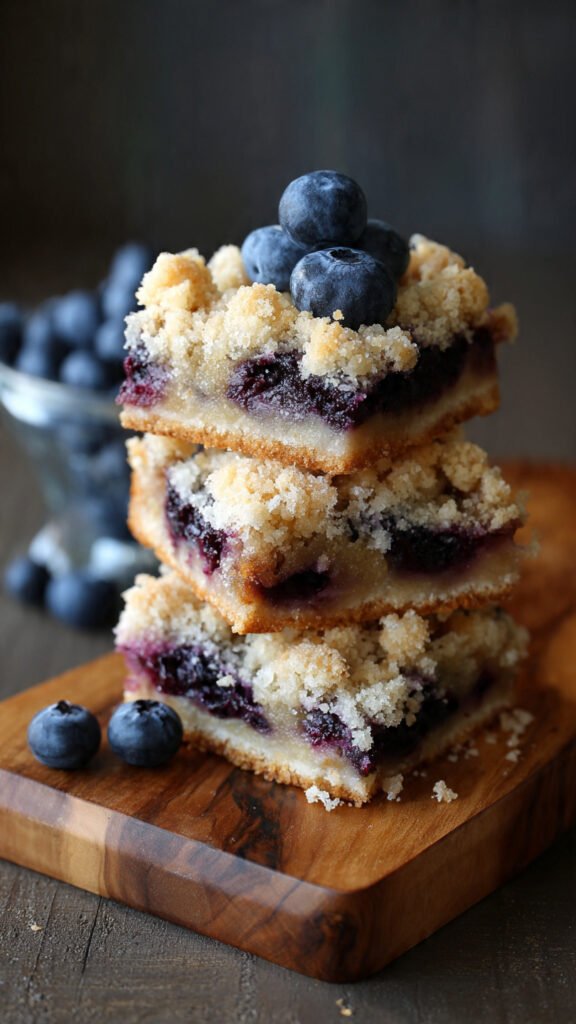
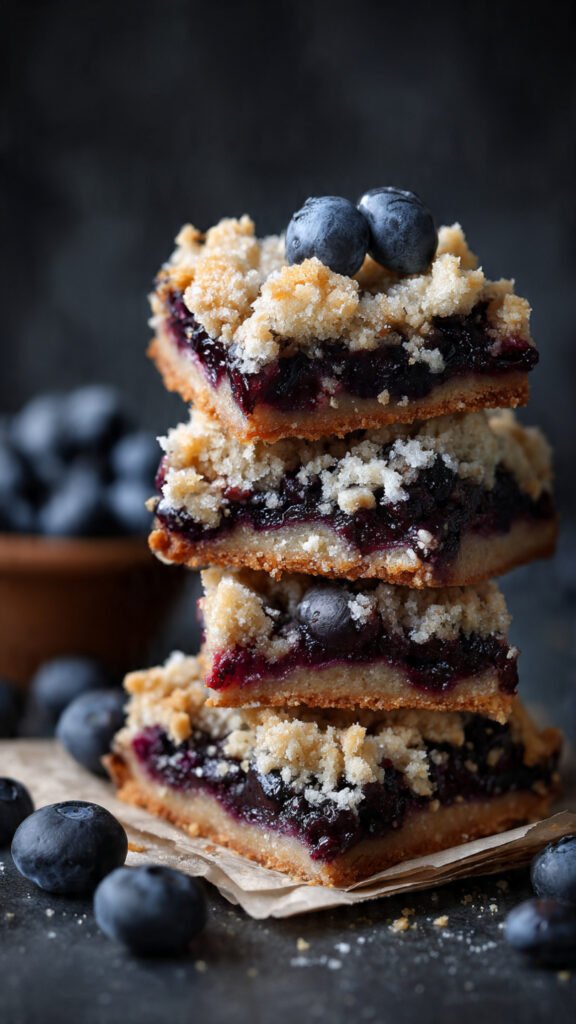
Blueberry Crumb Bars: A Summer Dessert Worth Making
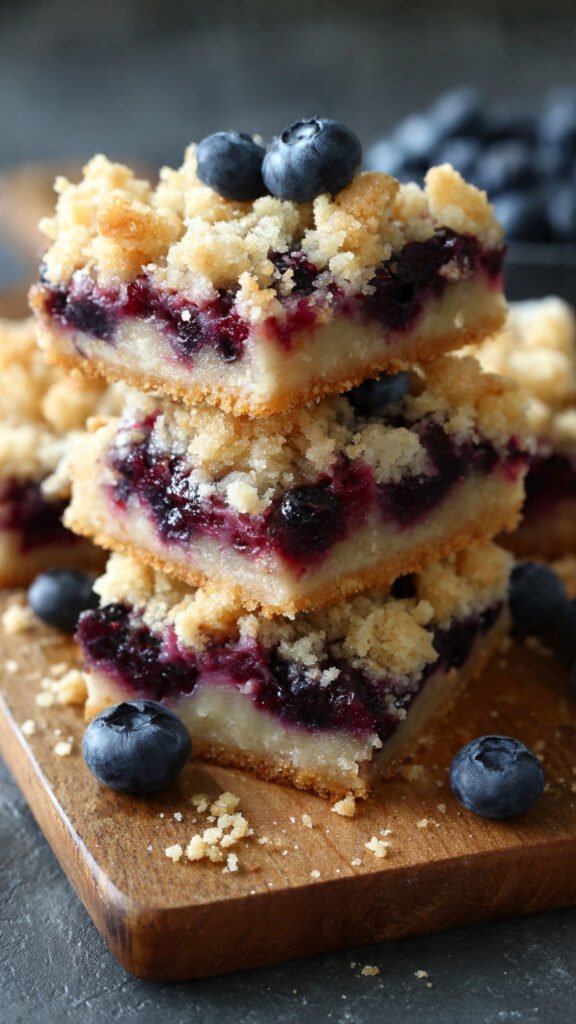
There’s something irresistible about the combination of buttery crumb topping and juicy fruit filling. These Blueberry Crumb Bars capture everything you love about summer baking in one delightful dessert. With their tender, cookie-like base, vibrant blueberry center, and generous crumbly topping, these bars deliver the perfect balance of sweet and tangy flavors in every bite.
What makes this recipe truly special is how it transforms simple pantry ingredients into an impressive treat that looks like it came from a bakery. The addition of warm spices like cinnamon and allspice adds depth to the buttery crust, while fresh lemon zest brightens the entire dessert. Whether you’re planning a summer barbecue, need a potluck contribution, or simply want to enjoy seasonal blueberries at their peak, these bars are guaranteed to become a favorite.
The beauty of this recipe lies in its versatility and ease. Unlike traditional pies that require rolling dough and crimping edges, these bars come together quickly with minimal fuss. The same dough mixture serves as both the base and the topping, which means less prep work and fewer dishes to clean. Even better, they’re portable and perfect for sharing, making them ideal for picnics, bake sales, or afternoon coffee breaks.
Ingredients You’ll Need
For the Crumb Base and Topping
- 1¾ cups all-purpose flour
- ⅓ cup granulated sugar
- ⅓ cup packed brown sugar
- ½ tsp baking powder
- ½ tsp cinnamon
- ¼ tsp allspice
- ¼ tsp salt
- ½ cup (1 stick) cold salted butter, cut into 1-inch cubes
- 1 large egg
- 1½ tsp lemon zest (from about half a lemon)
- 1 tsp pure vanilla extract
For the Blueberry Filling
- 2 cups fresh blueberries
- ⅓ cup granulated sugar
- 2 tsp lemon juice (from about a quarter of a lemon)
- 1 tbsp cornstarch
Step-by-Step Instructions
Preparing Your Workspace
Begin by preheating your oven to 375°F. This ensures your oven reaches the proper temperature by the time your bars are ready to bake. Prepare an 8×8-inch square baking pan by either spraying it generously with cooking spray or lining it with parchment paper. If using parchment, let the paper extend slightly over two opposite sides of the pan to create handles for easy removal later.
Making the Crumb Mixture
In a food processor, combine the flour, granulated sugar, brown sugar, baking powder, cinnamon, allspice, and salt. Pulse a few times to blend the dry ingredients evenly. The food processor makes quick work of this step, but if you don’t have one, you can absolutely mix these ingredients in a large bowl with a whisk.
Add the cold butter cubes to the flour mixture. The butter must be cold to achieve the proper crumbly texture. Pulse the mixture until small crumbs form and the butter is evenly distributed throughout. You’re looking for a texture similar to coarse sand with some slightly larger pea-sized pieces of butter remaining.
Next, add the egg, lemon zest, and vanilla extract. Pulse just until the mixture comes together. The dough will look crumbly but should hold together when you press it between your fingers. Be careful not to over-process at this stage, as you want to maintain that tender, crumbly texture.
Forming the Base Layer
Divide your dough mixture in half as evenly as possible. Take one half and spread it across the bottom of your prepared pan. Use your fingers to gently press the dough into an even layer that covers the entire bottom. The dough will feel slightly crumbly, but it should hold together when pressed. Don’t worry if it’s not perfectly smooth; a rustic appearance is part of the charm of these bars.
Preparing the Blueberry Filling
In a separate mixing bowl, gently combine the fresh blueberries, sugar, lemon juice, and cornstarch. The cornstarch is crucial here as it helps thicken the berry juices during baking, preventing your bars from becoming soggy. Mix carefully to avoid crushing the berries. You want them to stay as whole as possible for the best texture in the finished bars.
The lemon juice serves a dual purpose in this recipe. It enhances the natural brightness of the blueberries while also helping to balance their sweetness. This touch of acidity makes each bite more complex and interesting.
Assembling the Bars
Pour the blueberry mixture over the pressed crust layer, spreading it evenly to the edges. Take your time with this step to ensure even distribution, which will help the bars bake uniformly.
Now comes the fun part. Take the remaining crumb mixture and scatter it evenly over the blueberry filling. You can break it into smaller pieces with your fingers as you go, creating an appealing mix of fine crumbs and larger chunks. This varied topping creates wonderful texture contrast in the finished bars.
Baking to Perfection
Place the pan in your preheated oven and bake for 30 to 40 minutes. You’ll know the bars are done when the top turns a beautiful golden brown and you can see the blueberry filling bubbling around the edges. The exact baking time can vary depending on your oven, so start checking around the 30-minute mark.
Cooling and Serving
This is perhaps the hardest part of the recipe: waiting. Let the bars cool completely in the pan before attempting to cut them. This cooling period, which takes about 1 to 2 hours, allows the blueberry filling to set properly. If you cut into them too early, the filling will be runny and the bars won’t hold their shape well. Patience here pays off with clean, beautiful slices.
Once cooled, cut the bars into squares of your desired size. They’re delicious on their own, but for an extra-special treat, serve them with a scoop of vanilla ice cream. The cold, creamy ice cream melting into the warm spiced crumbs is absolutely heavenly.
Storage and Make-Ahead Tips
These bars store beautifully, making them perfect for meal prep or advance baking. Keep them in an airtight container in the refrigerator for up to 5 days. The cool temperature helps maintain their structure and keeps the blueberry filling fresh.
For longer storage, freeze the bars for up to 6 months in a heavy-duty freezer bag. If you plan to stack them, place parchment paper between layers to prevent sticking. Thaw frozen bars in the refrigerator overnight before serving.
Expert Tips for Success
While a food processor streamlines this recipe, it’s not essential. You can achieve the same crumbly texture using a pastry cutter or even two forks to cut the cold butter into the flour mixture. This traditional method takes a bit more time but works beautifully.
The recipe calls for an 8×8-inch pan, which creates bars with ideal thickness. If you only have a 9×9-inch pan, you can use it, but your bars will be thinner. Reduce the baking time by 5 to 10 minutes and watch them carefully to prevent overbaking.
Remember that setting time is crucial. Those 1 to 2 hours of cooling aren’t just a suggestion. The berry layer needs this time to firm up sufficiently. Cutting too early results in messy (though admittedly delicious) servings that won’t hold their shape.
Nutritional Information
Each bar contains approximately 168 calories, 27g carbohydrates, 2g protein, and 6g fat. They also provide small amounts of vitamins and minerals, including vitamin C from the fresh blueberries.