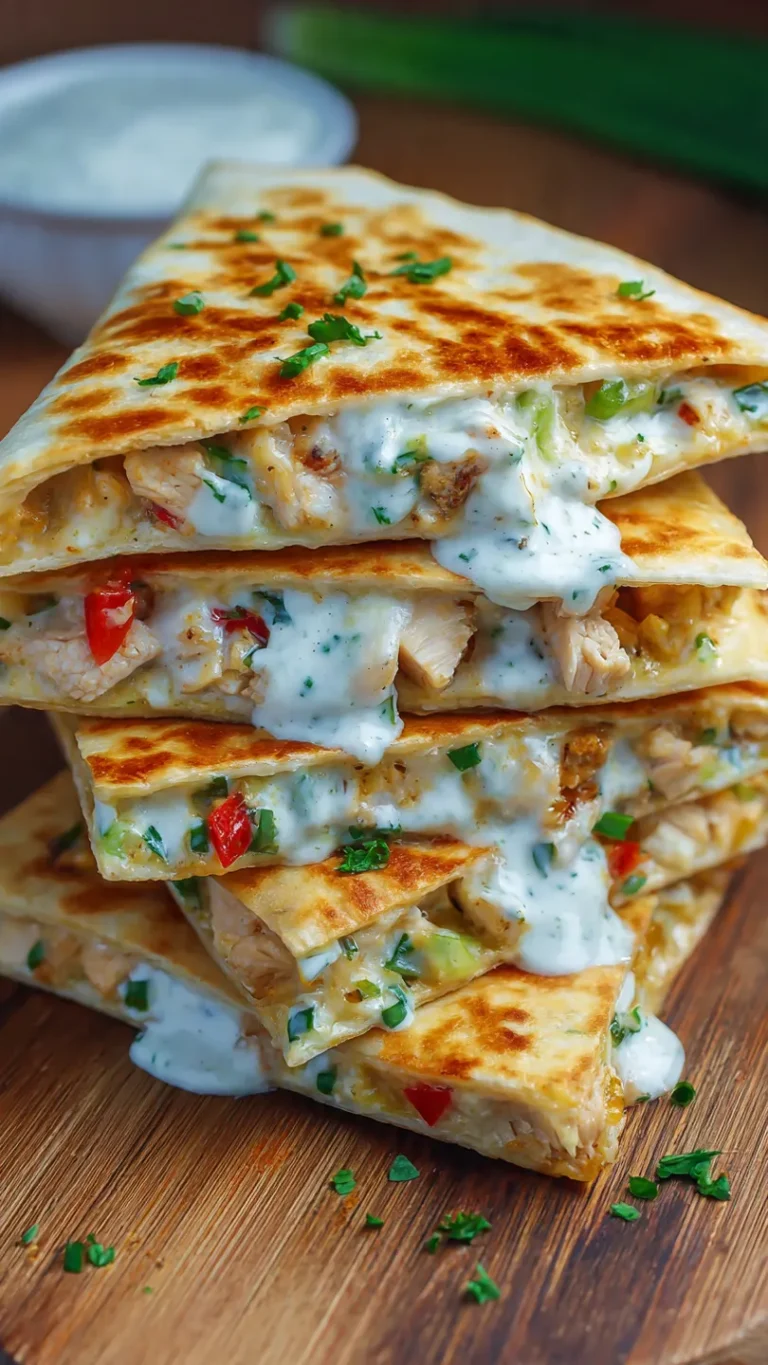
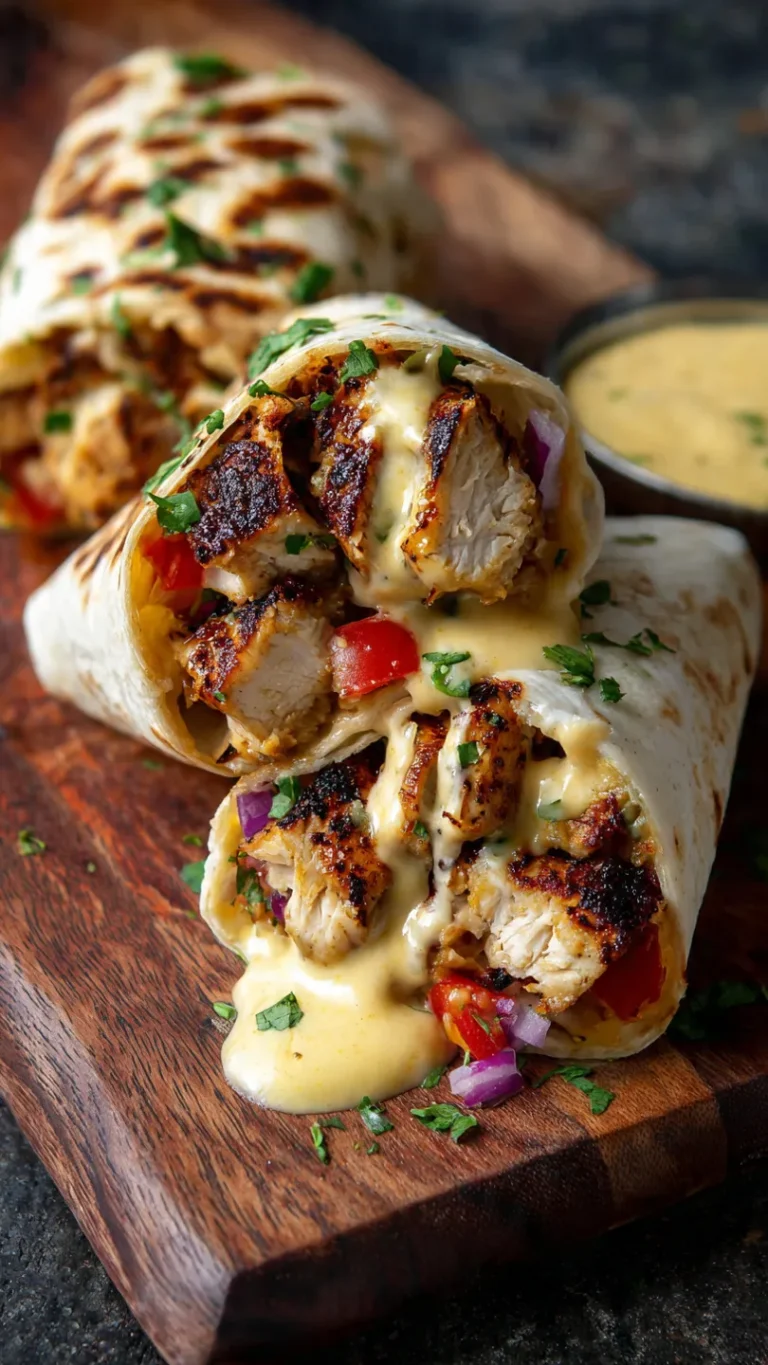
Cheesy Garlic Chicken Wraps (Melty, Juicy, 20-Minute Favorite!)
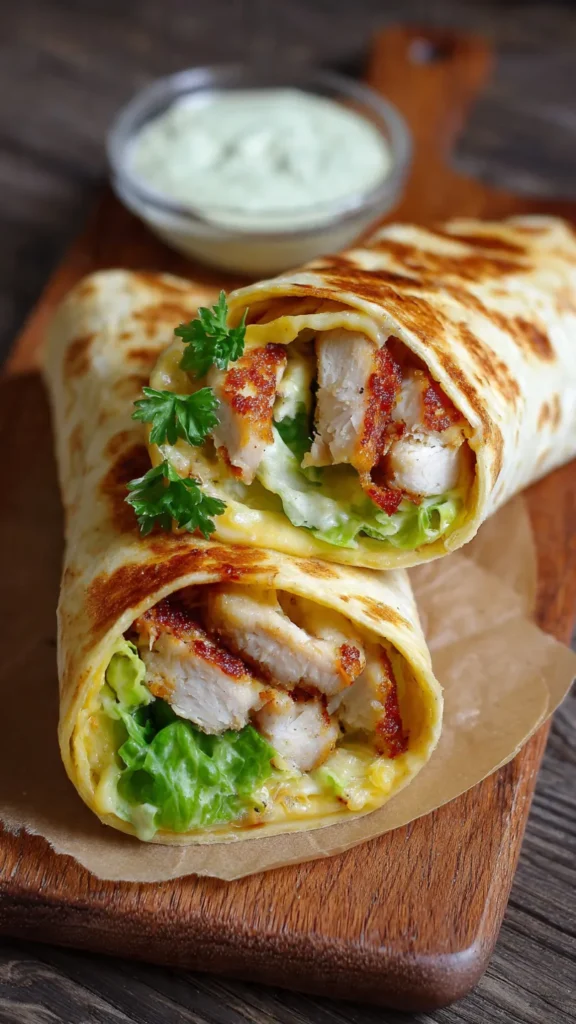
There’s a special kind of satisfaction that comes from biting into a warm, toasty wrap and getting that first pull of melted cheese. When you add tender, garlicky chicken and a creamy sauce tucked inside a golden, crisp tortilla, you’ve got the kind of meal that makes everyone at the table go quiet for a moment. That’s exactly what these Cheesy Garlic Chicken Wraps deliver—simple ingredients turned into something you’ll crave again and again.
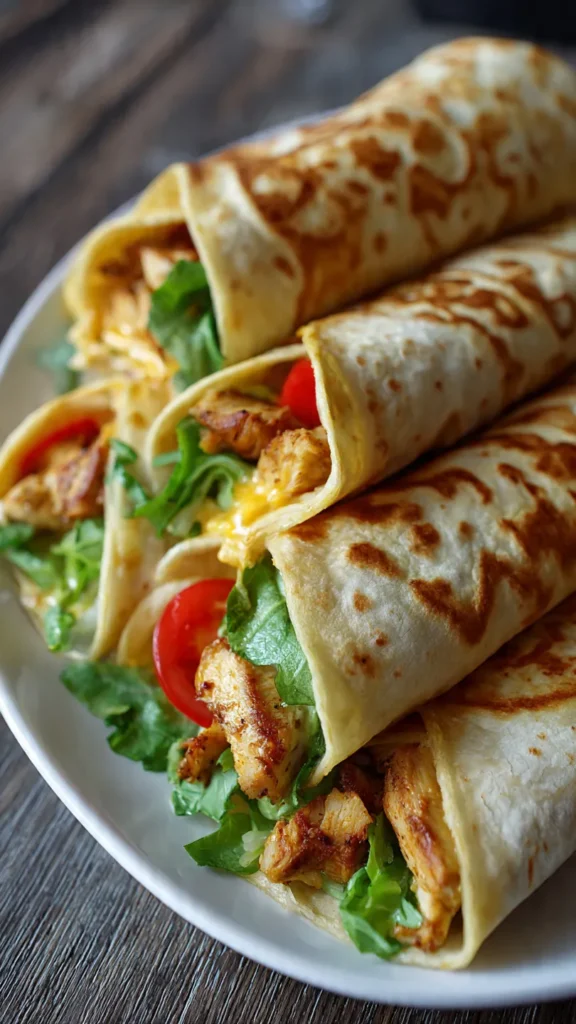
Wraps became one of my go-to weeknight dinners on the busiest days. They’re fast, flexible, and easy to eat on the go, but they don’t have to be boring. With this recipe, juicy seasoned chicken is folded together with a rich garlic sauce, plenty of cheese, and fresh touches like lettuce or tomatoes if you want them. A quick toast in the pan transforms everything into a handheld, crispy, cheesy pocket.
Whether you’re feeding kids after school, packing a satisfying work lunch, or looking for an easy dinner that doesn’t feel like “just another sandwich,” you’ll get a melty, flavor-packed wrap with juicy chicken, bold garlic, and gooey cheese in every bite.
Table of Contents
Prep Time: 10 min | Cook Time: 10–12 min | Total: 20–22 min
Yield: 4 large wraps | Difficulty: Easy
Quick Stats Box:
- Cuisine: American, Tex-Mex inspired
- Course: Lunch, Dinner, Meal Prep
- Diet: High-protein, can be made low-carb
- Best for: Quick weeknights, grab-and-go lunches, kid-friendly meals
Why This Recipe Works
- Big flavor from simple ingredients — Garlic, seasonings, and cheese turn basic chicken into a craveable filling.
- Fast and skillet-friendly — Everything cooks in one pan and assembles in minutes, perfect for busy days.
- Crispy outside, melty inside — Lightly toasting the wraps in the pan gives a quesadilla-like exterior with a soft, cheesy center.
- Customizable and family-friendly — Add veggies, swap cheeses, or adjust the garlic and spice level to suit everyone.
- Great for meal prep — The filling can be made ahead, then assembled and toasted fresh when you’re ready to eat.
Ingredient Spotlight
Chicken
Boneless, skinless chicken breasts or thighs both work well. Breasts are lean and slice neatly; thighs stay extra juicy. Cutting the chicken into thin strips or small cubes ensures fast cooking and even seasoning.
Garlic
Fresh garlic is key to getting that bold, fragrant flavor that makes these wraps special. Minced garlic blooms in butter or oil, flavoring the whole filling and giving the sauce its signature punch.
Cheese
A good melting cheese makes all the difference. Cheddar, mozzarella, Monterey Jack, or a blend all work. Using freshly shredded cheese helps it melt smoothly and creates that stretchy, gooey texture when you bite into the wrap.
Ingredients (Organized by Component)
For the Chicken:
- 1½ pounds boneless, skinless chicken breasts or thighs, cut into thin strips or small cubes
- 1 tablespoon olive oil
- 1 tablespoon butter
- 1 teaspoon salt (or to taste)
- ½ teaspoon black pepper
- 1 teaspoon garlic powder
- 1 teaspoon onion powder
- 1 teaspoon smoked paprika (or regular paprika)
- ½ teaspoon dried oregano or Italian seasoning
For the Cheesy Garlic Filling:
- 4–5 cloves garlic, minced
- ¼ cup mayonnaise or plain Greek yogurt
- ¼ cup sour cream
- 1½ cups shredded cheese (cheddar, mozzarella, or blend)
- 2 tablespoons cream cheese (optional, for extra creaminess)
- 1–2 tablespoons fresh parsley, chopped (optional)
- 1–2 tablespoons milk or cream (if you need to loosen the mixture)
For Assembling the Wraps:
- 4 large flour tortillas (burrito size) or low-carb wraps
- 1–2 tablespoons butter or oil for toasting
- Optional add-ins: shredded lettuce, sliced tomatoes, thinly sliced red onion, pickled jalapeños, sliced avocado
Essential Equipment
You’ll Need:
- Large skillet (nonstick or cast iron)
- Mixing bowl
- Spatula or tongs
- Cutting board and sharp knife
Nice to Have:
- Grill pan (for extra grill marks)
- Pastry brush (for brushing butter or oil on tortillas)
How to Make Cheesy Garlic Chicken Wraps (Step-by-Step)
Step 1: Season the Chicken
Pat the chicken dry with paper towels. In a bowl, toss it with salt, pepper, garlic powder, onion powder, smoked paprika, and oregano until evenly coated. You want every piece lightly covered in seasoning so no bite is bland.
Step 2: Cook the Chicken
Heat olive oil and 1 tablespoon butter in a large skillet over medium-high heat. When the fat is hot and shimmering, add the chicken in a single layer. Cook 4–6 minutes, stirring occasionally, until the chicken is cooked through and lightly browned on the edges. The pieces should be opaque in the center with no pink remaining. Remove the chicken to a bowl and set aside.
Step 3: Build the Cheesy Garlic Mixture
Turn the heat down to low. In the same skillet, add a tiny splash of oil or butter if the pan looks dry. Add minced garlic and cook 30–60 seconds, just until fragrant. Don’t let it brown. Transfer the garlic to the bowl with the cooked chicken.
Add mayonnaise (or yogurt), sour cream, shredded cheese, and cream cheese (if using) to the bowl. Stir everything together until the chicken is coated in a creamy, cheesy garlic mixture. If it seems too thick, add a tablespoon or two of milk or cream to loosen it. Taste and adjust salt, pepper, or garlic as needed. Fold in fresh parsley if you like a bright, herby note.
The mixture should be thick and scoopable—not runny—so it stays inside the wraps.
Step 4: Assemble the Wraps
Lay the tortillas out on a clean surface. Spoon a generous portion of the chicken mixture into the center of each tortilla, slightly off-center toward the bottom half. If using extras like lettuce, tomato, or onion, layer them on top of the chicken. Don’t overfill—leaving room at the edges helps you wrap tightly.
Fold the sides of the tortilla in over the filling, then roll from the bottom up, tucking as you go, to form a tight wrap. The seam should be on the underside so it stays closed during toasting.
Step 5: Toast to Melty, Golden Perfection
Wipe out the skillet if needed and return it to medium heat. Add a light coating of butter or oil. Place the wraps seam-side down in the pan. Cook 2–3 minutes per side, pressing gently with a spatula, until the tortillas are golden brown and crisp and the cheese inside is fully melted.
You’ll know they’re perfect when the outside is lightly crisp and you can see some cheese beginning to ooze slightly at the edges.
Remove from the pan and let rest for 1–2 minutes before slicing. Cut in half on the diagonal for easier handling and a nice presentation.
Expert Tips & Tricks
- Temperature matters: Medium heat is best for toasting—too high and the tortilla burns before the cheese melts, too low and it won’t crisp.
- Don’t overfill the wraps: Too much filling makes them hard to close and more likely to burst in the pan.
- The secret to extra gooey wraps: Use a blend of cheeses—one that melts smoothly (like mozzarella or Monterey Jack) plus a sharper one (like cheddar) for flavor.
- Common mistake: Skipping the brief rest after toasting. Letting the wraps sit for a minute helps the cheese settle so it doesn’t all spill out when you cut them.
- Make it neater: If your filling is very soft, chilling it for 10–15 minutes before filling can make wrapping easier.
Customization Ideas
Dietary Modifications:
- Low-Carb/Keto: Use low-carb tortillas and full-fat cheese and sour cream.
- Lighter Version: Use grilled or baked chicken, Greek yogurt instead of mayo, and reduced-fat cheese.
- High-Protein: Add extra chicken and use Greek yogurt base for the sauce.
Flavor Variations:
- Buffalo Chicken Wraps: Add buffalo sauce to the filling and serve with a drizzle of ranch or blue cheese.
- Bacon Ranch: Mix in cooked, crumbled bacon and a spoon of ranch seasoning or dressing.
- Herb & Spinach: Add chopped spinach and Italian seasoning to the filling.
- Spicy Kick: Add chopped jalapeños or a pinch of cayenne to the garlic mixture.
Serving Styles:
- As a Wrap Meal: Serve with fries, chips, or a simple side salad.
- As a Melt: Use the filling between two tortillas like a quesadilla.
- Party Style: Slice wraps into small pinwheels and secure with toothpicks for appetizers.
Storage & Meal Prep
Make Ahead:
- Cook and mix the chicken filling up to 3 days in advance; store in an airtight container in the fridge.
- Assemble wraps just before toasting for best texture.
Storing:
- Fridge: Store cooked, cooled wraps tightly wrapped or in an airtight container for up to 2 days.
- Freezer: Not ideal once assembled and toasted (tortillas can get tough), but you can freeze the filling on its own in portions.
Reheating for Best Results:
- Skillet: Reheat wraps over medium-low heat, covered, until warmed through and crisp again.
- Air Fryer: 350°C/°F equivalent setting for a few minutes until heated and crispy.
- Microwave: Quick but less crisp—wrap in a paper towel and heat in short bursts.
What to Serve With Cheesy Garlic Chicken Wraps
Perfect Pairings:
- Crisp green salad with a light vinaigrette
- Oven fries, sweet potato wedges, or potato wedges
- Coleslaw or a simple cucumber-tomato salad
Complete the Meal:
- Add a cup of tomato soup or creamy vegetable soup for a cozy combo.
- Serve with roasted vegetables like broccoli, carrots, or green beans for a balanced plate.
Nutrition Facts (Per Wrap – approximate, without optional add-ins)
Calories: ~520 | Protein: ~38g | Carbs: ~32g | Fat: ~26g | Fiber: ~2g | Sugar: ~3g | Sodium: depends on tortillas and cheese
Note: Values vary by tortilla size, cheese type, and whether you choose full-fat or light ingredients.
Your Questions Answered
Can I use rotisserie chicken?
Yes—shred rotisserie chicken and warm it briefly with the garlic and seasonings before mixing with the cheeses and sauce.
Can I bake these instead of toasting in a skillet?
You can. Place assembled wraps seam-side down on a baking sheet, brush lightly with oil, and bake at about 190°C/375°F for 10–15 minutes, flipping once, until crisp and heated through.
Can I make them without mayo?
Use Greek yogurt and a little extra cream cheese instead, or simply increase sour cream and cheese for a mayo-free filling.
How do I keep the wraps from opening in the pan?
Wrap tightly, start seam-side down, and don’t move them for the first minute of toasting so the seam “seals” as it crisps.
Can I add vegetables inside?
Yes—just keep them relatively dry. Good options: lettuce, spinach, tomato slices (patted dry), sautéed peppers, onions, or mushrooms.
Printable Recipe Card
Cheesy Garlic Chicken Wraps
Warm, crispy tortillas stuffed with juicy garlic chicken, creamy sauce, and melted cheese—ready in about 20 minutes!
Prep Time: 10 min
Cook Time: 10–12 min
Total Time: 20–22 min
Serves: 4
Ingredients:
- 1½ lb chicken breasts or thighs, cut into strips/cubes
- 1 tbsp olive oil
- 1 tbsp butter
- 1 tsp salt
- ½ tsp black pepper
- 1 tsp garlic powder
- 1 tsp onion powder
- 1 tsp smoked paprika
- ½ tsp dried oregano
- 4–5 cloves garlic, minced
- ¼ cup mayonnaise or Greek yogurt
- ¼ cup sour cream
- 1½ cups shredded cheese (cheddar, mozzarella, or blend)
- 2 tbsp cream cheese (optional)
- 4 large flour tortillas
- Butter or oil for toasting
Instructions:
- Season chicken with salt, pepper, garlic powder, onion powder, paprika, and oregano.
- Heat olive oil and butter in skillet over medium-high. Cook chicken 4–6 minutes until browned and cooked through. Remove to a bowl.
- Lower heat; add garlic to pan and cook 30–60 seconds. Add to bowl with chicken.
- Stir in mayo/yogurt, sour cream, shredded cheese, and cream cheese. Mix until chicken is coated and mixture is creamy. Adjust seasoning.
- Lay tortillas flat, add filling to center, fold in sides, and roll tightly into wraps.
- Wipe skillet, add a little butter or oil, and toast wraps 2–3 minutes per side over medium heat until golden and cheese is melted.
- Rest 1–2 minutes, slice in half, and serve warm.
Notes:
- Use low-carb tortillas for a lower-carb option.
- Filling can be made ahead and stored up to 3 days.
- Don’t overfill to keep wraps from bursting in the pan.