Classic Tuna Salad Recipe (Quick, Easy & Perfectly Delicious!)
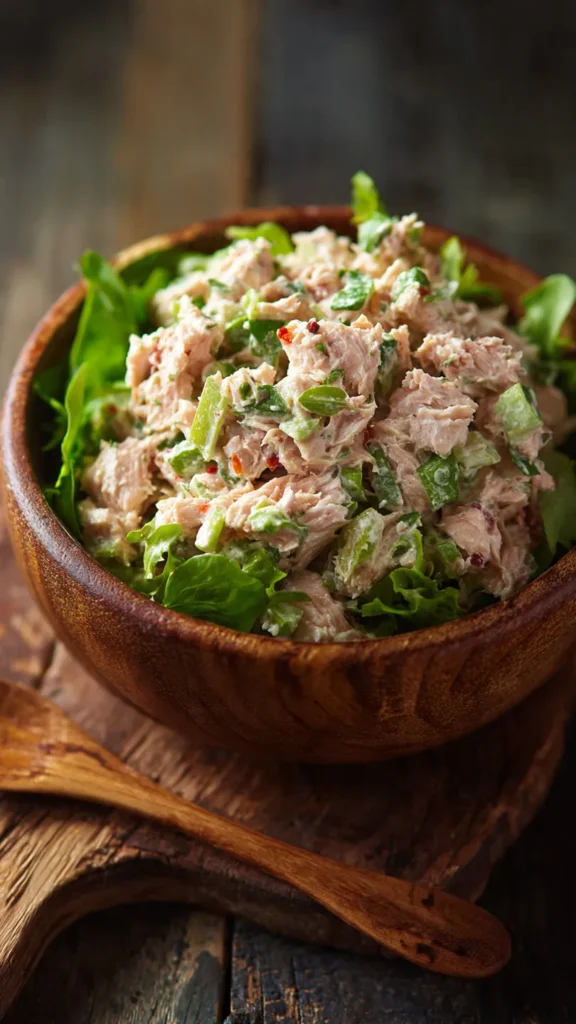
There’s something beautifully simple about a well-made tuna salad—tender chunks of tuna mixed with crisp vegetables and creamy dressing creates the perfect light lunch or quick dinner. This classic tuna salad recipe is the one you’ll turn to again and again, whether you’re packing school lunches, need a quick protein-packed meal, or want something healthy and satisfying without turning on the stove. It’s comfort food at its finest, ready in just 15 minutes with ingredients you probably already have in your pantry.
What makes this recipe truly special is its versatility and balance. Crunchy celery and onion provide texture, pickle relish adds tangy sweetness, and creamy mayonnaise ties everything together into a mixture that’s neither too dry nor too wet—just perfectly spreadable. Whether you serve it on toasted bread, stuff it into a pita, wrap it in lettuce leaves, or simply eat it with crackers, you’ll get a protein-rich meal that’s both nostalgic and endlessly customizable.
Table of Contents
Prep Time: 10 min | Cook Time: 0 min | Total: 10-15 min
Yield: 4 servings | Difficulty: Easy
Quick Stats Box:
- Cuisine: American
- Course: Main dish, lunch, sandwich filling
- Diet: Gluten-free option, high protein
- Best for: Quick lunches, meal prep, sandwiches, snacks
Why This Recipe Works
- Ready in 15 minutes — No cooking required, just mix and enjoy for the ultimate quick meal
- Perfect texture balance — Crunchy vegetables contrast beautifully with creamy, tender tuna
- Highly customizable — Easily adjust ingredients to match your taste preferences and dietary needs
- Meal prep friendly — Makes several servings and stays fresh for 3-5 days in the refrigerator
- Budget-friendly protein — Uses affordable canned tuna for a satisfying, nutritious meal
Ingredient Spotlight
Tuna Quality Matters: Choose solid white albacore tuna packed in water for the best flavor and texture. Water-packed tuna is lighter and less oily than oil-packed versions. Drain it thoroughly—excess liquid makes the salad watery.
Mayo is the Binder: Real mayonnaise (not Miracle Whip) provides creamy richness and helps bind everything together. The amount can be adjusted based on how creamy you like your tuna salad—start with less and add more as needed.
Pickle Relish Adds Tang: Sweet pickle relish provides tangy-sweet flavor that brightens the salad. Dill pickle relish or finely chopped dill pickles work for a more savory version.
Fresh Vegetables for Crunch: Celery and red onion add essential crunch and fresh flavor that elevate this from boring to delicious. Finely dice them so they distribute evenly throughout the salad.
Ingredients
For the Tuna Salad:
- 4 (5 oz) cans tuna packed in water, well drained
- ¾ to 1 cup mayonnaise (adjust to preference)
- ⅓ cup celery, finely diced (about 2 ribs)
- 3 tablespoons red onion, finely minced
- 2-3 tablespoons sweet pickle relish (or dill pickle relish)
- 1 tablespoon fresh lemon juice
- 1 teaspoon Dijon mustard
- 1 clove garlic, minced (optional)
- ½ teaspoon salt (or to taste)
- ¼ teaspoon black pepper
- 1-2 tablespoons fresh parsley or chives, chopped (optional)
Optional Add-Ins:
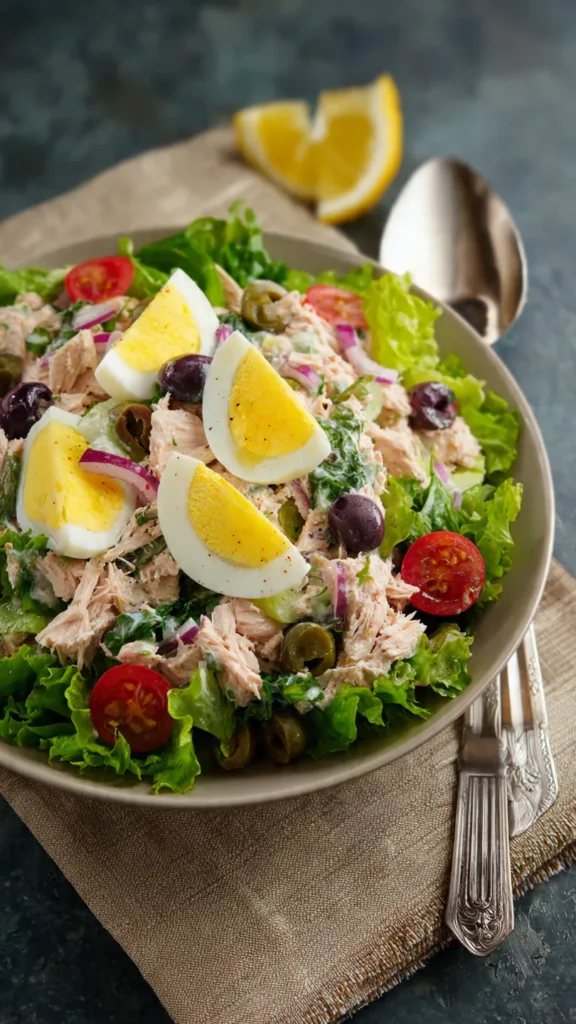
- 2 hard-boiled eggs, chopped (for extra protein and creaminess)
- ¼ cup sour cream or Greek yogurt (mixed with mayo for tang)
- ¼ teaspoon paprika or Old Bay seasoning
- 1 teaspoon capers, chopped
- ¼ cup grated Parmesan cheese
For Serving:
- Sliced bread (white, wheat, sourdough, or croissants)
- Lettuce leaves (butter lettuce, romaine, or iceberg)
- Sliced tomatoes
- Crackers or pita chips
- Tortilla wraps
Ingredient Notes:
- Quality matters most: Use solid white albacore tuna for best texture—chunk light tuna works but is softer
- Room temperature is key: Let ingredients come to room temperature for easier mixing
- Don’t skip: Draining tuna thoroughly is essential—press with lid or use paper towels to remove all liquid
Essential Equipment
You’ll Need:
- Medium mixing bowl — for combining all ingredients
- Fork — for flaking tuna and mixing
- Can opener — for opening tuna cans
- Cutting board and knife — for chopping vegetables
Nice to Have:
- Fine mesh strainer — for draining tuna completely
- Rubber spatula — for folding ingredients gently
- Airtight container — for storing leftovers
How to Make Classic Tuna Salad (Step-by-Step)
Step 1: Drain and Prep the Tuna
Open all four cans of tuna using a can opener. Hold each can over the sink with the lid tilted against the tuna, and press down firmly to squeeze out as much liquid as possible. Getting the tuna as dry as possible prevents watery salad. Transfer the drained tuna to a medium mixing bowl. Use a fork to gently break up any very large chunks, but don’t shred it completely—you want some texture.
Pro tip: For extra-dry tuna, place drained tuna between paper towels and press gently to absorb remaining moisture.
Step 2: Prepare the Vegetables
While the tuna drains, finely dice your celery into small pieces—about ¼-inch cubes. Mince the red onion very finely so it distributes evenly without overwhelming bites. If you’re sensitive to raw onion, rinse the minced onion under cold water and pat dry to mellow the flavor. Chop fresh herbs like parsley or chives if using. Have your pickle relish ready.
Common mistake: Cutting vegetables too large—they should be small enough to distribute evenly in every bite.
Step 3: Mix the Creamy Base
Add mayonnaise, Dijon mustard, and lemon juice to the bowl with the tuna. Start with ¾ cup mayonnaise—you can always add more if you prefer a creamier salad. The lemon juice adds brightness and prevents the salad from tasting too heavy. Stir gently with a fork to begin combining, breaking up the tuna to your desired consistency as you mix.
Test kitchen discovery: Adding acid (lemon juice) balances the richness and keeps the salad from tasting bland.
Step 4: Add Vegetables and Seasonings
Add the diced celery, minced red onion, pickle relish, minced garlic (if using), salt, pepper, and fresh herbs to the bowl. Fold everything together gently but thoroughly, making sure all ingredients are evenly distributed. The vegetables should be visible throughout the salad, adding pops of color and crunch to every bite.
Pro tip: Don’t overmix—you want distinct pieces of tuna and vegetables, not a mushy paste.
Step 5: Taste and Adjust
This is the most important step. Taste your tuna salad and adjust seasonings as needed. It might need more salt (tuna varies in saltiness), more lemon juice for brightness, extra mayo for creaminess, or more pickle relish for tang. The flavor should be balanced—creamy, tangy, slightly sweet, and savory all at once. If it seems dry, add a tablespoon more mayo. If it’s too mayo-heavy, add a squeeze more lemon juice.
Common mistake: Under-seasoning—tuna salad needs adequate salt and acid to taste its best.
Step 6: Chill or Serve
For best flavor, cover the bowl with plastic wrap and refrigerate for at least 30 minutes before serving. This allows the flavors to meld together beautifully. However, if you’re hungry, you can absolutely serve it immediately. The salad will keep covered in the refrigerator for up to 3-5 days, making it perfect for meal prep.
Pro tip: The salad actually tastes better after a few hours in the fridge as flavors develop and meld.
Expert Tips & Tricks
Temperature Matters: While tuna salad is served cold, mixing ingredients at room temperature creates smoother texture. Cold mayo doesn’t incorporate as easily.
Don’t Overdrain Your Relish: If using pickle relish, include a tiny splash of the pickle juice—it adds flavor and helps the salad come together.
The Secret to Restaurant Quality: Add a small amount of Dijon mustard and fresh lemon juice—these ingredients add depth and brightness that take it from good to great.
Common Mistake: Using too much mayo makes the salad heavy and masks other flavors. Start with less and add more gradually until you reach your preferred consistency.
Texture Control: For chunkier salad, use solid white tuna and flake it gently. For spreadable sandwich filling, use chunk light tuna and mix more vigorously.
Customization Ideas
Dietary Modifications:
- Lower Fat: Use light mayo or substitute half the mayo with plain Greek yogurt
- Dairy-Free: Already naturally dairy-free when using regular mayo
- Keto-Friendly: Already low-carb and keto-approved—serve with cucumber slices or celery sticks
- Higher Protein: Add 2 chopped hard-boiled eggs for extra protein and creaminess
- Paleo: Use avocado oil mayo and omit pickle relish or use finely chopped fresh pickles
Flavor Variations:
- Mediterranean Style: Add chopped Kalamata olives, capers, sun-dried tomatoes, and fresh dill
- Curry Tuna Salad: Mix in 1-2 teaspoons curry powder, raisins, and chopped apple
- Avocado Tuna Salad: Mash in half an avocado for creaminess and healthy fats
- Spicy Version: Add diced jalapeño, hot sauce, or a pinch of cayenne pepper
- Italian Style: Mix in Italian seasoned breadcrumbs, Parmesan cheese, and Italian herbs
Serving Styles:
- Classic Sandwich: Between two slices of toasted bread with lettuce and tomato
- Lettuce Wraps: Scoop into butter lettuce leaves for a low-carb option
- Tuna Melt: Spread on bread, top with cheese, and broil until melted and bubbly
- Crackers or Chips: Serve with your favorite crackers, pita chips, or vegetable chips
- Stuffed Tomatoes: Hollow out tomatoes and fill with tuna salad for an elegant presentation
- Tuna Salad Platter: Serve over mixed greens with vegetables for a complete salad
Storage & Meal Prep
Make Ahead:
- Full recipe: Make up to 3 days ahead and store covered in refrigerator—flavor improves as it sits
- Vegetables only: Chop celery and onion up to 2 days ahead and store separately
- Not recommended: Don’t add hard-boiled eggs if making more than 2 days ahead—they shorten shelf life
Storing:
- Counter: Should not sit at room temperature more than 2 hours due to mayonnaise
- Fridge: Store in airtight container for up to 3-5 days
- Freezer: Not recommended—mayonnaise and vegetables don’t freeze well
Reheating for Best Results:
Tuna salad is meant to be served cold—no reheating needed! Simply give it a quick stir before serving if it has been refrigerated.
Pro tip: If the salad seems dry after a day or two, stir in a tablespoon of mayo or a splash of lemon juice to refresh it.
What to Serve With Tuna Salad
Perfect Pairings:
- Potato Chips or Kettle Chips: Classic lunch pairing with satisfying crunch
- Fresh Fruit: Apple slices, grapes, or berries provide sweet contrast
- Soup: Tomato soup, vegetable soup, or chicken noodle make a complete meal
- Pickles: Dill pickle spears or bread-and-butter pickles complement the flavors
Complete the Meal:
- Side Salads: Coleslaw, pasta salad, or mixed green salad
- Vegetables: Carrot sticks, cucumber slices, cherry tomatoes, or bell pepper strips
- Beverages: Iced tea, lemonade, or sparkling water
- Dessert: Keep it light with cookies, fresh fruit, or yogurt parfait
Nutrition Facts (Per Serving – Based on 4 servings)
Calories: 380 | Protein: 28g | Carbs: 8g | Fat: 27g | Fiber: 1g | Sugar: 4g | Sodium: 680mg
Note: Calculated using full-fat mayo and standard ingredients. Using light mayo or Greek yogurt significantly reduces calories and fat. Nutrition varies based on tuna brand and exact ingredients used.
Your Questions Answered
Can I use tuna packed in oil instead of water?
Yes, but drain it very well as oil-packed tuna is richer and heavier. You may need less mayo since the tuna itself is already moist.
How long does tuna salad last in the fridge?
Properly stored in an airtight container, tuna salad stays fresh for 3-5 days. If you’ve added hard-boiled eggs, use within 3 days.
Can I make tuna salad without mayo?
Yes! Substitute Greek yogurt, mashed avocado, or a combination of olive oil and lemon juice. The texture will be different but still delicious.
Why is my tuna salad watery?
The tuna wasn’t drained thoroughly enough. Make sure to press out all liquid and even pat with paper towels if needed. Also check that your vegetables aren’t releasing water.
Can I use fresh tuna instead of canned?
Yes! Poach or grill fresh tuna, let it cool, then flake it. The flavor will be more delicate and the texture firmer than canned.
What’s the difference between chunk and solid tuna?
Solid tuna has larger, intact pieces while chunk tuna is broken into smaller flakes. Solid is better for chunky salads, chunk is easier to mix and spread.
How do I make tuna salad less fishy tasting?
Use quality white albacore tuna, drain it extremely well, and add plenty of lemon juice. The acid brightens the flavor and reduces any fishy taste.
Recipe History & Cultural Context
Tuna salad became an American staple in the early 20th century when canned tuna became widely available and affordable. During World War II, when meat was rationed, canned tuna became even more popular as a convenient, shelf-stable protein source that could be transformed into satisfying meals. The classic combination of tuna, mayo, and celery emerged as the standard recipe that most Americans recognize today.
The tuna salad sandwich has been a lunchbox and deli counter favorite for generations, representing practical American cooking at its best—simple, economical, and satisfying. It’s the kind of recipe that every home cook has their own version of, with family variations passed down through generations. Some families swear by pickle relish, others prefer chopped pickles; some add eggs, others keep it simple.
Today, tuna salad remains popular for its convenience, affordability, and versatility. It’s equally at home at casual lunches, fancy tea sandwiches, or quick weeknight dinners. The basic recipe has inspired countless variations—from Mediterranean versions with olives and feta to Asian-inspired renditions with sesame oil and ginger—proving that this humble salad continues to evolve while maintaining its place as an American comfort food classic.
Printable Recipe Card
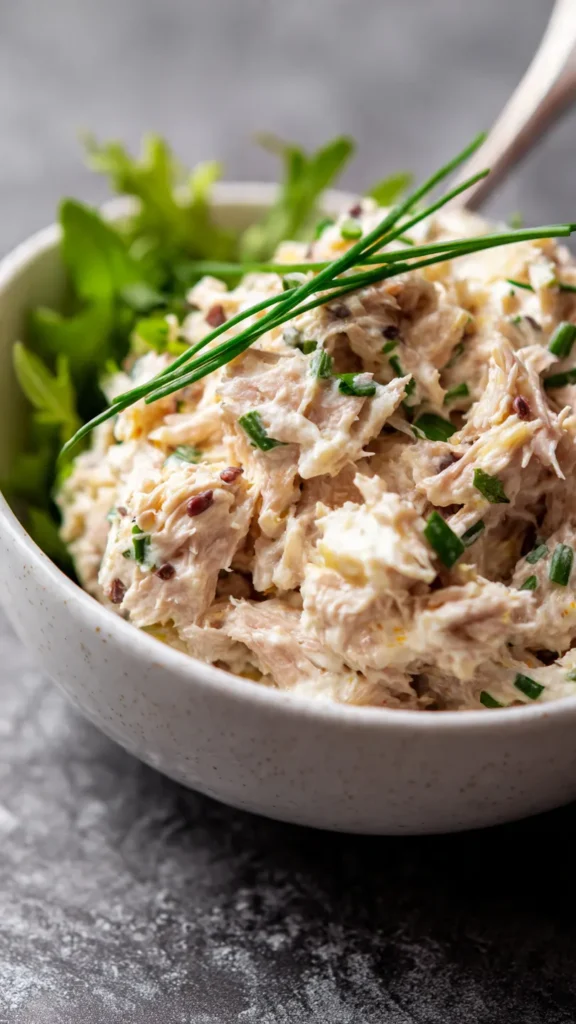
Classic Tuna Salad
Creamy tuna mixed with crunchy celery, onion, and tangy pickle relish—ready in 15 minutes!
Ingredients:
- 4 (5 oz) cans tuna in water, well drained
- ¾-1 cup mayonnaise
- ⅓ cup celery, finely diced
- 3 tbsp red onion, minced
- 2-3 tbsp sweet pickle relish
- 1 tbsp fresh lemon juice
- 1 tsp Dijon mustard
- 1 clove garlic, minced (optional)
- ½ tsp salt
- ¼ tsp black pepper
- 1-2 tbsp fresh parsley, chopped (optional)
Instructions:
- Drain tuna cans thoroughly, pressing lid against tuna to remove all liquid. Transfer to medium bowl.
- Finely dice celery and mince red onion. Chop herbs if using.
- Add mayonnaise, Dijon mustard, and lemon juice to tuna. Stir gently with fork, breaking up tuna to desired consistency.
- Add celery, onion, pickle relish, garlic (if using), salt, pepper, and herbs. Fold everything together until evenly combined.
- Taste and adjust seasonings—add more salt, lemon juice, or mayo as needed.
- Serve immediately or cover and refrigerate at least 30 minutes for best flavor.
Notes:
- Drain tuna very well—excess water makes salad watery
- Start with less mayo and add more to reach preferred consistency
- Tastes better after chilling 30+ minutes
- Stores in fridge 3-5 days in airtight container
- Serve on bread, crackers, lettuce wraps, or over salad greens
- Add 2 chopped hard-boiled eggs for extra protein