Cotton Candy Cake: A Fairground Fantasy in Every Slice
Step into a world where childhood memories dance with culinary artistry, where the magic of fairgrounds meets the elegance of fine baking. The Cotton Candy Cake isn’t merely a dessert—it’s an edible time machine that transports you back to those sun-drenched afternoons at the carnival, where the air sparkled with sugar crystals and laughter echoed through colorful tents. This extraordinary creation captures the essence of pure joy, transforming the fleeting pleasure of spun sugar into a magnificent layered masterpiece that delights both the eyes and the palate.
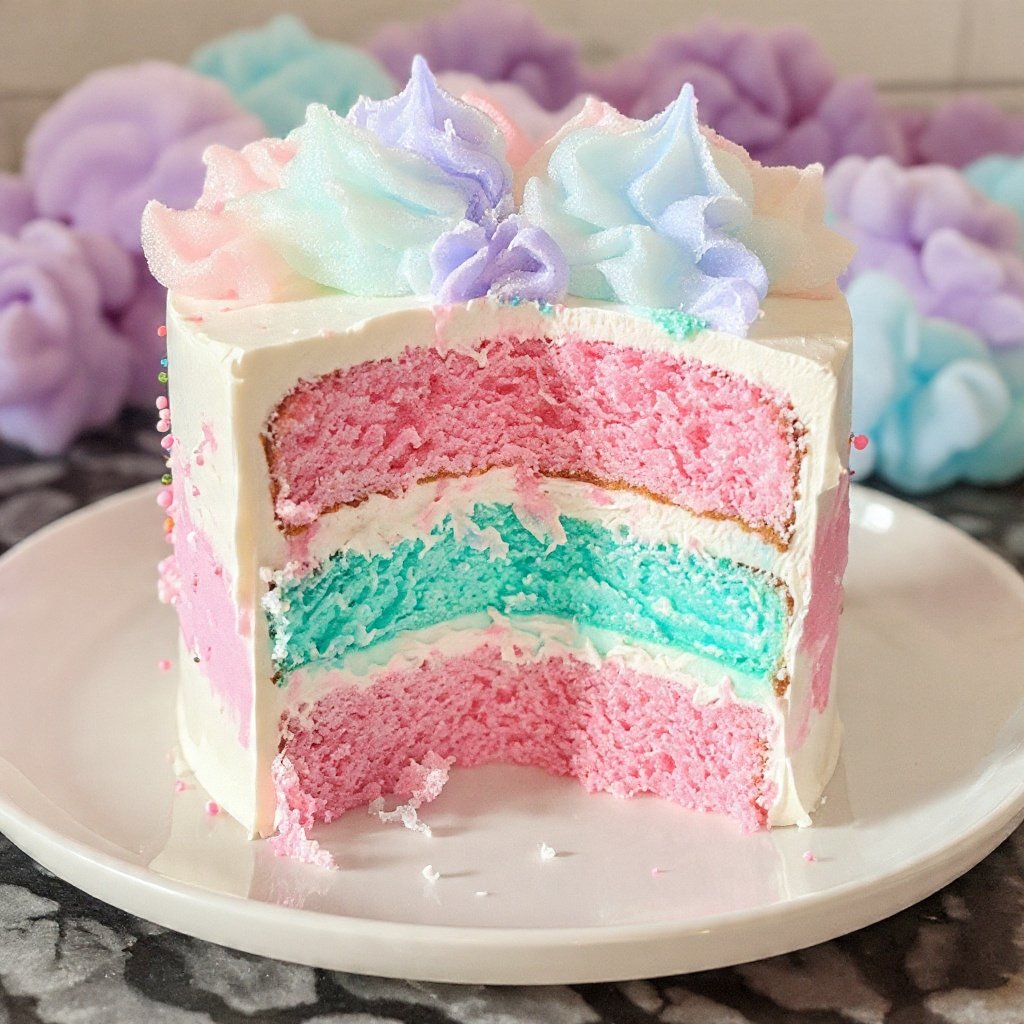
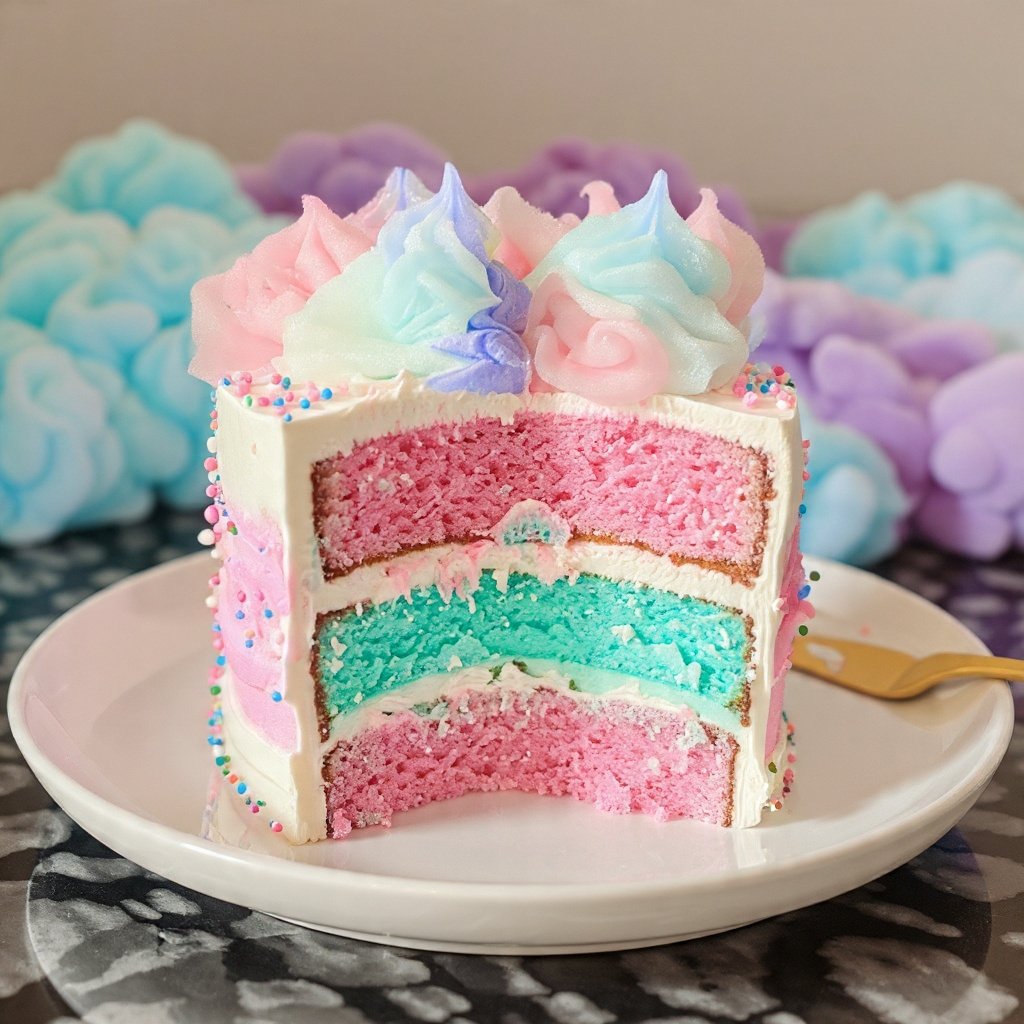
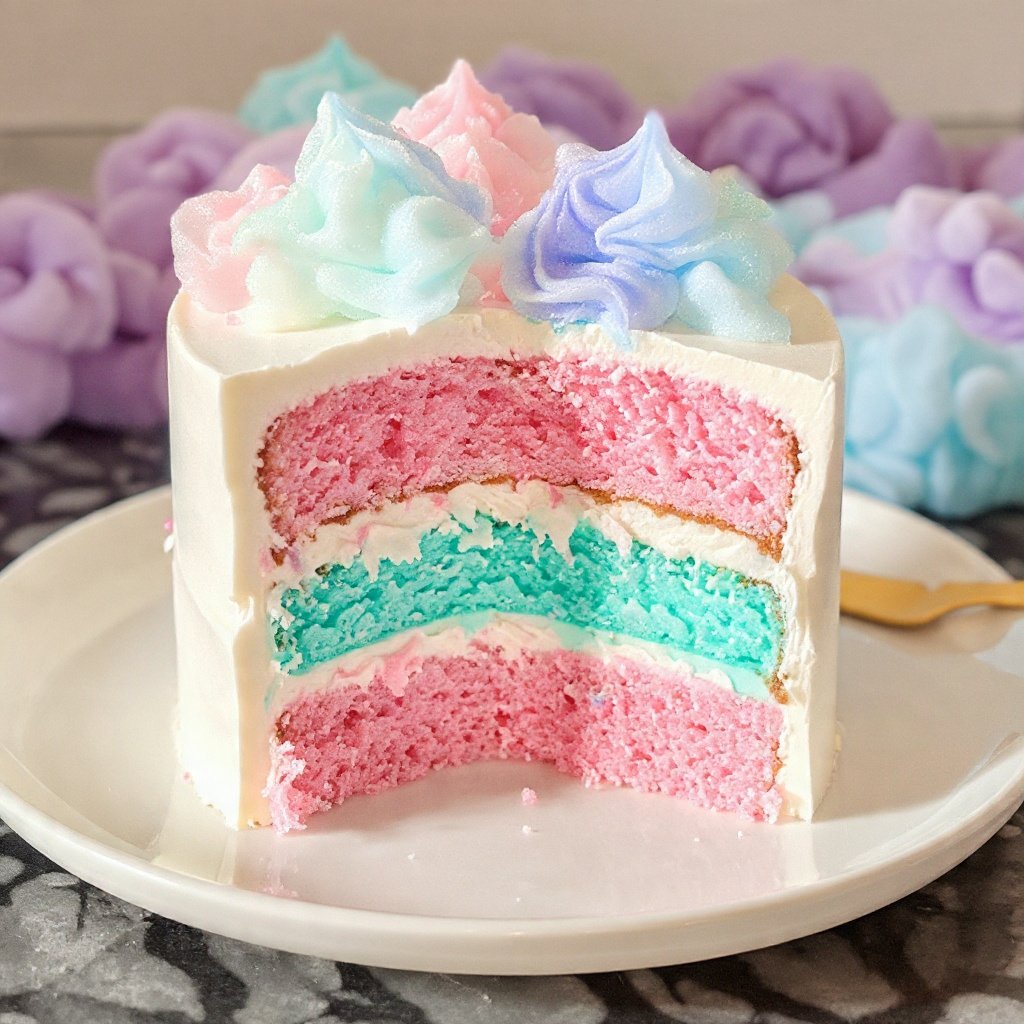
Imagine cutting into pastel-hued layers that reveal themselves like a sunset bleeding through clouds, each tier kissed with the unmistakable flavor of cotton candy. The ethereal buttercream that envelops this cake melts on your tongue like morning mist, carrying with it the sweet nostalgia of simpler times. This isn’t just baking—this is edible poetry, a celebration of color, flavor, and the beautiful memories we carry from childhood into our adult lives.
Whether you’re planning a whimsical birthday celebration, seeking to impress at a gathering, or simply wanting to bring a smile to someone’s face, this Cotton Candy Cake delivers wonder with every forkful. The soft pastel colors—fuchsia, sky blue, and violet—blend together in a watercolor dream, while the crowning glory of actual cotton candy adds theatrical flair that makes this cake truly unforgettable.
Ingredients for Your Edible Fairground
The Foundation: Cotton Candy Cake Layers
- 2 1/4 cups all-purpose flour, sifted to ensure cloud-like texture
- 2 1/4 teaspoons baking powder, the leavening magic that creates tender crumb
- 3/4 teaspoon salt, essential for balancing sweetness
- 3/4 cup unsalted butter, softened to room temperature for optimal creaming
- 1 1/2 cups granulated sugar, the sweet foundation of flavor
- 3 large eggs at room temperature, crucial for proper emulsification
- 1 1/2 teaspoons cotton candy flavoring extract, the carnival essence
- 1 cup whole milk at room temperature, for moisture and richness
- Fuchsia, sky blue, and violet gel food coloring, for pastel perfection
The Crowning Glory: Cotton Candy Swiss Meringue Buttercream
- 6 large egg whites, the protein base for silky frosting
- 1 1/2 cups granulated sugar, fine and pure
- 2 cups unsalted butter at room temperature, cut into tablespoon-sized pieces
- 1 teaspoon cotton candy flavoring extract, amplifying the theme
The Final Flourishes: Decoration Elements
- Additional fuchsia, sky blue, and violet gel food coloring
- Fresh cotton candy in complementary colors, added just before serving
- Sprinkles or edible glitter (optional), for extra sparkle
The Art of Creation: Step-by-Step Instructions
Preparing Your Canvas
Before diving into the mixing and measuring, proper preparation sets the stage for success. Preheat your oven to 350°F (175°C), allowing it to reach the perfect temperature while you prepare your batters. Grease three 6-inch round cake pans thoroughly with butter or non-stick spray, then line the bottoms with parchment paper circles. This dual protection ensures your precious cake layers release flawlessly after baking.
Bring all refrigerated ingredients to room temperature—this critical step allows for better emulsification and creates a more tender cake structure. Cold eggs won’t incorporate properly into butter, and cold milk can cause the batter to seize or curdle.
Crafting the Cake Layers
In a medium mixing bowl, whisk together the flour, baking powder, and salt until completely combined. This dry mixture forms the structural foundation of your cake, with the baking powder providing lift and the salt enhancing all the sweet flavors to come. Set this bowl aside while you work on the wet ingredients.
In the bowl of a stand mixer fitted with the paddle attachment (or using a hand mixer with a large bowl), cream together the softened butter and granulated sugar. Beat on medium-high speed for 4-5 minutes until the mixture becomes noticeably lighter in color and fluffy in texture. This creaming process incorporates air into the batter, contributing to the cake’s tender crumb.
Add the eggs one at a time, beating well after each addition. Wait until each egg is fully incorporated before adding the next—rushing this step can cause the batter to split or curdle. After all eggs are incorporated, mix in the cotton candy flavoring extract, ensuring it’s evenly distributed throughout the batter.
Now comes the delicate dance of alternating wet and dry ingredients. With the mixer on low speed, add about one-third of the flour mixture, mixing just until the streaks of flour disappear. Pour in half the milk, mixing briefly, then repeat with another third of flour, the remaining milk, and finally the last portion of flour. Always begin and end with the dry ingredients, and avoid overmixing—stop as soon as the last traces of flour disappear. Overmixing develops gluten and results in a tough, dense cake.
Creating the Pastel Rainbow
Divide the completed batter evenly among three separate bowls. Using a kitchen scale ensures perfect accuracy, but eyeballing works if you’re careful. To one bowl, add several drops of fuchsia gel coloring, folding gently with a spatula until the color is evenly distributed and you achieve your desired shade. Repeat with sky blue coloring in the second bowl and violet in the third.
Gel food coloring works best for achieving vibrant pastel shades without adding excess liquid to your batter. Start with just a few drops and add more gradually—you can always deepen the color, but you can’t lighten it without adding more batter.
Pour each colored batter into its prepared pan, using a spatula to spread evenly and tap the pans gently on the counter to release any air bubbles. Slide the pans into your preheated oven and bake for 30-35 minutes, rotating the pans halfway through for even baking.
The cakes are done when a toothpick inserted into the center comes out clean or with just a few moist crumbs attached, and the edges begin to pull away slightly from the pan sides. Allow the cakes to cool in their pans for 10 minutes before turning them out onto wire racks to cool completely. Patience is essential here—frosting warm cake leads to melted, sliding buttercream disaster.
Whipping Up Buttercream Dreams
Swiss meringue buttercream might sound intimidating, but it’s actually quite forgiving and produces the silkiest, most luxurious frosting imaginable. Begin by creating a double boiler: bring about 2 inches of water to a simmer in a medium saucepan. In the heatproof bowl of your stand mixer, combine the egg whites and sugar.
Place this bowl over the simmering water, ensuring the bottom doesn’t touch the water itself. Whisk constantly for 3-5 minutes until the sugar completely dissolves and the mixture reaches 160°F on an instant-read thermometer. You can test by rubbing a bit between your fingers—it should feel completely smooth with no grittiness from undissolved sugar.
Transfer the bowl to your stand mixer fitted with the whisk attachment. Beat on high speed for 8-10 minutes until the meringue forms stiff, glossy peaks and the bowl feels cool to the touch. This cooling is crucial—adding butter to warm meringue will melt it into a soupy mess.
Once cooled, reduce the mixer speed to medium-low and begin adding the butter one tablespoon at a time, allowing each piece to fully incorporate before adding the next. The mixture may look curdled at some point—don’t panic! Keep mixing and it will come together into smooth, creamy perfection. Finally, add the cotton candy flavoring and beat for another minute.
Assembly and Decoration Magic
Using a long serrated knife or cake leveler, trim the domed tops from each cooled cake layer to create flat, even surfaces. Place your fuchsia layer on a cake board or serving plate, spreading about 1/2 cup of buttercream evenly across the top. Add the sky blue layer, another layer of buttercream, then crown with the violet layer.
Apply a thin crumb coat of buttercream over the entire cake, sealing in any loose crumbs. Refrigerate for 20-30 minutes until this coating firms up.
Divide the remaining buttercream into three bowls, tinting each with your pastel colors. Using an offset spatula, apply patches of each colored buttercream randomly around the sides and top of the cake. Then, using a bench scraper or offset spatula, smooth the frosting while rotating the cake on a turntable, blending the colors together to create a dreamy watercolor effect.
Just before serving—and this timing is crucial—top the cake with generous tufts of fresh cotton candy. The spun sugar will dissolve when exposed to moisture or humidity, so add this final flourish at the last possible moment for maximum visual impact.
Expert Tips for Cotton Candy Cake Perfection
Room temperature ingredients aren’t just a suggestion—they’re essential for proper emulsification and a tender crumb. Plan ahead and remove eggs, butter, and milk from the refrigerator at least an hour before baking.
When coloring your batter, fold gently to avoid deflating the air you’ve incorporated. Use a light hand and stop as soon as the color is evenly distributed.
For more vibrant colors, don’t be shy with the gel coloring. Pastel shades are beautiful, but deeper tones photograph better and create more dramatic visual contrast.
Store the finished cake covered at room temperature for up to two days, or refrigerate for up to five days. Bring to room temperature before serving for the best flavor and texture. Add cotton candy only immediately before serving to maintain its structure.
If making ahead, bake and freeze the unfrosted cake layers wrapped tightly in plastic wrap and foil for up to one month. Thaw overnight in the refrigerator before assembling.
This Cotton Candy Cake transforms any occasion into a celebration of joy, nostalgia, and pure whimsy. Each slice reveals rainbow layers that taste as magical as they look, delivering the carnival straight to your table.