Crustless Coconut Pie (Impossible Magic in 45 Minutes!)
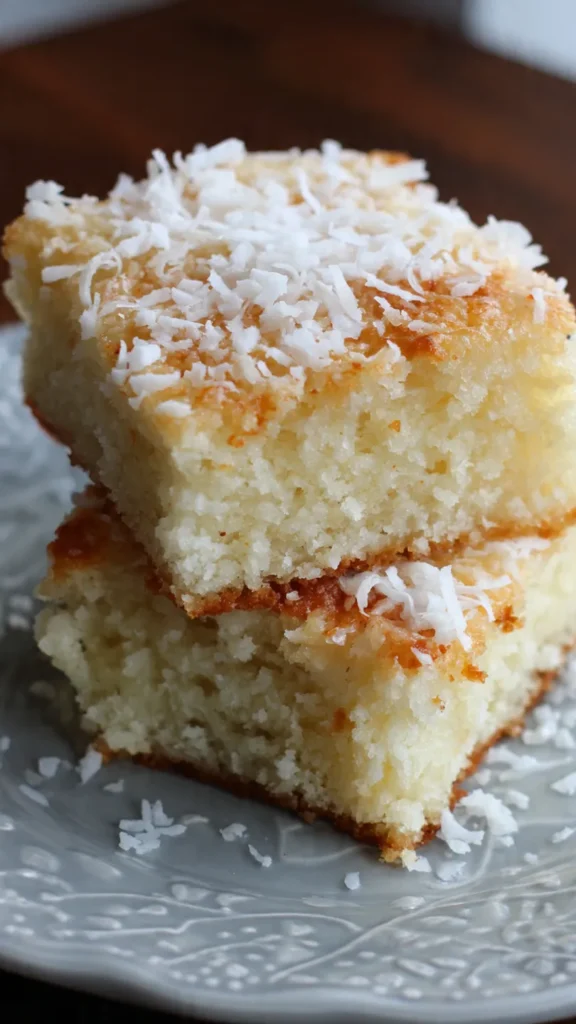
Imagine pouring a simple mixture of eggs, milk, coconut, and butter into a pie dish, then watching pure magic happen in your oven as it transforms into three distinct layers—a golden bottom crust, silky custard center, and crispy coconut topping—all without rolling a single piece of dough. This isn’t just any pie; it’s the legendary “Impossible Pie,” so named because it seems impossible that one simple batter creates such perfect layers.
I discovered this recipe when I needed dessert fast but wanted something that felt special and homemade. What makes this pie truly magical is the self-layering phenomenon—as it bakes, the flour naturally sinks to form a delicate crust on the bottom, eggs and milk create a creamy custard filling in the middle, and coconut rises to create a beautifully toasted, crispy top. The result is a sophisticated dessert that tastes like hours of work but requires only minutes of effort.
Whether you’re impressing last-minute guests, satisfying coconut cravings, or discovering the joy of effortless baking, expect bakery-quality results that’ll have everyone asking how you created such perfect layers.
Table of Contents
Recipe Quick Reference Module
Time Breakdown: Prep: 10 min | Active: 45-55 min | Total: 1 hour (plus cooling time)
Output: 8 servings | Skill Level: Beginner
At-a-Glance Details:
- Origin cuisine: American Southern
- Meal category: Dessert
- Dietary tags: Vegetarian, Can be made gluten-free
- Ideal occasion: Easy weeknight desserts, potlucks, family gatherings, last-minute entertaining
Value Proposition Points
- Self-Layering Magic — Creates three distinct layers from one simple batter with no special technique required
- Lightning Speed — Mix everything in one bowl in 10 minutes, then let the oven do all the work
- No-Fail Formula — Perfect for beginners with foolproof results every single time
- Minimal Cleanup — One bowl, one pie dish, and you’re done—no pastry equipment or rolling pin needed
- Customize-Friendly — Easily adapt with chocolate, vanilla, or tropical variations while maintaining magic structure
Featured Ingredient Analysis
Shredded Coconut (Sweetened or Unsweetened)
The star ingredient that defines this pie’s flavor and creates the signature golden, crispy top layer. As the pie bakes, coconut naturally rises to the surface where it toasts beautifully, creating textural contrast against the creamy custard below. Sweetened coconut adds extra tropical sweetness and caramelizes more during baking, while unsweetened coconut provides pure coconut flavor for those preferring less sugar. The coconut flakes also contribute fat and texture throughout the custard layer, creating pockets of chewiness. Quality matters—look for moist, fresh-smelling coconut rather than dry, stale flakes that won’t toast properly.
Eggs (The Structure Builders)
The crucial ingredient that creates the custard layer and helps form the distinct stratification as the pie bakes. Eggs provide protein structure that sets during baking, transforming liquid batter into silky, sliceable custard. The number of eggs (typically 3-4) determines custard richness—more eggs create firmer texture, fewer create softer custard. Room temperature eggs blend more smoothly into batter and bake more evenly than cold eggs straight from refrigerator. The eggs also act as emulsifiers, helping fat (butter) and liquid (milk) blend smoothly without separation.
Self-Rising Flour or All-Purpose Flour with Baking Powder
The magic ingredient that creates the bottom “crust” layer by sinking during baking while providing structure throughout. Self-rising flour already contains baking powder and salt, simplifying the recipe. If using all-purpose flour, adding baking powder creates lift that helps separate layers during baking. The small amount of flour (typically ½ cup) is just enough to form a delicate base without making the pie dense or heavy. As heat activates the baking powder, tiny air bubbles help create the characteristic layered texture that makes this pie “impossible.”
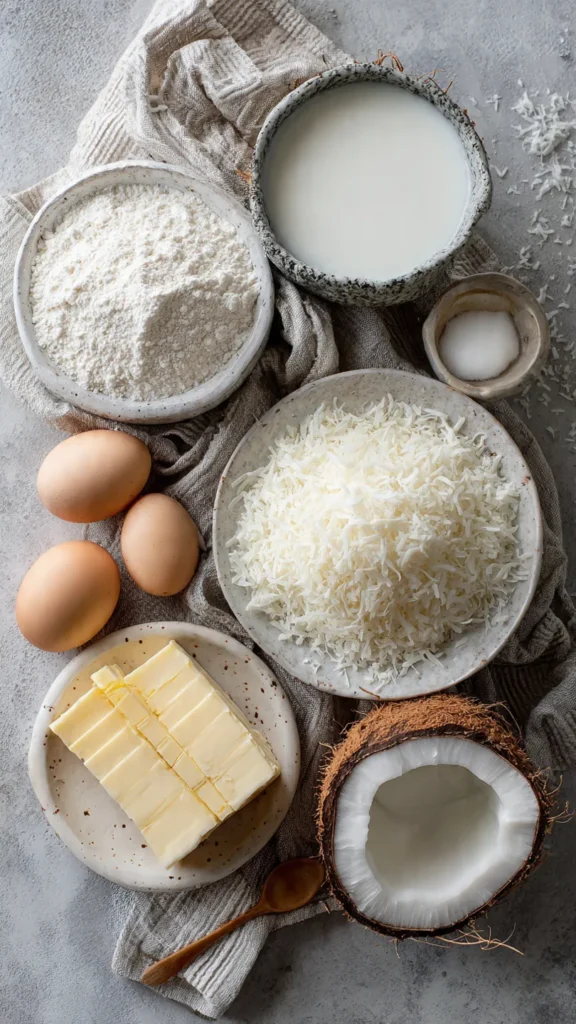
Component-Based Ingredient Lists
Primary Component [Magic Batter]:
- 4 large eggs, room temperature
- 2 cups whole milk (or half-and-half for richer custard)
- 1 cup granulated sugar
- ½ cup all-purpose flour (or self-rising flour, omitting baking powder and salt)
- ½ teaspoon baking powder (omit if using self-rising flour)
- ¼ teaspoon salt (omit if using self-rising flour)
- ½ cup (1 stick) unsalted butter, melted and slightly cooled
- 1-2 teaspoons vanilla extract
- 1⅓ to 2 cups sweetened shredded coconut (more coconut creates thicker top layer)
Optional Flavor Enhancements:
- ¼ teaspoon ground nutmeg (adds warm spice)
- 1 teaspoon coconut extract (intensifies coconut flavor)
- Zest of 1 lime (adds tropical brightness)
Serving Toppings:
- Whipped cream or whipped topping
- Fresh berries (strawberries, raspberries)
- Toasted coconut flakes
- Chocolate drizzle
- Vanilla ice cream
Ingredient Intelligence:
- Premium quality crucial for: Coconut (fresh, moist flakes toast better), eggs (fresher eggs create better custard), vanilla extract (pure vanilla versus imitation)
- Temperature requirements: Eggs and milk should be room temperature for smooth blending; melted butter should cool slightly to avoid scrambling eggs
- Non-negotiable elements: Proper greasing of pie dish prevents sticking; don’t skip this step
Tool & Equipment Section
Required Items:
- 9-inch deep-dish pie plate (glass or ceramic works best)
- Large mixing bowl or blender
- Whisk or electric mixer (or blender for ultra-smooth batter)
- Measuring cups and spoons
- Rubber spatula
Bonus Tools:
- Blender — Creates silky-smooth batter in seconds with no lumps
- Wire cooling rack — Allows air circulation for even cooling
- Pie shield or aluminum foil — Prevents over-browning if top darkens too quickly
Preparation Method (Detailed Steps)
Step 1: Prepare Your Pie Dish and Preheat
Preheat oven to 350°F (175°C). Generously grease a 9-inch deep-dish pie plate with butter or cooking spray, making sure to coat bottom, sides, and rim thoroughly—this prevents custard from sticking. Some bakers also dust the greased pan lightly with flour for extra insurance. Set prepared pie dish aside while you mix the batter.
Step 2: Blend the Magic Batter
In a blender, combine eggs, milk, sugar, flour, baking powder (if using), salt (if using), melted butter, and vanilla extract. Blend on medium speed or the “mix” setting for 2-3 minutes until completely smooth and well combined—there should be no flour lumps visible. Pro tip: Blending creates the smoothest custard texture, but whisking by hand in a bowl works too; just whisk vigorously for 2-3 minutes. The batter should be thin and pourable, similar to pancake batter consistency.
Step 3: Add Coconut and Pour into Dish
Stop the blender and add the shredded coconut. Pulse or blend for just 5-10 seconds to incorporate—you want coconut distributed throughout but not pulverized. Pour the batter carefully into your prepared pie dish. The dish should be about ¾ full. If desired, sprinkle a light dusting of nutmeg over the top for visual appeal and subtle spice flavor. Success marker: Batter should look very liquid and coconut will float throughout—this is correct.
Step 4: Bake and Watch the Magic Happen
Place pie dish carefully in preheated oven and bake for 45-55 minutes. As it bakes, you’ll notice the transformation: the batter will puff up significantly, the top will turn golden brown with crispy coconut pieces, and the edges will set first while center remains slightly jiggly. Timing alert: Baking time varies based on oven and dish depth; check at 45 minutes. The pie is done when a knife inserted near the center (not dead center) comes out mostly clean with just a few moist crumbs, and the top is golden brown. The center should still have a slight jiggle—it will continue setting as it cools.
Step 5: Cool Completely for Perfect Slicing
Remove pie from oven and place on a wire rack. The pie will be dramatically puffed and may even dome above the rim—this is normal. As it cools, it will deflate and sink back down, settling into distinct layers. Let cool at room temperature for at least 1 hour, then refrigerate for 2-4 hours until completely chilled and set. Critical patience point: Warm pie is too soft to slice cleanly; cold pie cuts beautifully into neat wedges. Once chilled, cut into wedges and serve with whipped cream or ice cream if desired.
Professional Guidance Section
Temperature Control: Room temperature eggs and milk blend more smoothly and bake more evenly than cold ingredients. Let eggs sit at room temperature 30 minutes before using, or place in bowl of warm water for 5 minutes to take off the chill.
Greasing Discipline: Thorough greasing is absolutely critical—custard sticks tenaciously to ungreased surfaces. Use butter or cooking spray generously, covering every surface including the rim where batter may spill over.
Cooling Patience Secret: The pie MUST cool completely before slicing or it will be soupy and fall apart. The custard continues setting as temperature drops, so rushing this step ruins presentation even though the pie is technically cooked through.
Avoid This Error: Don’t overbake trying to eliminate all jiggle in the center—overbaked custard becomes rubbery and develops an unpleasant texture. A slight wobble in the very center is perfect; carryover heat will finish setting it during cooling.
Testing Insight: During recipe development, bakers discovered that using a blender creates noticeably smoother custard than hand mixing, and the high-speed blending helps separate layers more distinctly.
Adaptation & Variation Guide
Dietary Adjustments
Gluten-Free Version: Replace all-purpose flour with gluten-free all-purpose flour blend or use Bisquick gluten-free baking mix. Add ½ teaspoon xanthan gum if your blend doesn’t include it. All other ingredients remain identical.
Lower-Sugar Option: Reduce sugar to ½ cup and use unsweetened coconut for less sweetness while maintaining structure. You can also substitute half the sugar with erythritol or monk fruit sweetener, though texture may differ slightly.
Dairy-Free Alternative: Use full-fat coconut milk in place of regular milk for ultra-coconutty flavor, and substitute vegan butter for regular butter. Results in intensely tropical flavor with similar texture.
Flavor Transformations
Chocolate Coconut Pie: Add 3 tablespoons cocoa powder to the batter and fold in ½ cup mini chocolate chips along with coconut. Creates a chocolate-coconut combination similar to Mounds candy bars.
Tropical Pineapple Coconut: Drain one 8-oz can crushed pineapple thoroughly and fold into batter with coconut. Add 1 teaspoon coconut extract. Creates piña colada-inspired flavor profile.
Almond Joy Style: Add 1 teaspoon almond extract to batter and sprinkle ½ cup chopped almonds over top before baking. Drizzle baked, cooled pie with melted chocolate for candy bar tribute.
Presentation Approaches
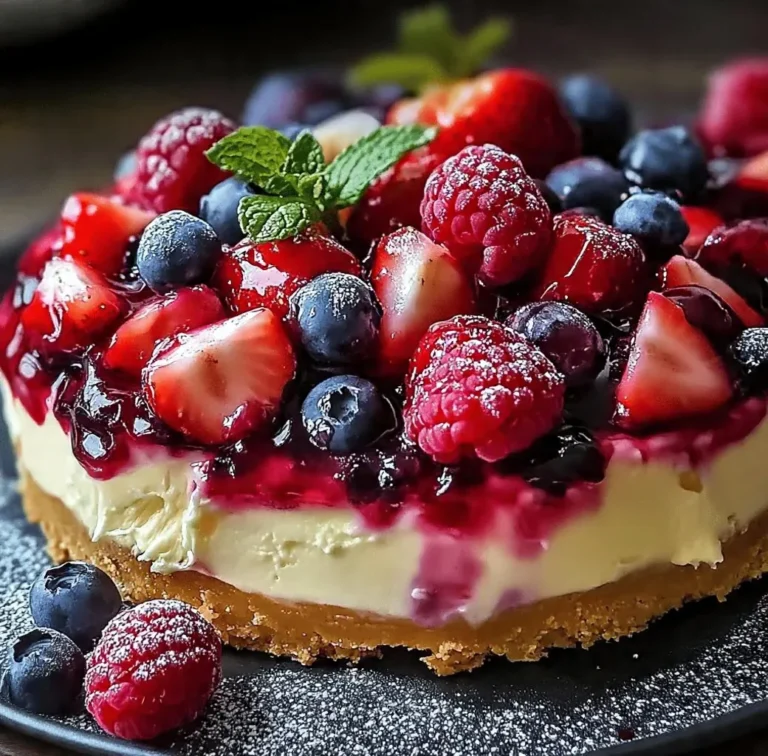
Classic Method: Serve chilled wedges on dessert plates with dollop of whipped cream and fresh berries for elegant simplicity.
Tropical Style: Top with toasted coconut flakes, fresh pineapple chunks, and maraschino cherries for retro tiki-inspired presentation.
Decadent Upgrade: Drizzle slices with caramel sauce or chocolate ganache, top with vanilla ice cream, and sprinkle with additional toasted coconut for restaurant-quality plated dessert.
Preservation & Advance Prep
Prepare-Ahead Strategy:
- Mix batter up to 2 hours ahead and refrigerate; stir well before pouring into pie dish and baking
- Bake pie completely up to 2 days ahead; store covered in refrigerator and serve chilled
- Not recommended to freeze unbaked batter—texture suffers significantly
Storage Guidelines:
Room Temperature: Do not leave at room temperature longer than 2 hours due to egg and dairy content. Serve chilled or at cool room temperature for best texture and food safety.
Refrigerated: Store covered with plastic wrap or aluminum foil up to 4 days in refrigerator. The custard may weep slightly over time but remains delicious. Cover tightly to prevent absorbing refrigerator odors.
Frozen: Freeze individual wrapped slices up to 1 month in airtight freezer bags. Thaw overnight in refrigerator before serving. Texture becomes slightly grainier but flavor remains excellent. The coconut topping may lose some crispness after freezing.
Optimal Reheating:
This pie is traditionally served chilled or at room temperature. If you prefer it warm, microwave individual slices for 15-20 seconds just to take off the chill—don’t overheat or custard will break and become watery.
Complementary Serving Suggestions
Ideal Pairings:
- Freshly whipped cream — Light, airy topping that doesn’t compete with delicate coconut-custard flavor
- Vanilla ice cream — Cold, creamy contrast enhances warm coconut notes while adding indulgence
- Hot coffee or tea — Classic pie accompaniment that cuts sweetness and provides satisfying contrast
Menu Building:
- Summer BBQ Dessert: Serve Crustless Coconut Pie after grilled meats, potato salad, and corn on the cob for refreshing, make-ahead finale
- Mother’s Day Brunch: Pair with quiche, fresh fruit salad, mimosas, and coffee for elegant spring celebration
- Potluck Favorite: Bring to gatherings with tropical theme—pairs beautifully with Caribbean jerk chicken, rice and beans, and tropical fruit salad
Nutritional Information (Single Serving)
Calories: 315 | Protein: 7g | Carbohydrates: 38g | Fat: 15g | Fiber: 2g | Sugar: 28g | Sodium: 210mg
Disclaimer: Calculated via USDA FoodData Central nutritional database based on 8 servings. Values approximate depending on specific ingredient brands and whether sweetened or unsweetened coconut is used. Complete nutrition methodology available upon request.
Reader FAQ Module
Q: Why is it called “Impossible Pie”?
A: Because it seems impossible that one simple batter creates three distinct layers—a bottom crust, custard center, and crispy coconut top—all by itself during baking. The magic happens as flour sinks, custard sets in the middle, and coconut rises and toasts on top.
Q: My pie didn’t form layers—what went wrong?
A: Most likely causes: overmixing after adding coconut (breaks down structure), oven temperature too low (layers need proper heat to separate), or using wrong size pan that’s too shallow. Solution: Use deep-dish 9-inch pie plate, blend minimally after adding coconut, and verify oven temperature with thermometer.
Q: Can I use coconut milk instead of regular milk?
A: Absolutely! Full-fat coconut milk creates intensely coconutty flavor and works beautifully. The custard will be slightly denser and richer. Light coconut milk also works but creates less rich custard.
Q: The center is still jiggly after baking time—is it done?
A: Yes! A slight jiggle in the very center is perfect—the custard continues setting as it cools. Only the very center (about 2-inch diameter) should jiggle; if the entire pie wobbles, bake 5 more minutes and check again.
Q: Can I double this recipe?
A: Not recommended in one pie dish—the batter is too deep and won’t bake evenly or form proper layers. Instead, make two separate pies using two pie dishes and doubling all ingredients proportionally. Both pies can bake simultaneously on different oven racks.
Q: How do I get clean slices?
A: The pie must be completely chilled (minimum 2 hours refrigerated) before slicing. Use a sharp knife dipped in hot water and wiped dry between each cut. The custard is delicate, so slice gently with sawing motion rather than pressing down.
Background & Heritage Context
Crustless Coconut Pie, commonly known as “Impossible Pie,” emerged during the 1970s as part of the “impossible pie” trend that swept American home kitchens. The concept originated from Bisquick marketing campaigns that promoted self-layering pies requiring no separate crust preparation—revolutionary for busy home cooks seeking impressive desserts without pastry-making skills. The term “impossible” referred to the seemingly magical way a single pourable batter separated into distinct layers during baking, defying logical expectations.
The science behind this magic involves density and heat. As the pie bakes, heavier flour particles naturally sink to the bottom, forming a delicate crust-like layer. The egg-milk mixture in the middle sets into custard through protein coagulation. Meanwhile, lighter coconut flakes float to the surface where direct oven heat toasts them golden brown, creating a crispy top “crust.” This natural stratification requires no special technique—just proper ingredient ratios and baking temperature.
The recipe gained particular popularity in Southern states where coconut custard pie was already beloved, and this crustless version offered the same flavor profile with dramatically reduced effort. Church potlucks, ladies’ auxiliary gatherings, and family reunions helped spread the recipe through handwritten recipe cards and word-of-mouth recommendations. By the 1980s-1990s, Impossible Coconut Pie had achieved classic status in American home baking.
What makes this pie enduringly popular is its forgiving nature—even novice bakers achieve success because the pie essentially makes itself. It represents American ingenuity in simplifying traditional recipes without sacrificing deliciousness, proving that sometimes the best innovations involve removing complexity rather than adding it. Today, the recipe continues appearing in community cookbooks, food blogs, and family recipe collections as a testament to practical magic in everyday baking.
Print-Optimized Recipe Summary
Crustless Coconut Pie (Impossible Pie)
Self-layering magic pie with custard center and golden coconut top
Ingredients: 4 eggs – 2 cups milk – 1 cup sugar – ½ cup all-purpose flour – ½ tsp baking powder – ¼ tsp salt – ½ cup melted butter (cooled) – 2 tsp vanilla – 1⅓-2 cups sweetened shredded coconut
Method:
- Preheat oven to 350°F; generously grease 9-inch deep-dish pie plate
- In blender, combine eggs, milk, sugar, flour, baking powder, salt, melted butter, and vanilla; blend 2-3 minutes until smooth
- Add coconut and pulse just 5-10 seconds to incorporate
- Pour batter into prepared pie dish
- Bake 45-55 minutes until golden brown on top and knife inserted near center comes out mostly clean
- Cool on wire rack 1 hour, then refrigerate 2-4 hours until completely set before slicing
- Serve chilled with whipped cream
Essential Notes: Grease pie dish thoroughly to prevent sticking – Room temperature eggs and milk blend smoother – Don’t overbake—slight jiggle in center is perfect – Must cool completely before slicing for clean cuts – Pie forms three layers automatically during baking – Store covered up to 4 days refrigerated – Can use self-rising flour (omit baking powder and salt) – Blender creates smoothest texture