Decadent Peppermint Bark Cheesecake: A No-Bake Holiday Masterpiece

When the holiday season arrives, there’s an undeniable magic in the air that calls for desserts as spectacular as the celebrations themselves. If you’re searching for the ultimate festive showstopper that combines elegance, flavor, and simplicity, this Peppermint Bark Cheesecake is your answer. This stunning no-bake creation brings together the richness of velvety chocolate, the smooth luxuriousness of cheesecake, and the bright, refreshing burst of peppermint in every single bite. It’s not just a dessert—it’s an experience that transforms any winter gathering into an unforgettable celebration.
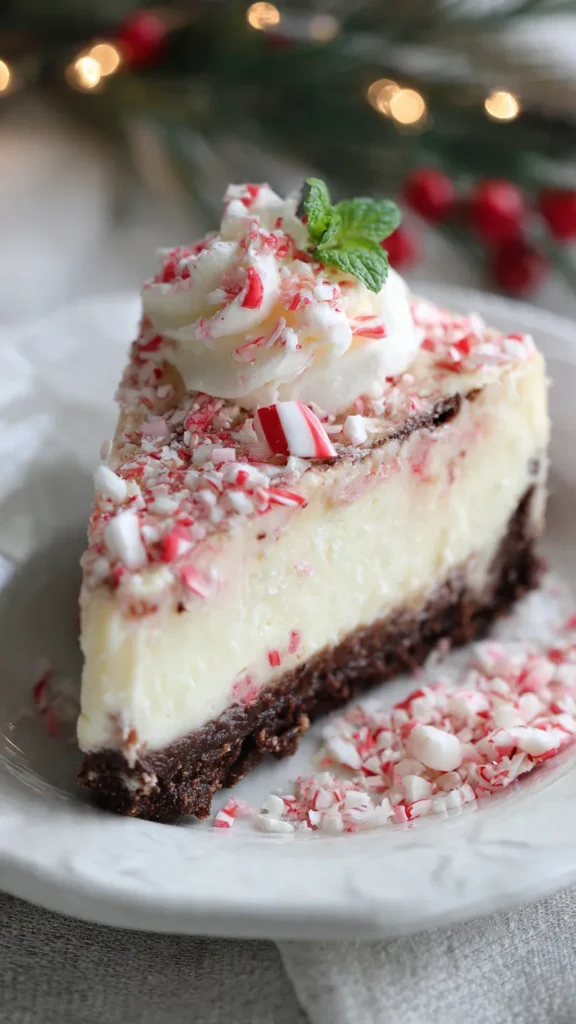
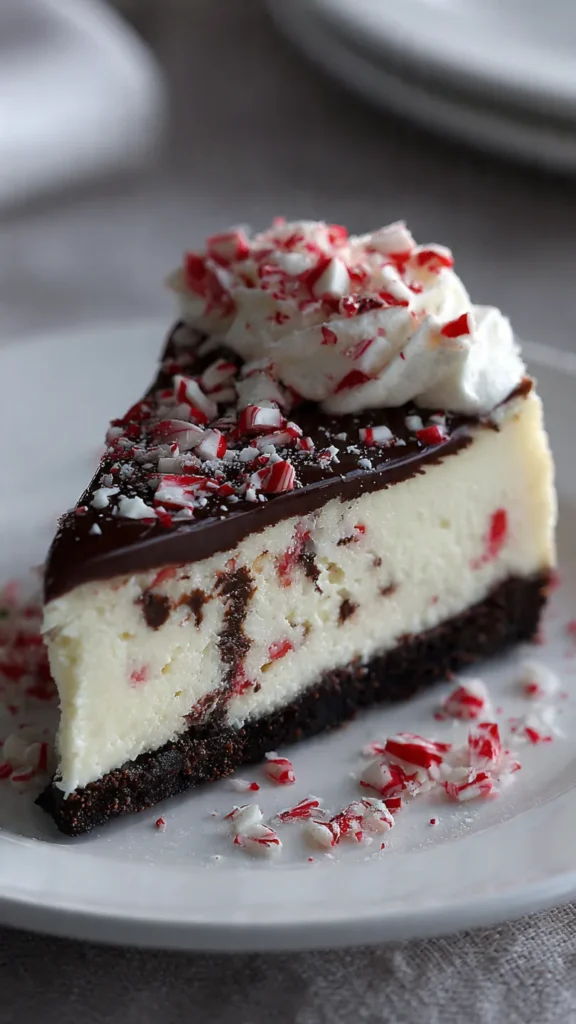
What makes this cheesecake truly special is its perfect balance of textures and flavors. The foundation starts with a crisp chocolate cookie crust that provides the ideal contrast to the creamy layers above. Next comes a decadent chocolate cheesecake layer that’s rich without being overwhelming, followed by a cloud-like peppermint filling that feels as light as freshly fallen snow. The entire creation is crowned with a glossy chocolate ganache and festive crushed candy canes that make each slice look like it came straight from a professional pastry shop.
The beauty of this recipe extends beyond its impressive appearance and delicious taste. Unlike traditional baked cheesecakes that require precise oven temperatures and water baths, this no-bake version eliminates the stress and potential pitfalls of baking. There’s no risk of cracks, no worrying about whether it’s perfectly cooked, and no anxious waiting by the oven. Instead, you simply layer the components, let the refrigerator work its magic, and emerge with a flawless dessert that looks and tastes absolutely professional.
For busy holiday hosts, the make-ahead nature of this cheesecake is truly a gift. You can prepare it a day or even two before your event, freeing up valuable time for other preparations or simply allowing you to enjoy the season without last-minute kitchen stress. The longer it chills, the better the flavors meld together, creating an even more harmonious and delicious result. This means you can focus on your guests, your decorations, and enjoying the festivities rather than being tied to the kitchen.
Table of Contents
Ingredients You’ll Need
For the Chocolate Cookie Crust:
- 2 cups chocolate sandwich cookie crumbs
- 5 tablespoons unsalted butter, melted
For the Chocolate Cheesecake Layer:
- 4 oz cream cheese, softened to room temperature
- 1/4 cup granulated sugar
- 1/2 cup semi-sweet chocolate chips, melted until smooth
- 1/2 cup heavy cream
For the Peppermint Cheesecake Layer:
- 16 oz cream cheese, softened to room temperature
- 1/2 cup granulated sugar
- 1/2 cup sour cream
- 1/2 teaspoon peppermint extract
- 1 teaspoon vanilla extract
- 1 1/2 cups whipped topping or freshly whipped cream
- 3/4 cup crushed peppermint candies
For the Chocolate Ganache:
- 3/4 cup semi-sweet chocolate chips
- 1/2 cup heavy cream
For Garnish:
- Whipped cream
- Crushed peppermint candies
Step-by-Step Instructions
Creating the Perfect Crust:
Begin your cheesecake journey by preparing the chocolate cookie crust, which serves as the sturdy and flavorful foundation for all the delicious layers to come. In a medium mixing bowl, combine the chocolate sandwich cookie crumbs with the melted unsalted butter. Using a fork or your hands, mix thoroughly until every crumb is evenly coated with butter and the mixture resembles wet sand. This moisture is crucial—it’s what allows the crumbs to bind together and form a cohesive crust that won’t crumble when you slice the finished cheesecake.
Transfer the buttery cookie mixture to a 9-inch springform pan. Using the bottom of a measuring cup or your fingers, press the crumbs firmly and evenly across the bottom of the pan, creating a compact, uniform layer. Pay special attention to the edges where the crust meets the sides of the pan, ensuring there are no gaps or thin spots. Once your crust is perfectly formed, place the entire pan in the freezer. This chilling step is essential as it allows the butter to solidify, creating a firm base that will support the weight of the creamy layers above.
Building the Chocolate Cheesecake Layer:
While your crust is setting in the freezer, it’s time to create the first luscious filling layer. In a clean mixing bowl, beat together 4 oz of softened cream cheese and 1/4 cup of granulated sugar using an electric mixer. Beat on medium speed for about 2-3 minutes until the mixture becomes completely smooth, light, and fluffy with no lumps remaining. The cream cheese must be properly softened to room temperature before you begin—this is critical for achieving a silky texture without any grainy bits.
Melt your semi-sweet chocolate chips using either a double boiler or the microwave in 30-second intervals, stirring between each interval until completely smooth. Pour the melted chocolate into your cream cheese mixture and beat until thoroughly combined and the color is uniform throughout. The warmth of the chocolate will help everything blend seamlessly. Next, gradually fold in 1/2 cup of heavy cream, mixing gently until the chocolate cheesecake filling is fluffy, airy, and beautifully glossy.
Remove your springform pan from the freezer and spread the chocolate cheesecake mixture evenly over the chilled cookie crust, using an offset spatula to create a smooth, level surface. Return the pan to the freezer for at least 30 minutes to allow this layer to set properly before adding the next layer. This freezing step prevents the layers from blending together and maintains the distinct, beautiful stratification that makes this dessert so visually appealing.
Crafting the Peppermint Layer:
The peppermint layer is where this cheesecake truly comes alive with holiday spirit. In a large mixing bowl, combine 16 oz of softened cream cheese, 1/2 cup of granulated sugar, 1/2 cup of sour cream, 1/2 teaspoon of peppermint extract, and 1 teaspoon of vanilla extract. Using your electric mixer, beat on medium-high speed for 3-4 minutes until the mixture is impeccably smooth, creamy, and completely lump-free. The sour cream adds a subtle tanginess that balances the sweetness and creates a more complex, sophisticated flavor profile.
Once your base is perfectly smooth, it’s time to add the airy components. Gently fold in the whipped topping or freshly whipped cream using a rubber spatula, using broad, sweeping motions to incorporate it without deflating the mixture. This folding technique preserves the air bubbles that make this layer so wonderfully light and fluffy. Finally, fold in the crushed peppermint candies, distributing them evenly throughout the filling. These candy pieces provide delightful pockets of concentrated peppermint flavor and a subtle crunch that contrasts beautifully with the smooth, creamy texture.
Carefully spread the peppermint filling over your chilled chocolate layer, again using an offset spatula to create an even, smooth surface. Take your time with this step to ensure the layer is level and extends all the way to the edges of the pan for a professional finish.
The Essential Chilling Period:
Cover your assembled cheesecake with plastic wrap, being careful not to let the wrap touch the surface of the filling. Place the covered cheesecake in the refrigerator and let it chill for at least 6 hours, though overnight is ideal. This extended chilling time is absolutely crucial—it allows all the layers to set properly, the flavors to meld and develop, and ensures clean, beautiful slices when you’re ready to serve. Rushing this step will result in a cheesecake that’s too soft to slice neatly, so patience is truly a virtue here.
Creating the Ganache Topping:
When your cheesecake has fully set, it’s time to create the crowning glory: a rich, glossy chocolate ganache. Place 3/4 cup of semi-sweet chocolate chips in a heat-safe bowl. In a separate microwave-safe container, heat 1/2 cup of heavy cream until it’s hot and steaming but not boiling—this should take about 45-60 seconds in the microwave. Pour the hot cream directly over the chocolate chips and let the mixture sit undisturbed for 2 minutes. This resting period allows the heat to gently melt the chocolate without any stirring.
After 2 minutes, begin stirring the mixture with a whisk or spoon, working from the center outward in smooth, circular motions. Continue stirring until the chocolate is completely melted and the ganache is silky, smooth, and glossy. Let the ganache cool for about 10 minutes until it’s slightly thickened but still pourable. Pour the ganache over the chilled cheesecake, using an offset spatula to spread it evenly across the top and allowing it to drip slightly over the edges for a dramatic effect.
Return the cheesecake to the refrigerator for another 30-60 minutes to allow the ganache to set completely. Just before serving, garnish with generous dollops of freshly whipped cream and a festive sprinkling of crushed peppermint candies that catch the light beautifully.
Expert Tips for Success
For the absolute best results, allow your cheesecake to chill overnight. This extended time ensures the firmest texture and the cleanest slices, making your presentation truly spectacular. When slicing, use a sharp knife that’s been dipped in hot water and wiped dry between each cut—this creates those picture-perfect slices with clean edges.
Make sure all your cream cheese is properly softened to room temperature before beginning. Cold cream cheese will create lumps that are difficult to smooth out, compromising the luxurious texture of your finished dessert. If you’re short on time, you can cut the cream cheese into cubes and let them sit at room temperature for about 30 minutes, or microwave them in 10-second intervals until softened but not melted.
This Peppermint Bark Cheesecake is more than just a dessert—it’s a celebration on a plate, a conversation starter, and a delicious memory in the making. Whether you’re serving it at Christmas dinner, a New Year’s gathering, or any winter celebration, this show-stopping creation is guaranteed to earn you rave reviews and requests for the recipe!