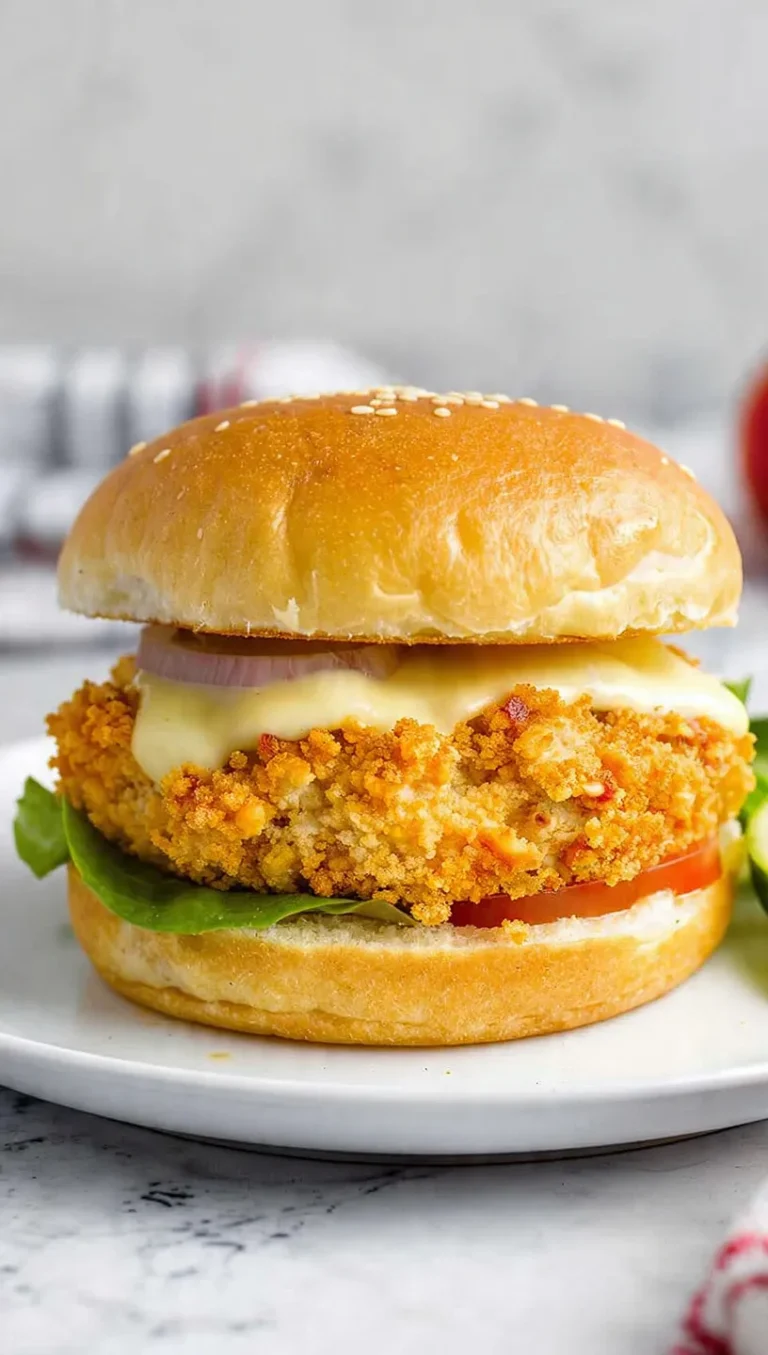
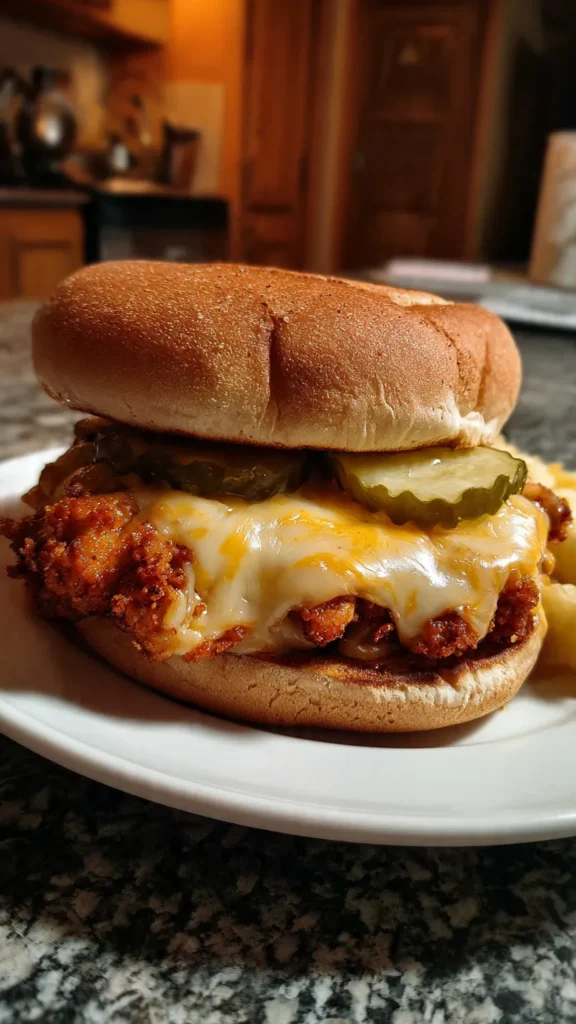
Homemade Chick-fil-A Spicy Chicken Deluxe Sandwich with Pepper Jack Cheese (Crispy Heat at Home Tonight!)
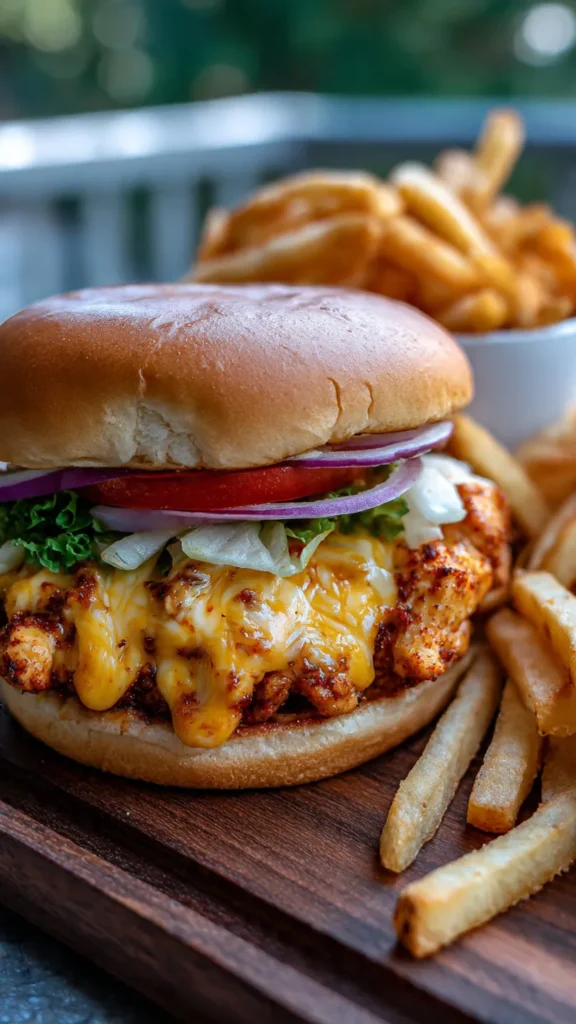
There is something irresistible about biting into a crispy, spicy chicken sandwich layered with melty cheese, cool lettuce, and a toasted buttery bun. The contrast of crunchy coating, juicy chicken, and creamy sauce hits all the right notes and makes every bite feel like fast-food perfection at home. If you love the heat and flavor of a Chick-fil-A spicy chicken deluxe, this homemade version will quickly become a regular in your kitchen.
I first started testing this recipe on a rainy weekend when cravings for a drive-thru sandwich hit hard but the line was just too long to face. After a few batches adjusting the brine, spice level, and breading technique, I landed on a version that gives you that signature spicy kick and crunch, without leaving the house. It has now turned into a game-day favorite and a fun “fakeaway” meal that feels special but is surprisingly manageable on a weeknight.
This recipe focuses on a well-seasoned buttermilk brine, a crunchy double-dip coating, and a simple, punchy spicy mayo that brings everything together. With a few pro tips, you can expect restaurant-quality results at home, complete with juicy chicken, consistent heat, and beautifully golden crust.
Table of Contents
Recipe Quick Reference
Time Breakdown: Prep: 25 minutes (plus 1–4 hours marinating) | Active: 25 minutes | Total: 50 minutes (excluding marinating)
Output: 4 sandwiches | Skill Level: Intermediate
At-a-Glance Details:
- Origin cuisine: American fast-food inspired
- Meal category: Lunch/Dinner
- Dietary tags: Spicy, Poultry, Can be nut-free
- Ideal occasion: Game day, casual weekend dinners, fast-food “copycat” night, crowd-pleasing family meal
Value Proposition Points
- Achieves bakery-level flakiness thanks to a double dredge that creates a craggly, ultra-crispy crust.
- Ready in under 1 hour (active time), making it realistic for a weeknight treat.
- Customize with 6+ flavor variations by adjusting the spice blend, cheese choice, and toppings.
- Includes chef-style techniques for managing oil temperature and preventing greasy or soggy breading.
- Impressive enough for guests as a “copycat” showpiece, yet simple enough for a casual Tuesday dinner.
Featured Ingredient Analysis
Chicken breasts or thighs
- Functional role: The star of the sandwich, providing juicy, meaty texture and mild flavor that carries the spice and marinade.
- Selection tips: Use boneless, skinless chicken breasts sliced horizontally into cutlets, or boneless thighs for extra juiciness and forgiveness. Choose similar-sized pieces for even cooking.
- Alternatives: Thighs give richer flavor and stay very moist; chicken tenders can be used for sliders. Switching to tenders reduces cooking time and slightly changes texture but still delivers great crunch.
Buttermilk
- Functional role: Tenderizes the chicken while helping spices cling to the meat and creating a sticky surface that grabs the flour coating.
- Selection tips: Use full-fat buttermilk if possible for richer flavor and thicker adherence.
- Alternatives: A mixture of regular milk and a tablespoon of lemon juice or vinegar can simulate buttermilk, though the tenderizing effect is slightly milder.
Pepper jack cheese
- Functional role: Adds creamy richness with extra heat and slight tang that enhances the spicy profile.
- Selection tips: Choose pre-sliced pepper jack for easy assembly and even melting.
- Alternatives: Monterey Jack for milder flavor, or a slice of cheddar or Colby Jack if serving spice-sensitive eaters; these will reduce overall heat but keep the creamy melt.
Component-Based Ingredient Lists
Primary Component: Spicy Chicken
- 2 large boneless, skinless chicken breasts, sliced horizontally into 4 cutlets (or 4 small boneless thighs)
- 1 ½ cups buttermilk
- 1 large egg
- 1 tablespoon hot sauce (such as cayenne-based or your favorite)
- 1 ½ cups all-purpose flour
- ¼ cup cornstarch
- 2 teaspoons smoked paprika
- 2 teaspoons garlic powder
- 2 teaspoons onion powder
- 1–1 ½ teaspoons cayenne pepper (adjust to heat preference)
- 1 teaspoon ground black pepper
- 1½ teaspoons kosher salt (plus more to season chicken directly)
- Neutral oil for frying (peanut, canola, or vegetable), enough for 1 ½–2 inches in a deep skillet
Secondary Component: Sandwich Assembly & Sauce
- 4 brioche or soft hamburger buns
- 4 slices pepper jack cheese
- 4–8 leaves green leaf or romaine lettuce
- 4–8 slices ripe tomato
- Dill pickle chips (optional but highly recommended)
Spicy mayo sauce
- ½ cup mayonnaise
- 1–2 tablespoons hot sauce (to taste)
- ½ teaspoon smoked paprika
- ¼ teaspoon garlic powder
- ¼ teaspoon sugar or honey (to balance heat)
- Pinch salt and pepper
Ingredient Intelligence
- Premium quality crucial for:
- Buns: Soft brioche-style buns help balance heat and keep each bite tender and cohesive.
- Chicken: Uniform, fresh chicken ensures even cooking and better texture.
- Temperature requirements:
- Chicken should be close to room temperature (15–20 minutes out of the fridge) before frying for even cooking.
- Buttermilk and egg mixture can be cold, which helps the coating cling.
- Non-negotiable elements:
- Acidic, seasoned buttermilk brine: Essential for juicy, flavorful chicken.
- Cornstarch in the dredge: Helps create that slightly craggly, ultra-crispy crust.
- Proper oil temperature: Critical for avoiding greasy, undercooked chicken.
Tools & Equipment
Required Items:
- Heavy-bottomed skillet or Dutch oven (about 10–12 inches wide) — helps maintain steady frying temperature.
- Deep-fry thermometer or instant-read thermometer — ensures oil stays around 165–175 °C and chicken reaches safe internal temp.
- Wire rack set over a baking sheet — keeps fried chicken crisp while resting and draining.
- Mixing bowls (medium and large) — for marinade and flour dredge.
- Tongs — to handle chicken safely while breading and frying.
Bonus Tools:
- Meat mallet or rolling pin — to lightly pound chicken to even thickness for consistent cooking.
- Kitchen spider or slotted spoon — simplifies lifting chicken from hot oil.
- Toaster or skillet with lid — for toasting buns and melting cheese efficiently.
Preparation Method (Detailed Steps)
Step 1: Prepare and marinate the chicken
Pat the chicken dry, slice breasts into 4 even cutlets if using, and lightly pound thicker sections so each piece is about 1.5–2 cm thick. Season both sides with a pinch of salt. In a bowl, whisk together buttermilk, egg, and hot sauce until smooth, then submerge the chicken pieces, cover, and refrigerate for at least 1 hour and up to 4 hours. The mixture should cling slightly to the chicken and look thick and creamy.
Step 2: Mix the spicy coating
In a separate large shallow bowl, combine flour, cornstarch, smoked paprika, garlic powder, onion powder, cayenne, black pepper, and salt. Stir well, breaking up any clumps. The mixture should be evenly colored with the spices and feel light and fluffy when you run your fingers through it.
Step 3: Dredge the chicken for maximum crunch
Remove chicken from the buttermilk, letting excess drip off but not wiping it clean. Dredge one piece at a time in the flour mixture, pressing firmly so the coating adheres and forms small clumps and ridges on the surface. For extra craggly crunch, dip the coated chicken briefly back in the buttermilk, then again into the flour mixture, pressing once more. If any spots look bare, sprinkle extra flour mixture over and press with your fingers.
Step 4: Heat the oil
Pour enough oil into a heavy skillet or Dutch oven to reach about 1 ½–2 inches up the sides. Heat over medium to medium-high until the oil reaches about 170–175 °C. A small pinch of flour should sizzle immediately on contact without burning quickly. Maintain this temperature window throughout frying, adjusting heat as needed.
Step 5: Fry the chicken
Carefully lower 2 pieces of chicken into the oil, avoiding crowding the pan (this keeps the oil from cooling too much). Fry 4–6 minutes per side, turning once, until deeply golden brown and crisp. The internal temperature should reach at least 74 °C at the thickest part. The coating should look evenly browned, with small crunchy ridges and no pale floury spots. Transfer to a wire rack to drain and rest, sprinkling lightly with salt while hot. Repeat with remaining pieces.
Step 6: Make the spicy mayo and prep toppings
While the chicken fries, stir together mayonnaise, hot sauce, smoked paprika, garlic powder, sugar or honey, and a pinch of salt and pepper until smooth and slightly rosy. Taste and adjust heat or sweetness as desired. Wash and dry lettuce, slice tomatoes, and have pickles ready. Keep toppings completely dry to prevent soggy buns.
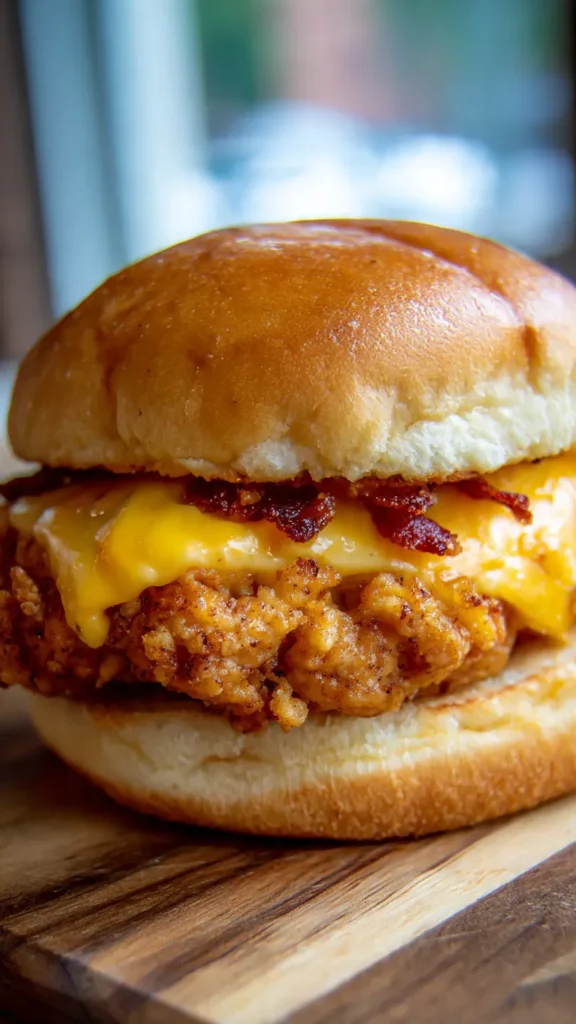
Step 7: Toast buns and melt cheese
Lightly butter or oil the cut sides of the buns. Toast in a dry skillet or under a broiler until golden at the edges. While the chicken is still hot on the rack, place a slice of pepper jack on each piece and tent loosely with foil or use a skillet with a lid briefly to encourage melting. The cheese should appear soft and glossy, just starting to drip over the edges.
Step 8: Assemble the sandwiches
Spread a generous layer of spicy mayo on the bottom bun, then add lettuce leaves and tomato slices. Place the cheesy spicy chicken on top, add pickles if using, and finish with another swipe of sauce on the top bun. Press the sandwich gently to help everything settle. Serve immediately, while the coating is crisp and the cheese is still melted.
Professional Guidance Section
- Temperature Control: Aim to keep the oil between 165–175 °C; cooler oil leads to greasy chicken, while hotter oil can burn the crust before the inside cooks through.
- Timing Patience: Do not rush frying or flip too often; allow the crust to set for a few minutes before turning, so it doesn’t tear or slide off.
- Texture Achievement Secret: The combination of cornstarch and a double dredge creates those characteristic crisp ridges; pressing the flour mixture firmly into the chicken is key.
- Avoid This Error: Skipping the marinating time drastically reduces flavor and juiciness; even 45–60 minutes in buttermilk makes a big difference.
- Testing Insight: Cooking one “test” piece first lets you check seasoning and crunch; adjust salt or cayenne in the coating if needed before frying the rest.
Adaptation & Variation Guide
Dietary Adjustments
- Gluten-Free Conversion: Use a cup-for-cup gluten-free flour blend plus cornstarch in place of regular flour, and serve on gluten-free buns. Ensure your hot sauce and mayo are certified gluten-free.
- Plant-Based Version: Replace chicken with extra-firm tofu slabs or breaded cauliflower “steaks,” marinating them in a dairy-free buttermilk made from plant milk and acid. Use vegan mayo, vegan cheese slices, and plant-based buns.
- Reduced Sugar Option: Skip the sugar or honey in the sauce or replace with a small amount of a sugar-free sweetener; this keeps balance without adding sugar.
Flavor Transformations
- Southern Style: Add a touch of brown sugar and extra smoked paprika to the coating, and serve with dill pickles and coleslaw for a Southern-inspired profile.
- Summer Edition: Top with fresh tomato, crisp lettuce, and a squeeze of lemon or lime; add sliced avocado during warmer months for a lighter, fresher feel.
- Gourmet Upgrade: Finish the sandwich with a drizzle of honey, a few pickled jalapeños, or a smear of garlic aioli along with the spicy mayo for an elevated flavor layer.
Presentation Approaches
- Classic Method: Serve the sandwich in a basket or on a plate with waffle fries, coleslaw, or a simple green salad.
- Contemporary Style: Slice the sandwich in half on a bias, secure with skewers, and plate with a small ramekin of extra spicy mayo and pickles.
- Entertaining Format: Make slider-sized sandwiches using smaller buns and chicken pieces or tenders, perfect for parties and buffets.
Preservation & Advance Prep
Prepare-Ahead Strategy
- You can marinate the chicken in the buttermilk mixture up to 12 hours in advance for deeper flavor (keep refrigerated).
- Pre-mix the flour dredge and store in an airtight container for up to a week.
- Slice and prep toppings earlier in the day, storing them covered in the refrigerator (dry thoroughly before use).
Storage Guidelines
- Room Temperature: Only safe for up to 1–2 hours; beyond that, refrigerate promptly.
- Refrigerated: Store leftover cooked chicken in an airtight container for up to 3 days. Keep buns and toppings separate for best texture.
- Frozen: Cool fried chicken completely, then freeze in a single layer before transferring to a freezer bag or container for up to 2 months. Reheat from frozen or thawed according to preference.
Optimal Reheating
- Reheat chicken on a wire rack over a baking sheet in a 190 °C oven or air fryer for about 8–12 minutes, until hot and crisp again. Avoid microwaving, which softens the crust. Assemble with fresh buns and toppings for best texture.
Complementary Serving Suggestions
Ideal Pairings
- Drinks: Serve with iced tea, lemonade, or a citrusy soda to cut through richness and complement the spicy heat.
- Sides: Pair with waffle fries, potato wedges, or a crunchy cabbage slaw to echo the fast-food experience at home.
- Flavor Complement: A side of tangy pickles or a simple cucumber salad adds refreshing contrast to the spicy, crispy chicken.
Menu Building
- Make it a full meal by pairing the sandwich with baked fries and a light side salad.
- Offer a “spicy vs. mild” option by making a batch with less cayenne and regular cheese for spice-sensitive guests.
- Add a dessert like churros, brownies, or a simple fruit salad to create a complete, crowd-pleasing menu.
Nutritional Information (Approximate per Sandwich)
Calories: ~750–850 | Protein: ~40–45 g | Carbohydrates: ~60–70 g | Fat: ~35–40 g | Fiber: ~3–4 g | Sugar: ~7–10 g | Sodium: Depends on salt and sauce, approximately 1,400–1,700 mg
Disclaimer: These values are estimates calculated using a standard online nutrition calculator and will vary based on ingredient brands, portion sizes, and amount of oil absorbed. Always adjust based on your tools and products.
Reader FAQ Module
Q: Can I make this without a deep-fry thermometer?
A: Yes. Use a small pinch of flour or a bread cube to test the oil; it should sizzle steadily and turn golden in about 50–60 seconds, not dark brown in seconds.
Q: My coating fell off the chicken — why?
A: The chicken may have been too wet when breaded, the oil too cool, or the pieces moved too soon after adding to the pan. Pat lightly, press the coating firmly, and let the crust set before flipping.
Q: What’s the optimal frying temperature for the chicken?
A: Aim for around 170–175 °C oil temperature, and cook until the internal temperature of the chicken reaches at least 74 °C.
Q: How do I maintain the crispy texture?
A: Drain the chicken on a wire rack instead of paper towels and avoid covering tightly with foil, which traps steam and softens the crust.
Q: Is recipe doubling possible?
A: Yes. Fry in batches, returning the oil to temperature between rounds. Keep cooked chicken warm and crisp in a low oven (about 95–105 °C) on a rack.
Q: I’m missing buttermilk — what works instead?
A: Mix regular milk with about 1 tablespoon of lemon juice or vinegar per cup, let sit for 5–10 minutes, then use as a substitute. It won’t be identical but still tenderizes well.
Background & Heritage Context
The fried chicken sandwich has deep roots in American food culture, combining influences from Southern fried chicken traditions and the rise of fast-food chains in the mid-20th century. Spicy versions evolved as diners sought bolder flavors and regional hot chicken styles, especially in the American South, spread into mainstream menus. Over time, major chains introduced their own takes on spicy fried chicken sandwiches, sparking a kind of “chicken sandwich war” that pushed heat, crunch, and quality to new levels.
Copycat recipes emerged as home cooks tried to recreate their favorite fast-food sandwiches in their own kitchens. These homemade versions often rely on familiar pantry spices, buttermilk marinades, and frying techniques refined over generations of family recipes. Making a spicy deluxe sandwich at home allows you to control not only spice and quality, but also the story behind the meal — turning a drive-thru favorite into a shared experience cooked with care.
Today, the spicy chicken sandwich has become a modern classic, appearing everywhere from food trucks to gourmet menus. Recreating a Chick-fil-A style spicy chicken deluxe at home, complete with pepper jack cheese and a well-balanced sauce, taps into this cultural trend while giving you full flexibility to tailor heat, ingredients, and serving style to your own table.
Print-Optimized Recipe Summary
Homemade Chick-fil-A Spicy Chicken Deluxe Sandwich with Pepper Jack Cheese
A crispy, juicy spicy chicken sandwich layered with melted pepper jack cheese, fresh toppings, and a zesty sauce, all on a soft toasted bun.
Ingredients (Consolidated)
- 2 large boneless, skinless chicken breasts (sliced into 4 cutlets) or 4 boneless thighs
- Salt and pepper
- 1 ½ cups buttermilk
- 1 large egg
- 1 tablespoon hot sauce
- 1 ½ cups all-purpose flour
- ¼ cup cornstarch
- 2 teaspoons smoked paprika
- 2 teaspoons garlic powder
- 2 teaspoons onion powder
- 1–1 ½ teaspoons cayenne pepper
- 1 teaspoon ground black pepper
- 1½ teaspoons kosher salt
- Neutral oil for frying
- 4 brioche or hamburger buns
- 4 slices pepper jack cheese
- Lettuce leaves, tomato slices, dill pickle chips
Spicy mayo:
- ½ cup mayonnaise
- 1–2 tablespoons hot sauce
- ½ teaspoon smoked paprika
- ¼ teaspoon garlic powder
- ¼ teaspoon sugar or honey
- Salt and pepper
Method (Numbered)
- Season chicken with salt and lightly pound to even thickness.
- Whisk buttermilk, egg, and hot sauce; submerge chicken and marinate 1–4 hours in the fridge.
- Mix flour, cornstarch, smoked paprika, garlic powder, onion powder, cayenne, black pepper, and salt in a shallow bowl.
- Remove chicken from marinade, let excess drip, then dredge in flour mixture, pressing firmly. For extra crunch, dip briefly back into buttermilk, then dredge again.
- Heat 1 ½–2 inches of oil in a heavy skillet to about 170–175 °C.
- Fry chicken in batches for 4–6 minutes per side, until golden and crisp and internal temperature reaches 74 °C. Drain on a wire rack and season lightly with salt.
- Stir together mayonnaise, hot sauce, smoked paprika, garlic powder, sugar or honey, and salt and pepper to make spicy mayo. Prepare lettuce, tomato, and pickles.
- Toast buns lightly. Place a slice of pepper jack on each hot chicken piece and let it melt.
- Spread spicy mayo on buns, layer lettuce, tomato, and pickles, then top with spicy cheesy chicken. Close sandwich and serve immediately.
Essential Notes
- Do not skip the buttermilk marinade; it’s crucial for juicy, flavorful chicken.
- Keep oil at a steady frying temperature to avoid greasy or undercooked pieces.
- For less heat, reduce cayenne and use Monterey Jack instead of pepper jack.