Oreo Cream Cheese Cheesecake Sushi Rolls
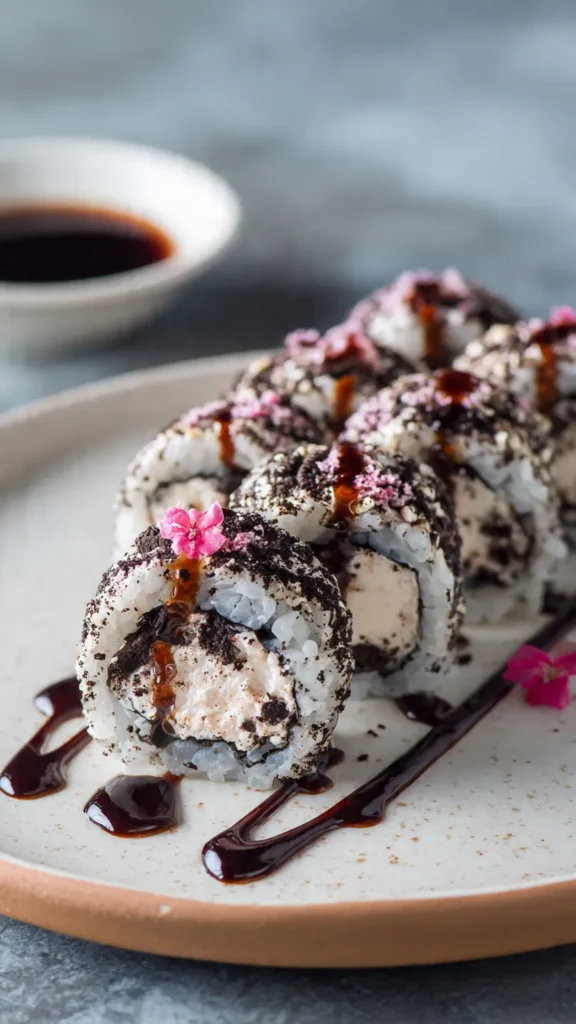
If you’re craving a show-stopping dessert that merges two beloved treats, these Oreo Cream Cheese Cheesecake Sushi Rolls deliver pure magic. This creative fusion transforms classic cheesecake into an eye-catching, sushi-inspired creation that tastes as incredible as it looks.
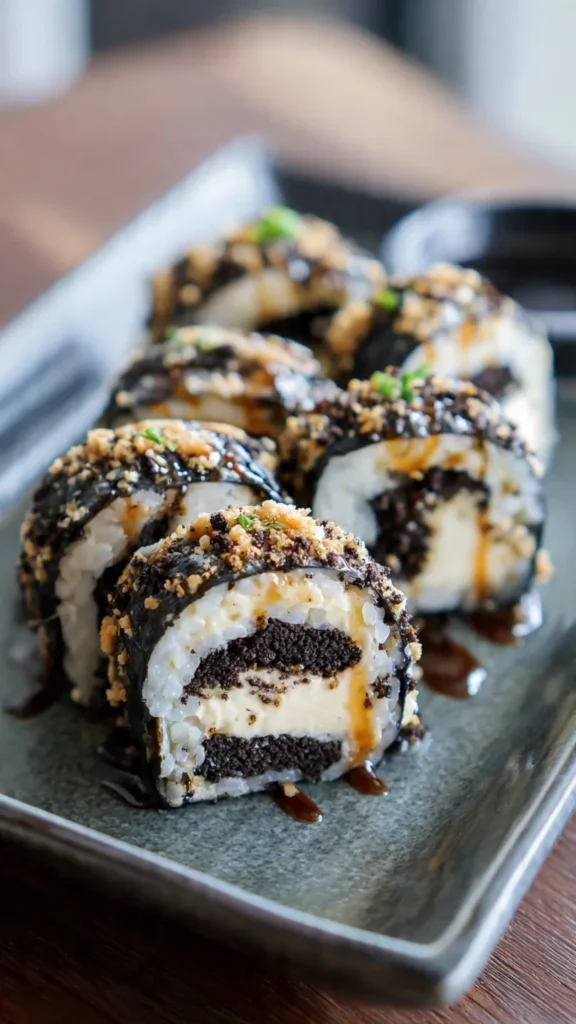
The beauty of this recipe lies in its simplicity and visual impact. You’ll crush Oreo cookies into a pliable base, spread a luscious cream cheese filling across it, then roll everything together for a stunning spiral effect. When sliced, each piece reveals gorgeous layers that look almost too pretty to eat—almost.
These rolls work beautifully for dinner parties, birthday celebrations, potlucks, or anytime you want to impress guests without spending hours in the kitchen. The combination of crunchy cookie exterior and silky cheesecake interior creates an addictive texture contrast that keeps everyone coming back for seconds.
What Makes This Recipe Special
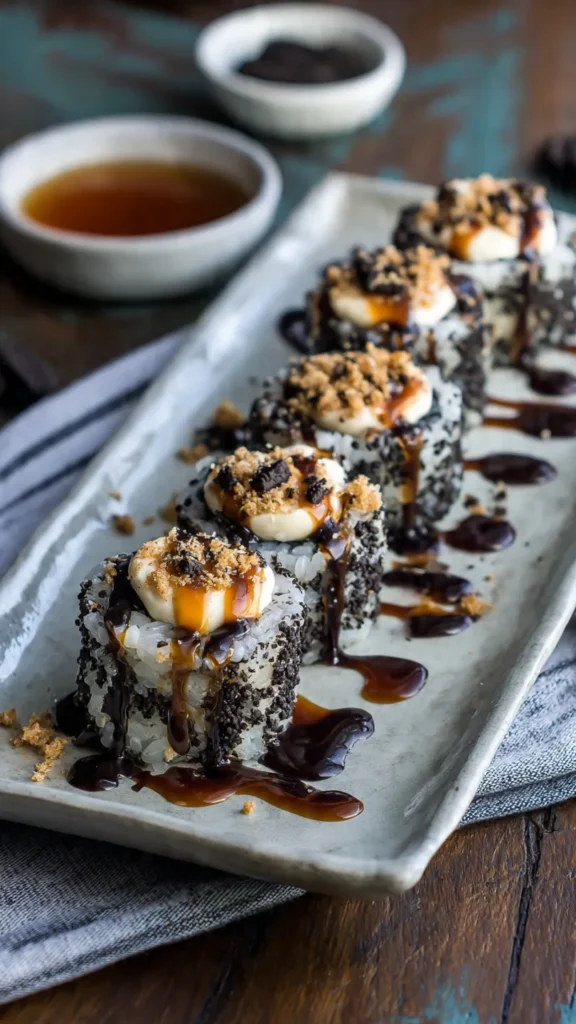
Unlike traditional cheesecake that requires baking and hours of cooling time, these no-bake rolls come together quickly and chill in just one hour. The rolling technique isn’t just for aesthetics—it creates perfect portion control and makes serving a breeze. Each slice stands upright on the plate, drizzled with chocolate and garnished with cookie crumbs for an Instagram-worthy presentation.
The flavor profile hits all the right notes. Rich cream cheese balances the sweetness of Oreos, while vanilla extract adds depth and whipped cream keeps everything light and airy. The chocolate drizzle on top provides that final touch of indulgence.
Ingredients
- 24 Oreo cookies, finely crushed
- 3 tablespoons melted butter
- 2 tablespoons milk
- 8 oz cream cheese, softened to room temperature
- 1/4 cup powdered sugar
- 1/2 teaspoon vanilla extract
- 1/4 cup heavy whipping cream, whipped to soft peaks
- Chocolate syrup or melted chocolate for drizzling
- Extra crushed Oreos for garnish
Ingredient Tips
Make sure your cream cheese sits at room temperature for at least 30 minutes before starting. Cold cream cheese creates lumps that won’t blend smoothly into your filling. The butter should be fully melted but not hot, which would make the cookie mixture too wet. When crushing Oreos, pulse them in a food processor for the finest, most even texture.
Instructions
Prepare the Cookie Base
Combine the finely crushed Oreo cookies with melted butter and milk in a large mixing bowl. Stir thoroughly until the mixture resembles wet sand and holds together when pressed. The consistency should be moldable but not overly sticky.
Shape the Foundation
Lay a large sheet of plastic wrap flat on your countertop. Transfer the Oreo mixture onto the center and use your hands to flatten it into a thin rectangle measuring approximately 8 inches by 10 inches. Aim for even thickness throughout—this ensures uniform slices later.
Create the Filling
Beat the softened cream cheese, powdered sugar, and vanilla extract in a separate bowl using an electric mixer on medium speed. Mix for 2-3 minutes until completely smooth with no lumps remaining. Gently fold in the whipped cream using a spatula, being careful not to deflate the airy texture.
Assemble the Roll
Spread the cheesecake filling evenly across the Oreo layer, leaving about a half-inch border along one of the longer edges. This border helps seal the roll. Starting from the opposite long edge, carefully roll the dessert tightly using the plastic wrap to guide and support the roll. Think of rolling a sushi mat—firm but gentle pressure keeps everything compact.
Chill and Finish
Wrap the completed roll tightly in plastic wrap, twisting the ends to secure. Refrigerate for at least one hour, though two hours produces firmer slices. Before serving, unwrap the roll and drizzle generously with chocolate syrup. Sprinkle crushed Oreos over the top, then use a sharp knife to cut into 1-inch slices.
Recipe Variations
Peanut Butter Twist
Add 2 tablespoons of creamy peanut butter to the cream cheese filling and use peanut butter Oreos for the base. Drizzle with melted peanut butter instead of chocolate.
Red Velvet Version
Swap regular Oreos for red velvet Oreos and add a few drops of red food coloring to the filling for a vibrant Valentine’s Day dessert.
Mint Chocolate Delight
Use mint Oreos and add 1/4 teaspoon peppermint extract to the filling. Top with crushed Andes mints and chocolate drizzle.
Birthday Cake Style
Replace Oreos with Golden Oreos, add rainbow sprinkles to the filling, and top with colorful sprinkles and white chocolate drizzle.
Storage and Make-Ahead Tips
Store leftover rolls tightly wrapped in the refrigerator for up to three days. The texture stays perfect throughout this time—some say day two tastes even better as flavors meld together.
For make-ahead convenience, prepare the rolls up to 24 hours before serving. Keep them wrapped until ready to slice, then add the chocolate drizzle and Oreo garnish just before presenting.
These rolls don’t freeze well due to the cream cheese filling, which can become grainy when thawed.
Serving Suggestions
Serve these sushi rolls on a rectangular platter for authentic sushi presentation. Arrange slices in a row with the spiral facing up, then drizzle chocolate in a zigzag pattern across the entire presentation.
Pair with fresh berries for color contrast and a tart counterpoint to the sweetness. A dollop of whipped cream on each plate adds extra elegance. For casual gatherings, serve on individual dessert plates with decorative chocolate sauce designs.
Troubleshooting Common Issues
If your Oreo base crumbles when rolling, add another tablespoon of milk to increase moisture. If it’s too sticky, refrigerate the flattened base for 10 minutes before adding filling.
When the filling oozes out during rolling, you’ve likely spread it too thick. Aim for about 1/4 inch thickness, leaving that crucial border unsealed.
For cleaner slices, wipe your knife with a damp cloth between each cut. A warm knife also helps—run it under hot water, dry it, then slice.
Why This Recipe Works
The combination of crushed cookies and butter creates a flexible base that rolls without cracking. Adding milk provides just enough moisture for malleability while maintaining structural integrity. The whipped cream folded into the cream cheese filling keeps it light and spreadable rather than dense and heavy.
Chilling firms everything up perfectly—long enough to set but not so long that it becomes rock-hard. The plastic wrap technique makes rolling foolproof even for beginners.
Nutrition Information
Each roll contains approximately 250 calories, 120 mg sodium, and 4 g protein. Keep in mind these are rich, indulgent desserts meant for special occasions rather than everyday treats.