Sheet Pan Pizza: The Ultimate Guide to Easy Homemade Pizza Night
There’s something magical about homemade pizza that brings everyone to the table. This sheet pan pizza delivers everything you love about your favorite pizzeria pie—a crispy golden crust, perfectly melted gooey cheese, and endless topping possibilities—all baked on a single pan. Whether you’re feeding a hungry family on a busy weeknight or hosting a casual get-together with friends, this recipe transforms simple ingredients into a crowd-pleasing dinner that’s both impressive and incredibly easy to make.
Unlike traditional round pizzas that require special equipment or tricky dough-tossing techniques, sheet pan pizza takes a more practical approach. The rectangular shape maximizes your baking space, giving you more pizza per batch and ensuring everyone gets their fair share. The method is forgiving for beginners yet produces professional-quality results that will have everyone asking for your secret.
Why You’ll Love This Recipe
This sheet pan pizza stands out for several compelling reasons. First, it’s remarkably simple to prepare, requiring minimal hands-on time and no special pizza-making skills. The dough stretches easily across the pan without any complicated shaping or spinning. Second, the large surface area means you can feed more people with less effort, making it perfect for family dinners or casual entertaining. Third, the versatility is unmatched—you can customize each section with different toppings to satisfy picky eaters or adventurous taste buds alike.
The texture is another winning feature. The generous olive oil creates a crispy, almost fried bottom crust that contrasts beautifully with the soft, chewy interior. The edges develop a delightful crunch while the center stays tender. When you finish it under the broiler, the cheese gets those irresistible golden-brown spots that add both visual appeal and extra flavor.
Ingredients You’ll Need
For the Base:
- ¼ cup olive oil for coating the pan
- 16 ounces pizza dough at room temperature
- ⅔ cup pizza sauce
- 2 cups shredded mozzarella cheese
- 1 teaspoon Italian seasoning
- ½ teaspoon garlic powder
The ingredient list is intentionally streamlined, focusing on pantry staples that deliver maximum flavor. The olive oil serves double duty—it prevents sticking and creates that signature crispy bottom crust. Room temperature dough is crucial because cold dough resists stretching and springs back frustratingly. The combination of Italian seasoning and garlic powder adds aromatic depth without overwhelming the classic pizza flavor profile.
Step-by-Step Instructions

Preparing Your Workspace
Begin by preheating your oven to 450°F. This high temperature is essential for achieving that pizzeria-quality crust with a crispy exterior and tender interior. While the oven heats, prepare your sheet pan by brushing olive oil generously across the bottom and up the sides. Don’t skip the sides—this prevents the edges from sticking and helps them crisp up beautifully.
Working with the Dough
Remove your pizza dough from the refrigerator and let it come to room temperature if you haven’t already. Cold dough is stubborn and elastic, making it nearly impossible to stretch properly. Gently press the dough into a rough rectangle shape, then cover it completely with plastic wrap. This crucial resting period of 30 minutes allows the gluten to relax, making the dough pliable and cooperative.
After the rest, you’ll notice the dough stretches much more easily. Using your fingertips, gently press and stretch the dough toward the edges of the pan. Work gradually and evenly, coaxing it into all four corners. If the dough resists, let it rest for another 5-10 minutes and try again. Patience here prevents tears and ensures even thickness throughout.
Adding the Toppings
Once your dough covers the entire pan, it’s time for the fun part. Spread the pizza sauce evenly across the surface, leaving a small border around the edges for the crust. Use the back of a spoon or a ladle to distribute it smoothly. Avoid using too much sauce—excess moisture can make the crust soggy rather than crispy.
Sprinkle the shredded mozzarella cheese evenly over the sauce, making sure every bite will have that stretchy, melted cheese everyone craves. Follow with the Italian seasoning and garlic powder, distributing them uniformly for consistent flavor. This is also when you add any additional toppings you’ve chosen, from classic pepperoni to creative combinations.
Baking to Perfection
Slide the prepared pizza into your preheated oven and bake for 15-20 minutes. You’re looking for a golden-brown crust and bubbling cheese. The exact timing depends on your oven and how crispy you prefer your crust. Check around the 15-minute mark to gauge progress.
For that final touch of perfection, switch your oven to broil and position the pan on the top rack. Watch carefully—this only takes 1-2 minutes—until the cheese develops beautiful golden-brown spots and the edges of the crust darken slightly. This step elevates the pizza from good to extraordinary, adding flavor complexity and visual appeal.
Topping Ideas for Every Preference
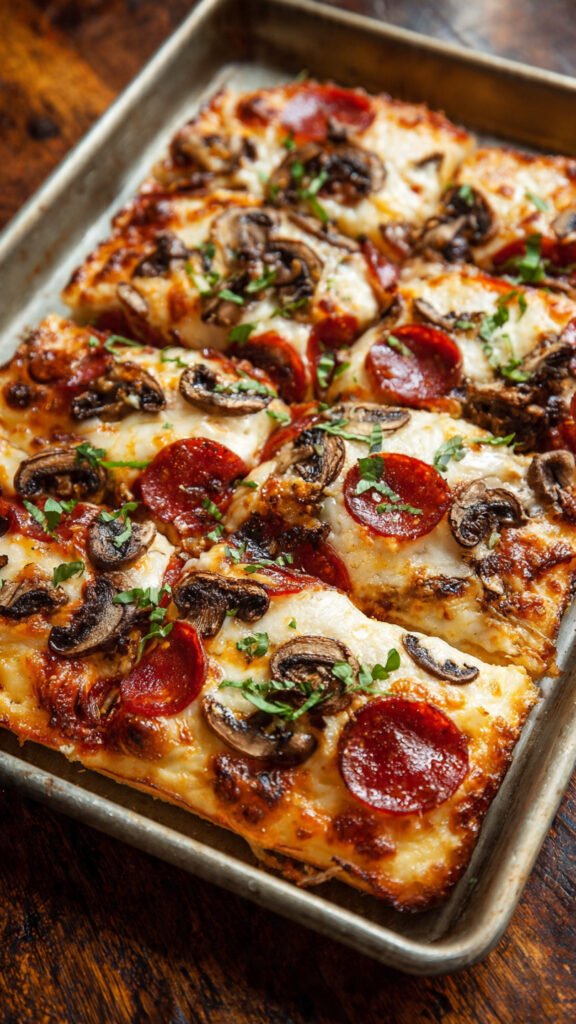
The beauty of sheet pan pizza lies in its versatility. Classic combinations include pepperoni with mushrooms, or Italian sausage with green peppers and onions. For meat lovers, try a combination of pepperoni, sausage, bacon, and ham. Vegetarians will enjoy mushrooms, onions, green peppers, black olives, spinach, tomatoes, and fresh basil.
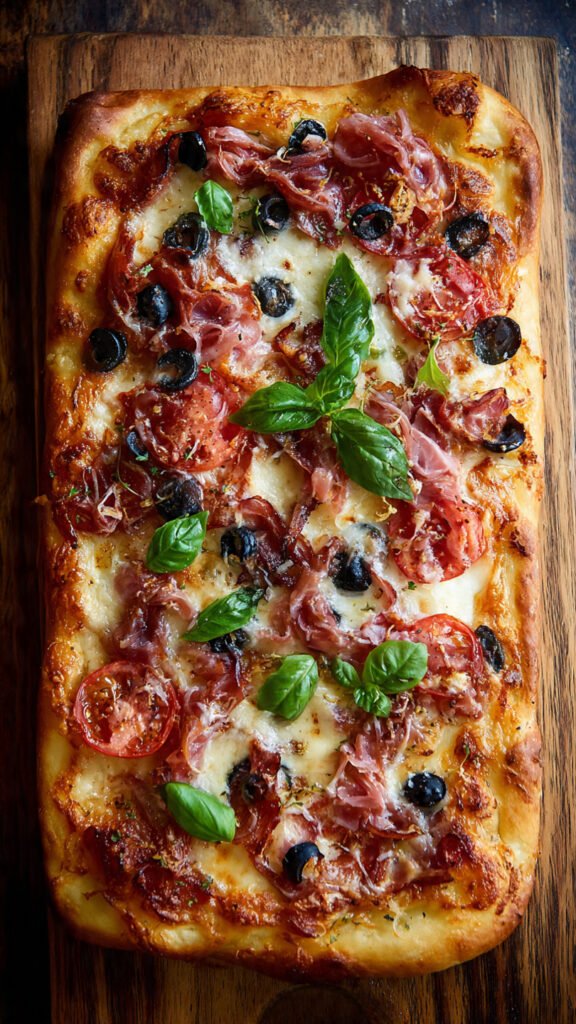
Create a Hawaiian-inspired version with ham and pineapple, or go gourmet with chicken, garlic, spinach, and tomatoes drizzled with a balsamic reduction. You can even divide the pizza into sections with different toppings to please everyone at the table.
Storage and Make-Ahead Tips
Leftover sheet pan pizza stores beautifully in an airtight container in the refrigerator for 3-4 days. The key to maintaining quality is proper reheating. Use an air fryer at 350°F for 3-5 minutes, or warm it in the oven at 375°F until heated through. Avoid the microwave, which makes the crust disappointingly soggy.
For longer storage, freeze cooled pizza slices wrapped tightly in plastic wrap and aluminum foil for up to 3 months. Defrost overnight in the refrigerator before reheating. If you want to prep ahead, par-bake the crust for 7-10 minutes, let it cool completely, then wrap and refrigerate for up to 24 hours. When ready to eat, add your toppings and finish baking.
Expert Tips for the Best Results
The resting period for the dough isn’t optional—it’s what prevents the dough from shrinking back as you stretch it. Preheating your sheet pan before adding the dough can create an even crispier bottom crust, though it requires careful handling. Shredding your own mozzarella rather than using pre-shredded cheese results in better melting and creamier texture, as pre-shredded varieties contain anti-caking agents.
Distribute toppings evenly to prevent soggy spots where moisture pools. Too much sauce is a common mistake—less is more when it comes to achieving crispy crust. For an extra-flavorful base, consider making homemade pizza dough, which offers a chewier texture and more complex taste than store-bought versions.
Nutritional Information
Each serving contains approximately 289 calories, with 29g carbohydrates, 11g protein, and 15g fat. The pizza provides 148mg calcium and 2mg iron per serving, along with modest amounts of vitamins A and C. These values will vary based on your choice of toppings and portion sizes.