The Best Chocolate Caramel Cream Cake (Decadent Perfection!)
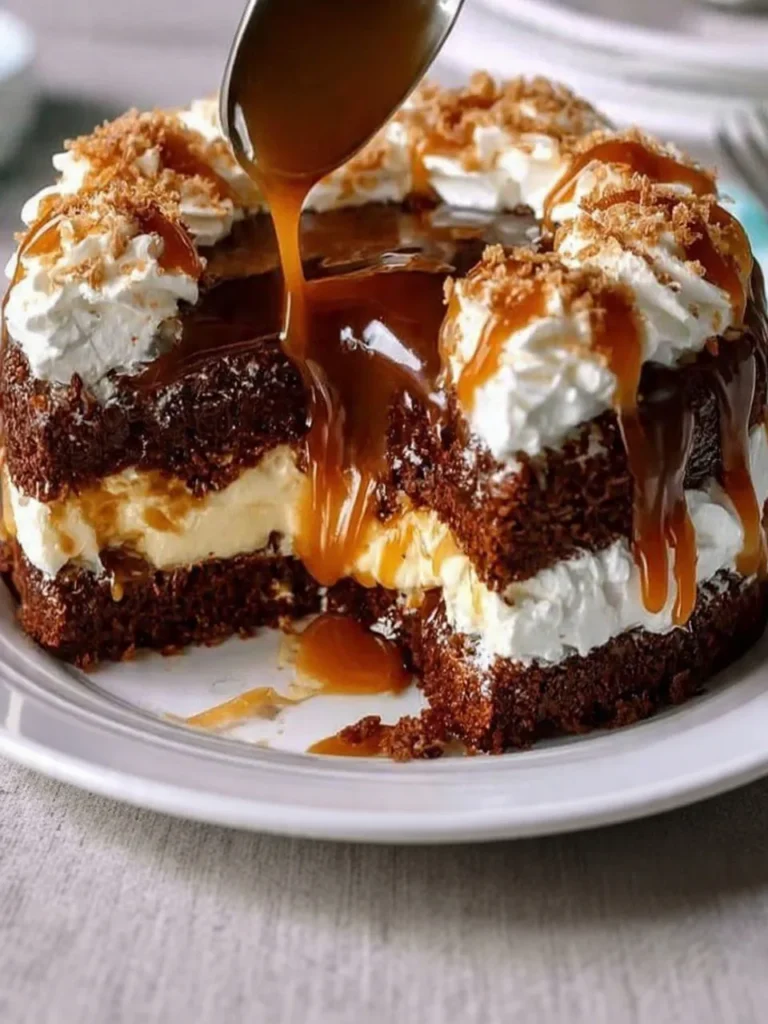
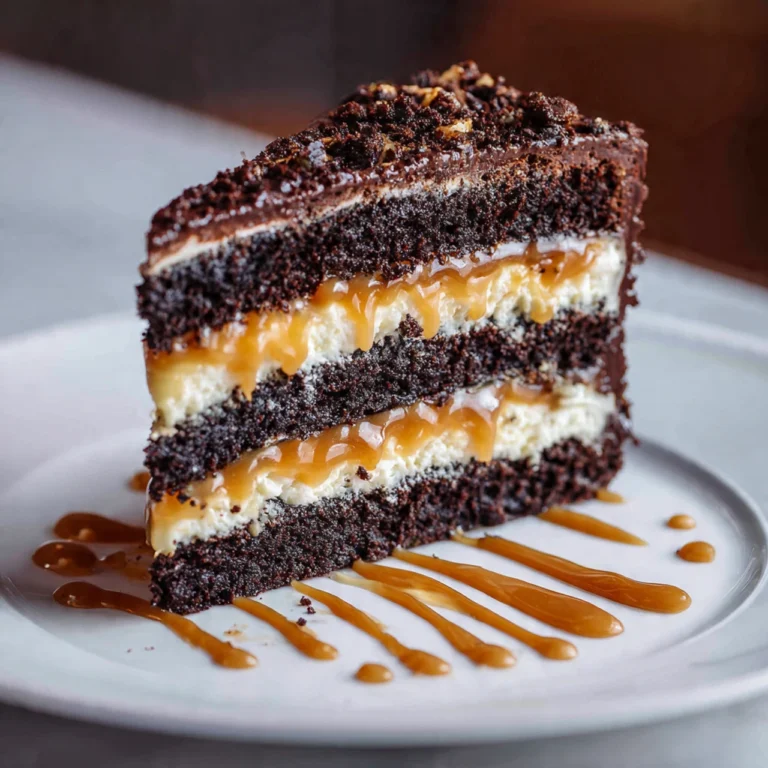
The first time I cut into a chocolate caramel cream cake and saw those beautiful layers—dark chocolate cake, glossy caramel cream, and shiny ganache—I knew I’d found the ultimate special occasion dessert. There’s something almost magical about the way the sweet, buttery caramel plays against the deep, slightly bitter chocolate, creating a flavor combination that feels both nostalgic and utterly sophisticated.
I developed this recipe after years of making chocolate cakes that were good but never quite spectacular enough for milestone celebrations. What I wanted was a cake that looked impressive, tasted unforgettable, and had that perfect balance of textures—moist cake, creamy frosting, and smooth ganache all working together. This cake delivers on every front, and while it has multiple components, each one is surprisingly straightforward to make.
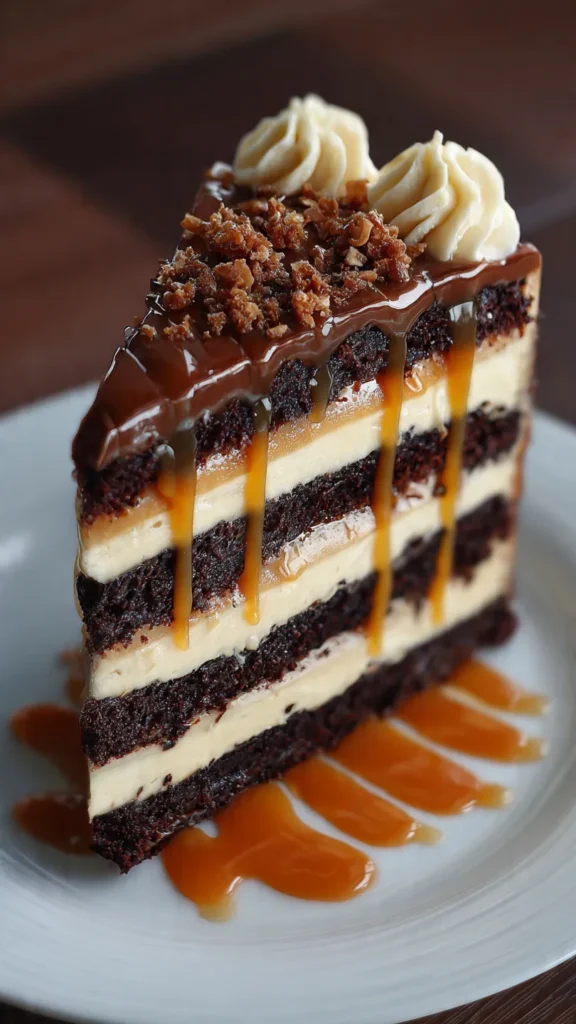
What makes this version exceptional is the incredibly moist chocolate cake base (thanks to buttermilk and hot coffee), the silky-smooth caramel buttercream that’s sweet but not cloying, and an optional chocolate ganache drip that makes it look bakery-perfect. You’ll get a show-stopping three-layer cake that’s worth every minute of effort and guaranteed to make any celebration unforgettable.
Table of Contents
Prep Time: 45 min | Cook Time: 30 min | Total: 2 hours (including cooling and assembly)
Yield: 12-16 servings | Difficulty: Medium
Quick Stats Box:
- Cuisine: American
- Course: Dessert
- Diet: Vegetarian
- Best for: Birthdays, anniversaries, holidays, special celebrations
Why This Recipe Works
- Incredibly moist chocolate cake — Hot coffee and buttermilk create a tender, flavorful crumb that stays moist for days
- Homemade salted caramel frosting — Rich, buttery caramel buttercream provides the perfect sweet-salty balance
- Stable layers that slice beautifully — Proper cooling and frosting techniques ensure clean, professional-looking slices
- Make-ahead friendly components — Bake cake layers and make caramel a day ahead to break up the work
- Show-stopping presentation — The combination of chocolate and caramel with optional ganache drip looks like it came from a professional bakery
Ingredient Spotlight
Hot Coffee in Chocolate Cake: Adding hot coffee to chocolate cake batter might seem unusual, but it’s a baker’s secret weapon. The coffee doesn’t make the cake taste like coffee—instead, it intensifies and deepens the chocolate flavor, making it taste more chocolatey than cocoa powder alone could achieve.
Buttermilk: This tangy ingredient reacts with the baking soda to create lift and tenderness in the cake. It also adds moisture and a subtle tang that balances the sweetness of the caramel frosting. If you don’t have buttermilk, you can make a substitute by adding 1 tablespoon lemon juice or vinegar to 1 cup of milk.
Homemade Caramel: Making caramel from scratch might sound intimidating, but it’s just sugar, cream, and butter cooked until golden and fragrant. Homemade caramel has a depth of flavor that store-bought can’t match, and controlling the salt level lets you create that perfect sweet-salty balance.
Ingredients
For the Chocolate Cake Layers
- 2 cups (250g) all-purpose flour
- 2 cups (400g) granulated sugar
- ¾ cup (75g) unsweetened cocoa powder (natural or Dutch-process)
- 2 teaspoons baking soda
- 1½ teaspoons baking powder
- 1½ teaspoons salt
- 2 large eggs, room temperature
- 1 cup (240ml) buttermilk
- ½ cup (120ml) vegetable oil
- 2 teaspoons vanilla extract
- 1 cup (240ml) hot brewed coffee (or hot water)
For the Salted Caramel Buttercream
- 1¼ cups (250g) granulated sugar
- ½ cup (120ml) water
- 1 cup (240ml) heavy cream, warmed
- 2 cups (450g) unsalted butter, room temperature
- 1 teaspoon vanilla extract
- 1 teaspoon kosher salt (adjust to taste)
- 7 cups (800g) powdered sugar, sifted
For Optional Chocolate Ganache Drip
For Assembly
Ingredient Notes:
- Quality matters most: Use good quality cocoa powder—Dutch-process creates a darker color and milder flavor, while natural cocoa is more acidic
- Room temperature is key: Butter, eggs, and buttermilk should all be at room temperature for smooth batter and frosting
- Don’t skip: The salt in the caramel buttercream is essential—it balances the sweetness and makes the caramel flavor pop
Essential Equipment
You’ll Need:
- Three 8-inch or 9-inch round cake pans
- Parchment paper for lining pans
- Large mixing bowls (at least 2)
- Electric mixer (stand or hand mixer)
- Wire cooling racks
- Medium heavy-bottomed saucepan for caramel
- Offset spatula for frosting
- Cake turntable (optional but helpful)
Nice to Have:
- Candy thermometer for monitoring caramel
- Piping bag with large tip for easy frosting application
- Cake leveler for perfectly flat layers
How to Make Chocolate Caramel Cream Cake (Step-by-Step)
Step 1: Prepare and Bake Cake Layers
Preheat oven to 350°F (175°C). Grease three 8-inch round cake pans and line the bottoms with parchment paper circles. In a large bowl, whisk together flour, sugar, cocoa powder, baking soda, baking powder, and salt until well combined with no streaks. In a separate bowl, whisk together eggs, buttermilk, oil, and vanilla extract. Pour wet ingredients into dry ingredients and mix on low speed until just combined—don’t overmix. Gradually pour in hot coffee while mixing slowly. The batter will be very thin and liquid—this is correct. Divide batter evenly among the three prepared pans. Bake for 25-30 minutes until a toothpick inserted in the center comes out clean or with just a few moist crumbs. Let cakes cool in pans for 15-20 minutes, then turn out onto wire racks to cool completely.
Pro tip: Use a kitchen scale to divide batter evenly for uniformly sized layers.
Step 2: Make the Salted Caramel
In a large, light-colored heavy-bottomed saucepan, combine sugar and water. Heat over medium-high heat, stirring until sugar dissolves completely. Stop stirring and let mixture cook undisturbed, swirling the pan occasionally, until it turns a deep amber color (about 10-12 minutes). Watch carefully—it can go from perfect to burnt quickly. Remove from heat and carefully pour in the warmed cream in a slow, steady stream while whisking constantly. The mixture will bubble violently—this is normal. Add butter pieces and whisk until melted and smooth. Whisk in vanilla and salt. Pour caramel into a bowl, cover with plastic wrap, and let cool to room temperature for 3-4 hours.
Common mistake: Adding cold cream causes dangerous splattering. Always warm the cream first.
Step 3: Make Caramel Buttercream
Once caramel has cooled completely to room temperature, beat room-temperature butter in a large bowl with an electric mixer on medium-high speed until light and fluffy, about 3-4 minutes. Gradually add sifted powdered sugar, 1 cup at a time, beating on low speed after each addition. Add about 1 cup of the cooled caramel (reserve remaining caramel for drizzling if desired) and vanilla extract. Beat on high speed for 5-7 minutes until buttercream is light, fluffy, and smooth. Taste and adjust salt level if needed—it should have a pleasant sweet-salty balance.
Test Kitchen Discovery: Whipping the buttercream for the full 5-7 minutes incorporates air and creates an incredibly smooth, pipeable texture.
Step 4: Level and Fill Cake Layers
If your cake layers have domed tops, use a serrated knife or cake leveler to trim them flat. Place the first layer on a cake stand or serving plate. Spread about 1 cup of caramel buttercream in an even layer over the top. Place the second cake layer on top and repeat with another cup of buttercream. Add the third layer, bottom-side up for a flat top surface.
Step 5: Crumb Coat and Frost
Apply a thin “crumb coat” of buttercream all over the cake—this seals in crumbs. Refrigerate for 30 minutes to set the crumb coat. Once set, apply a thick final coat of buttercream over the top and sides, smoothing with an offset spatula. Use a cake scraper or bench scraper for ultra-smooth sides if desired. Refrigerate the frosted cake while you make the ganache.
Pro tip: A cake turntable makes frosting much easier and creates more professional results.
Step 6: Make Optional Chocolate Ganache Drip
Heat heavy cream in a small saucepan or microwave until it just begins to simmer. Pour hot cream over chocolate chips in a heatproof bowl. Let sit for 2-3 minutes without stirring. Add vanilla and whisk gently until smooth and glossy. Let ganache cool for 10-15 minutes until it’s thickened but still pourable—it should coat the back of a spoon.
Step 7: Finish and Garnish
Remove cake from refrigerator. Pour ganache into the center of the cake and use a spoon or offset spatula to gently push it toward the edges, allowing it to drip down the sides naturally. Alternatively, pipe ganache around the top edge and let it drip. Drizzle with extra caramel sauce if desired. Sprinkle with flaky sea salt for a beautiful finishing touch. Refrigerate for 30 minutes to set all layers before slicing.
Expert Tips & Tricks
Temperature Matters: All ingredients for both cake and buttercream should be at room temperature for smooth, lump-free results. Cold eggs won’t incorporate well; cold butter won’t cream properly.
Don’t Rush the Caramel Cooling: The caramel must be completely cooled to room temperature before adding to buttercream, or it will melt the butter. This takes 3-4 hours, so plan ahead.
The Secret to Moist Cake: The liquid batter might seem wrong, but it creates an incredibly tender, moist crumb. Don’t try to thicken it.
Common Mistake: Over-darkening the caramel makes it bitter. Remove from heat when it’s deep amber, not dark brown.
Test Kitchen Discovery: Letting the finished cake sit overnight in the refrigerator actually improves flavor and makes slicing much cleaner.
Customization Ideas
Dietary Modifications:
- Gluten-Free: Use a 1:1 gluten-free flour blend in the cake layers
- Dairy-Free: Use non-dairy milk and butter substitutes throughout (results may vary)
- Reduced Sugar: Decrease sugar in cake to 1½ cups (flavor will be less sweet and more intensely chocolate)
Flavor Variations:
- Salted Caramel Chocolate: Increase salt in frosting to 1½ teaspoons for more pronounced salted caramel flavor
- Mocha Caramel: Use brewed espresso instead of regular coffee in the cake for stronger coffee notes
- Chocolate Caramel Pecan: Add ½ cup toasted chopped pecans between layers
- Dark Chocolate: Use dark chocolate instead of semi-sweet in the ganache for a more sophisticated, less sweet finish
- Caramel Drizzle: Reserve extra caramel and create decorative drizzles on top of the ganache
Serving Styles:
- Naked Cake: Skip the crumb coat and leave sides partially exposed for a rustic look
- Sheet Cake Version: Bake in a 9×13 pan for 35-40 minutes; frost with half the buttercream recipe
- Cupcakes: Divide batter among 24 cupcake liners; bake 18-20 minutes
Storage & Meal Prep
Make Ahead:
- Bake cake layers up to 2 days ahead; wrap tightly and refrigerate, or freeze up to 3 months
- Make caramel up to 1 week ahead; store refrigerated and bring to room temperature before using
- Assemble and frost cake 1 day ahead; add ganache drip the day of serving for best appearance
Storing:
- Counter: Frosted cake can sit at room temperature for up to 4 hours for serving
- Fridge: Store covered or in a cake keeper for up to 5 days
- Freezer: Freeze unfrosted cake layers tightly wrapped for up to 3 months; thaw in refrigerator overnight
Serving from Cold:
Bring cake to room temperature 30-60 minutes before serving for best flavor and texture. Cold cake is still delicious but the buttercream will be firmer.

What to Serve With Chocolate Caramel Cream Cake
Perfect Pairings:
- Hot coffee or espresso — Cuts through the richness and complements both chocolate and caramel flavors
- Cold milk — Classic pairing that balances the sweetness
- Vanilla ice cream — For an extra-indulgent dessert experience
- Salted caramel sauce — Additional drizzle on the plate for caramel lovers
Complete the Celebration:
- Serve as the centerpiece of a birthday or anniversary dessert table
- Pair with champagne or dessert wine for elegant dinner parties
- Offer alongside fresh berries to cut the richness
- Add whipped cream on the side for guests who want extra creaminess
Nutrition Facts (Per Serving)
Calories: 680 | Protein: 6g | Carbs: 92g | Fat: 34g | Fiber: 2g | Sugar: 75g | Sodium: 420mg
Note: Based on 12 servings. Values will vary based on specific brands and modifications.
Your Questions Answered
Can I use store-bought caramel sauce instead of homemade?
Yes, though homemade has better flavor and consistency. Use high-quality jarred caramel sauce (about 1 cup) mixed into the buttercream. The frosting may be softer, so refrigerate longer before serving.
Why is my caramel grainy?
This happens if sugar crystals form during cooking. Make sure all sugar dissolves before it starts boiling, and don’t stir once it begins to caramelize—just swirl the pan gently.
Can I make this as a two-layer cake instead?
Absolutely! Divide batter between two 9-inch pans and bake for 30-35 minutes. You’ll use less frosting but the cake will still be impressive.
How do I get smooth ganache drips?
The ganache needs to be the right temperature—too hot and it runs too fast; too cold and it won’t drip. Test on the side of the cake first, and if it’s too thick, warm it slightly.
Can I skip the coffee in the cake?
Yes, use hot water instead. The cake will still be delicious, though the chocolate flavor won’t be quite as deep.
How far ahead can I assemble this cake?
The fully assembled and frosted cake can be made 1-2 days ahead. Add the ganache drip the day you plan to serve for the freshest appearance.
Recipe History & Cultural Context
The chocolate-caramel combination has been beloved in desserts for over a century, but it gained particular prominence with the rise of multi-layer celebration cakes in American home baking during the mid-20th century. Caramel, made from simple pantry ingredients, became a favorite frosting flavor when home cooks sought alternatives to basic chocolate or vanilla buttercream.
The modern trend of elaborate, multi-component layer cakes emerged from the food blogging era of the 2000s and 2010s, when home bakers began sharing techniques that were once considered professional secrets. The addition of elements like ganache drips, salted caramel, and carefully constructed layers transformed homemade cakes into showpieces worthy of special celebrations.
What makes chocolate caramel cream cake endure is its perfect balance of sophisticated flavors—the slight bitterness of dark chocolate against sweet, buttery caramel with a hint of salt. It’s become a modern classic for milestone birthdays, weddings, and anniversaries, proving that homemade can rival any professional bakery when made with care and quality ingredients.
Printable Recipe Card
Chocolate Caramel Cream Cake
Three-layer chocolate cake with salted caramel buttercream and chocolate ganache
Ingredients:
Cake: 2 cups flour – 2 cups sugar – ¾ cup cocoa powder – 2 tsp baking soda – 1½ tsp baking powder – 1½ tsp salt – 2 eggs – 1 cup buttermilk – ½ cup oil – 2 tsp vanilla – 1 cup hot coffee
Caramel: 1¼ cups sugar – ½ cup water – 1 cup warm cream – 2 cups butter (room temp) – 1 tsp vanilla – 1 tsp salt – 7 cups powdered sugar
Ganache: 1 cup chocolate chips – ⅔ cup heavy cream – 1 tsp vanilla
Instructions:
- Preheat oven to 350°F; prep three 8″ pans
- Mix dry ingredients; whisk wet ingredients separately
- Combine wet into dry; slowly add hot coffee (batter will be thin)
- Divide among pans; bake 25-30 min; cool completely
- Make caramel: cook sugar + water to amber; add warm cream, butter, vanilla, salt; cool 3-4 hours
- Beat butter; add powdered sugar, 1 cup cooled caramel, vanilla; whip 5-7 min
- Level cakes; fill and frost with buttercream; refrigerate 30 min
- Make ganache: heat cream, pour over chocolate, whisk smooth; cool to thicken
- Drip ganache over cake; garnish with caramel + sea salt
Notes:
- Caramel must cool completely before adding to frosting
- Thin batter is correct—creates moist cake
- Cake improves overnight in fridge
- Store refrigerated up to 5 days